

Good to know:
- Workspace single sign-on is available on an Enterprise plan (Business or Enterprise). Workspaces created before October 1, 2026 keep their earlier plan requirement.
- To add and update members automatically, use SCIM provisioning for Microsoft Entra ID.
How it works
Base44 signs your team in through Microsoft Entra ID using OpenID Connect (OIDC). To do this, you need to register an app in Entra, then enter 3 of its values into your Base44 workspace under Settings > Authentication:- Client ID: The app’s Application (client) ID from Entra.
- Client Secret: A secret you generate for the app.
- Tenant ID: Your Directory (tenant) ID, which controls who is allowed to sign in.
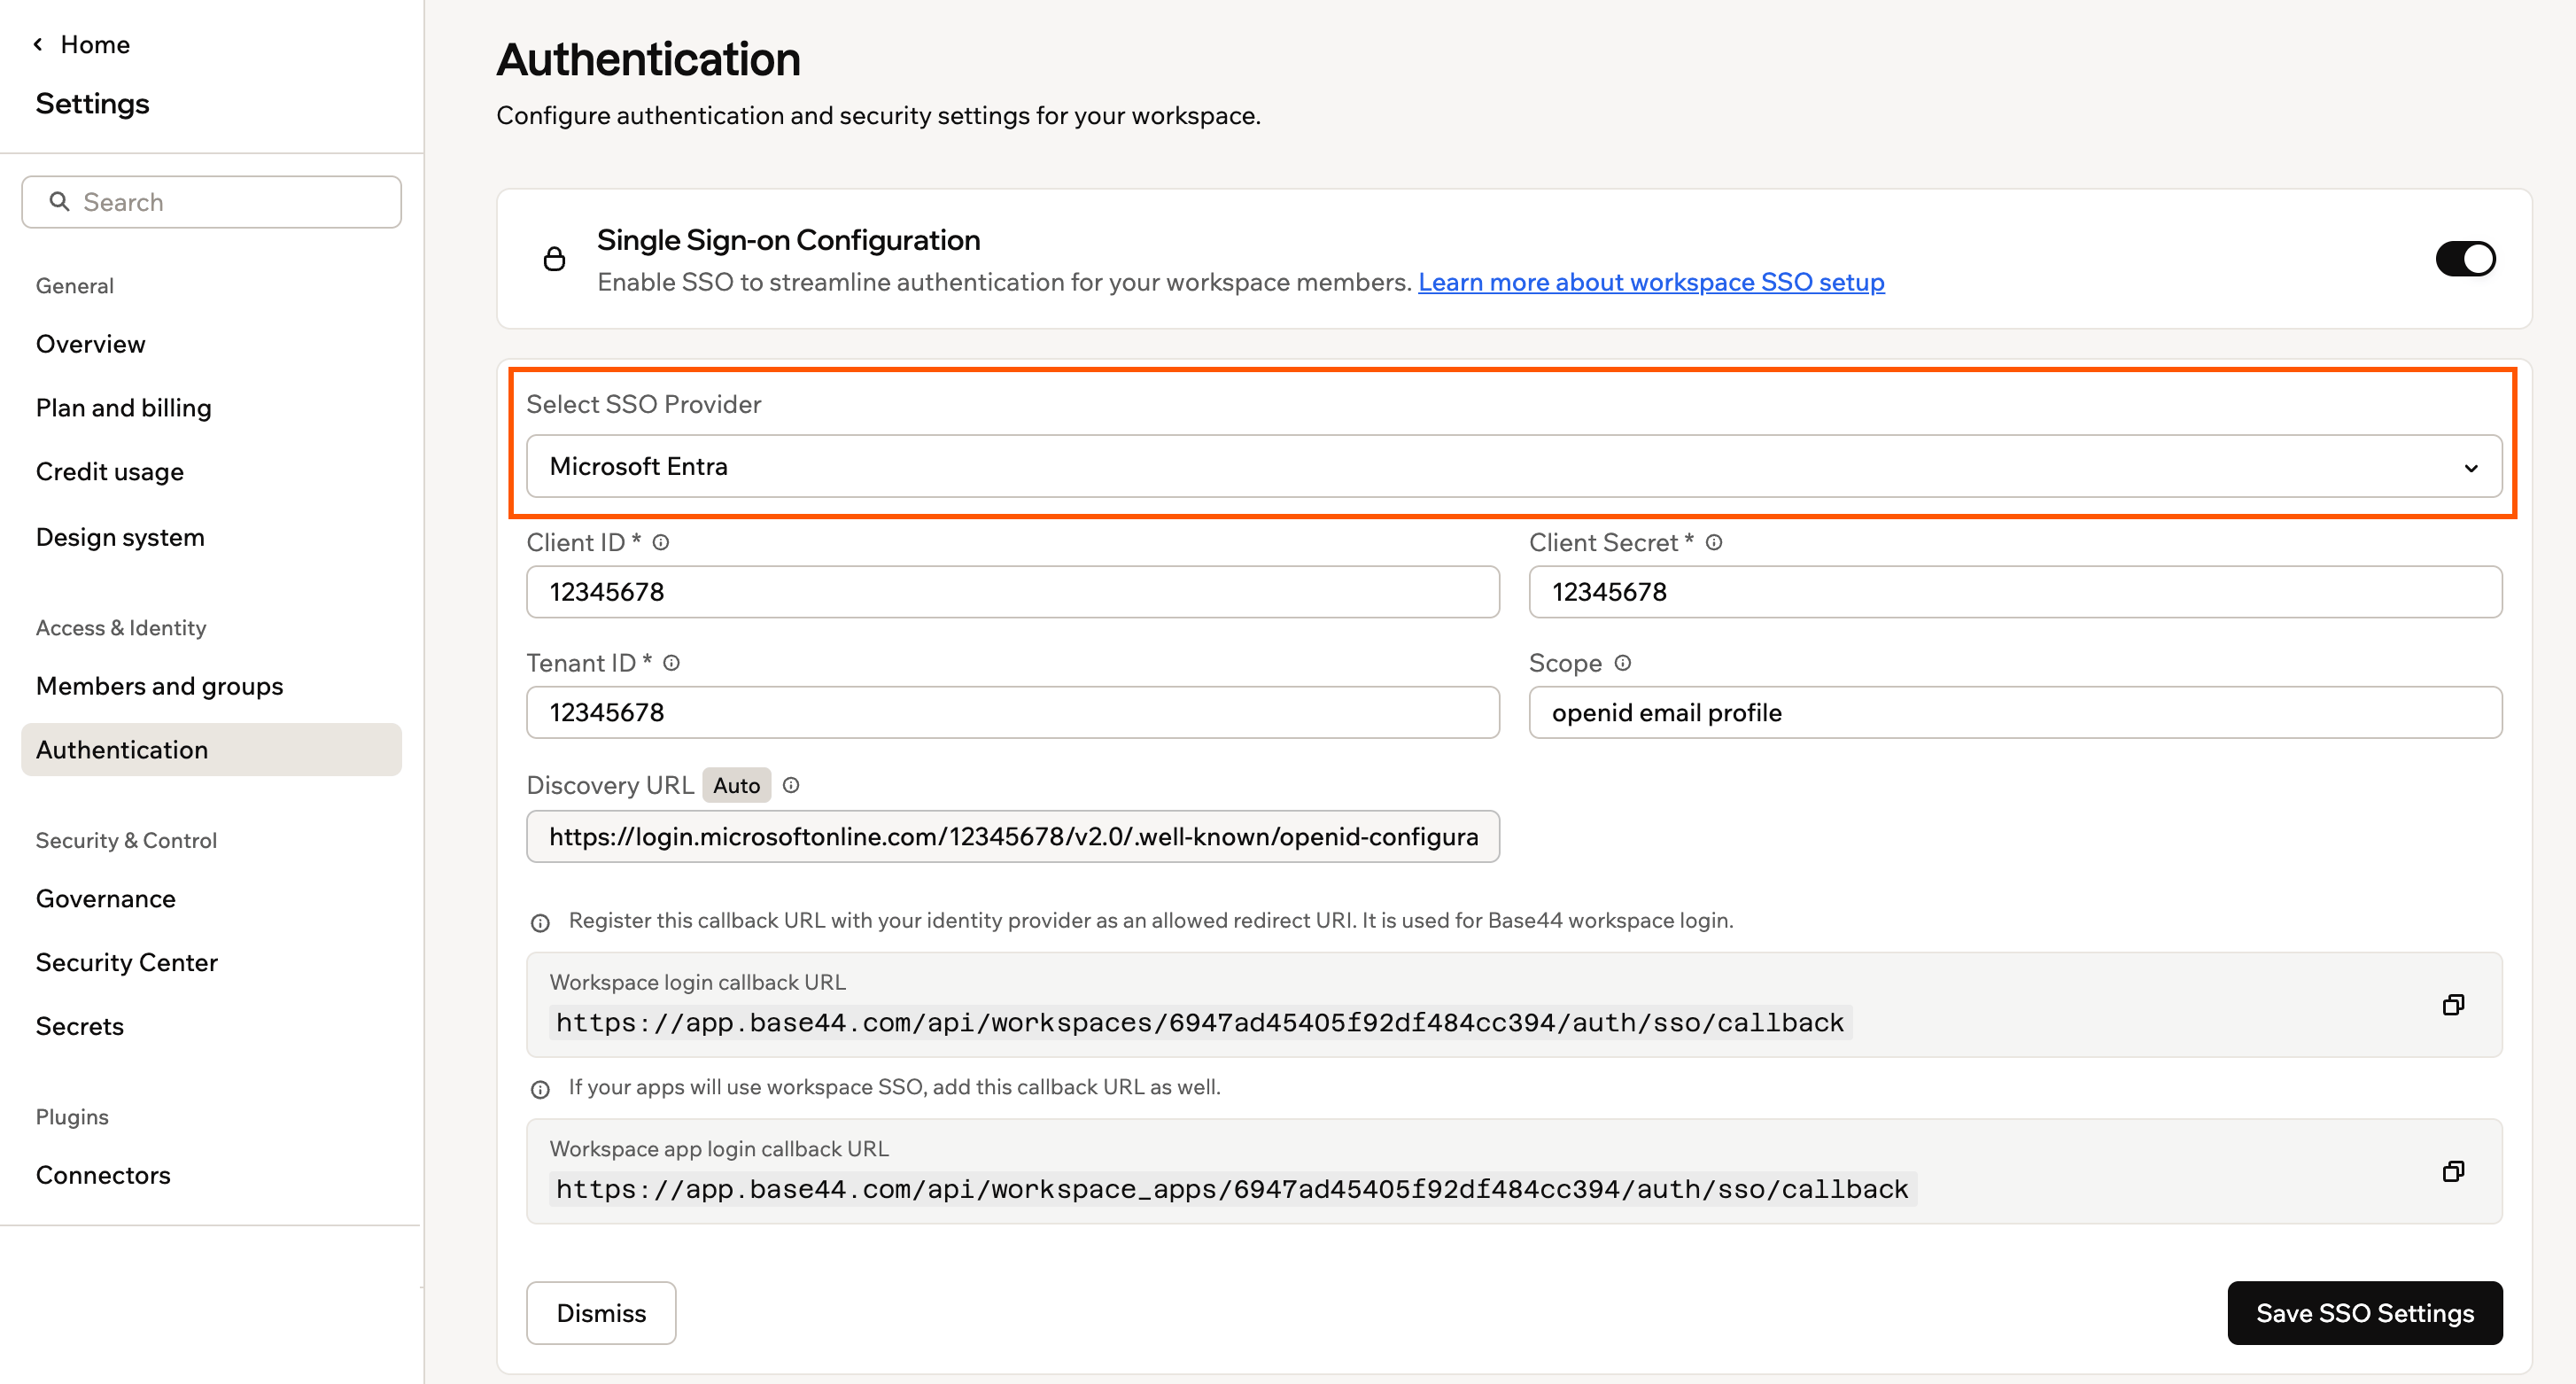
The SSO configuration form in Base44's Authentication settings
Setting up single sign-on
Follow these steps to register the Entra app, create its secret, and connect it to your Base44 workspace.Step 1: Register the app
Create the Entra App registration that represents Base44 sign-in. To register the app:- In the Microsoft Entra admin center, go to App registrations.
- Click New registration.
- Enter a name that identifies your workspace, for example your company name.
- Under Supported account types, choose the option that matches your organization. If you are unsure, click Help me choose.
- Under Redirect URI, select Web and enter your workspace callback URL, replacing
{{WORKSPACE_ID}}with your workspace ID:https://app.base44.com/api/workspaces/{{WORKSPACE_ID}}/auth/sso/callback - Click Register.
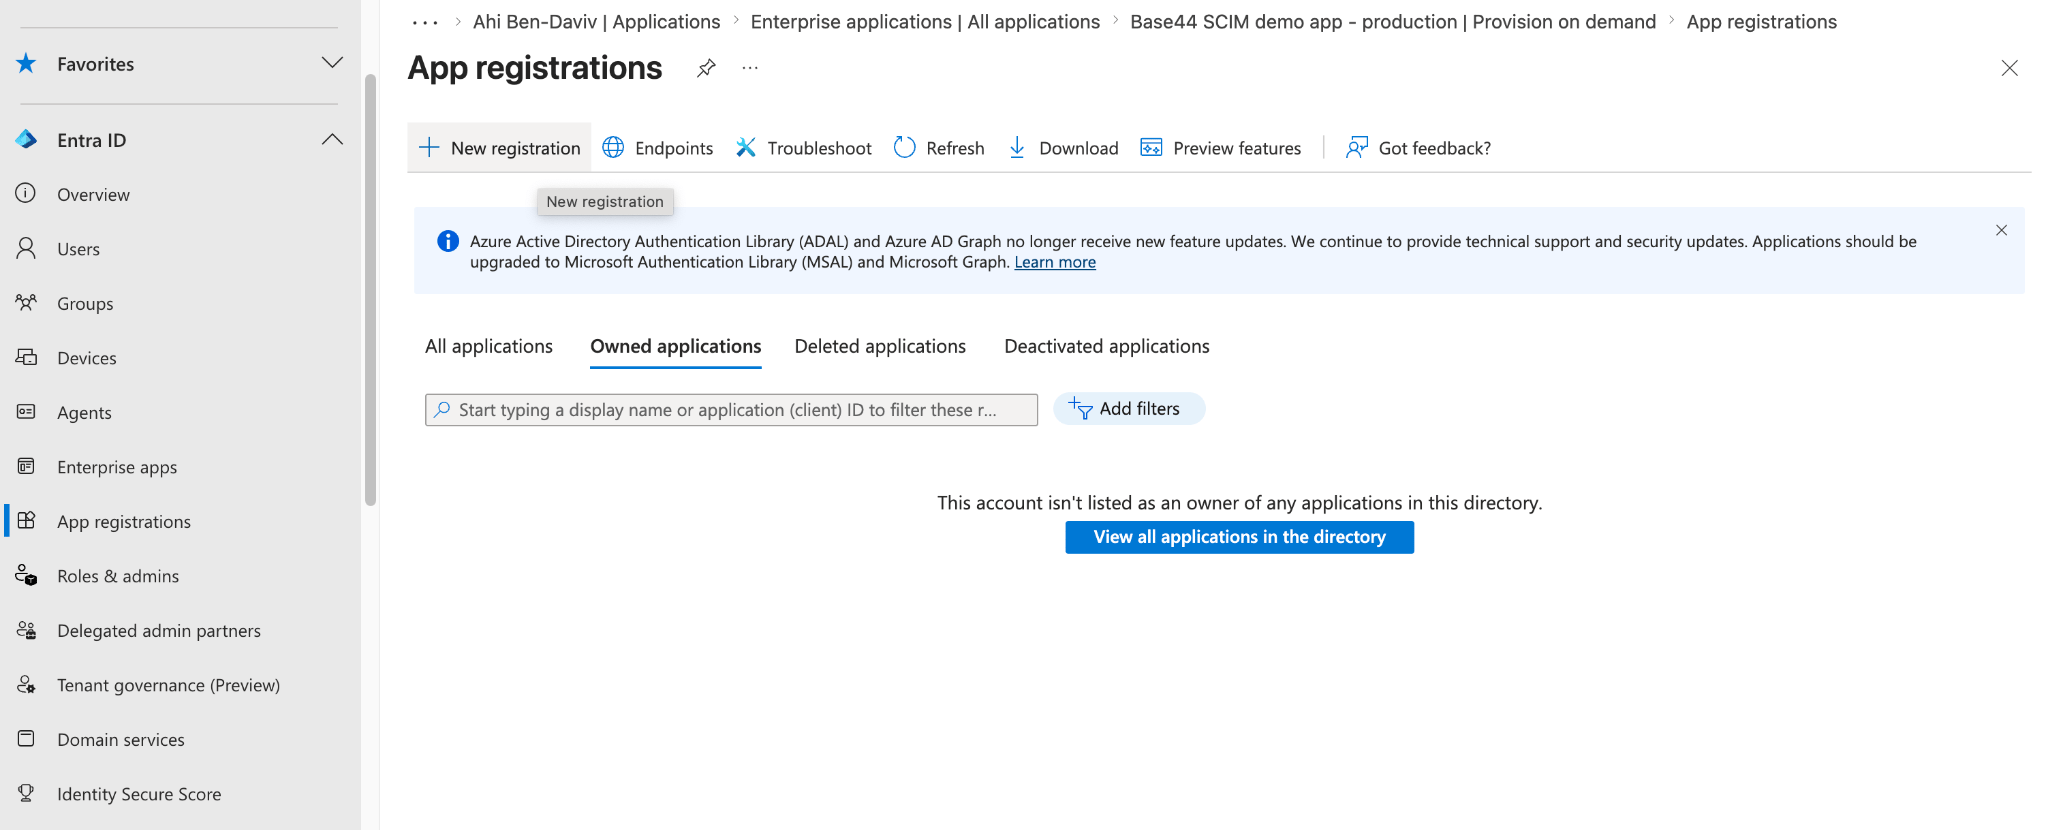
Registering a new app in Microsoft Entra
After registering, open API permissions and confirm the app has User.Read and the openid, email, and profile permissions. These let Entra return the user’s email at sign-in. New app registrations include
User.Read by default, so you usually only need to confirm it is there.Step 2: Create a client secret
Generate the secret Base44 uses to authenticate with Entra. To create a client secret:- In your app, go to Certificates & secrets.
- Click New client secret, add a description that helps you recognize this workspace, then click Add.
- Copy the secret from the Value column, not the Secret ID, and store it somewhere safe.
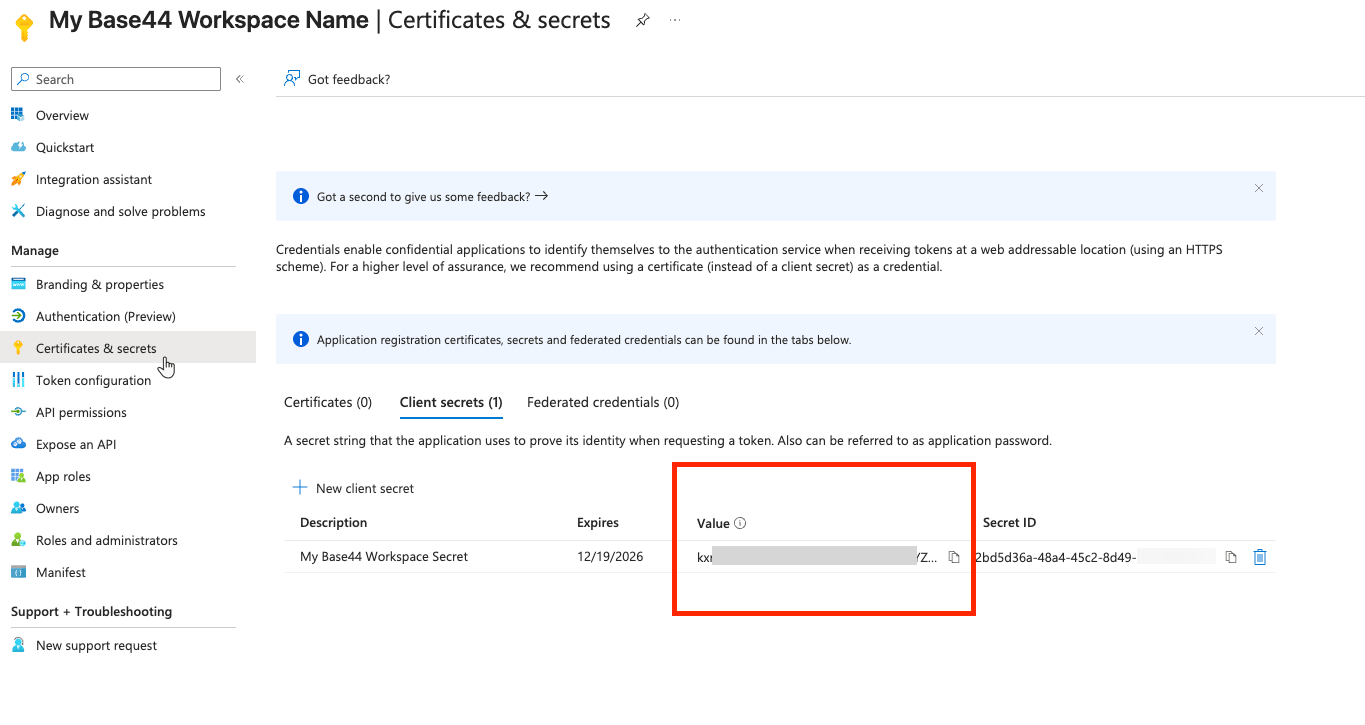
Creating a client secret in Entra
Step 3: Copy your IDs
Base44 needs 2 IDs from your app, both shown on its Overview page.- Application (client) ID: This is your Client ID in Base44.
- Directory (tenant) ID: This is your Tenant ID in Base44.
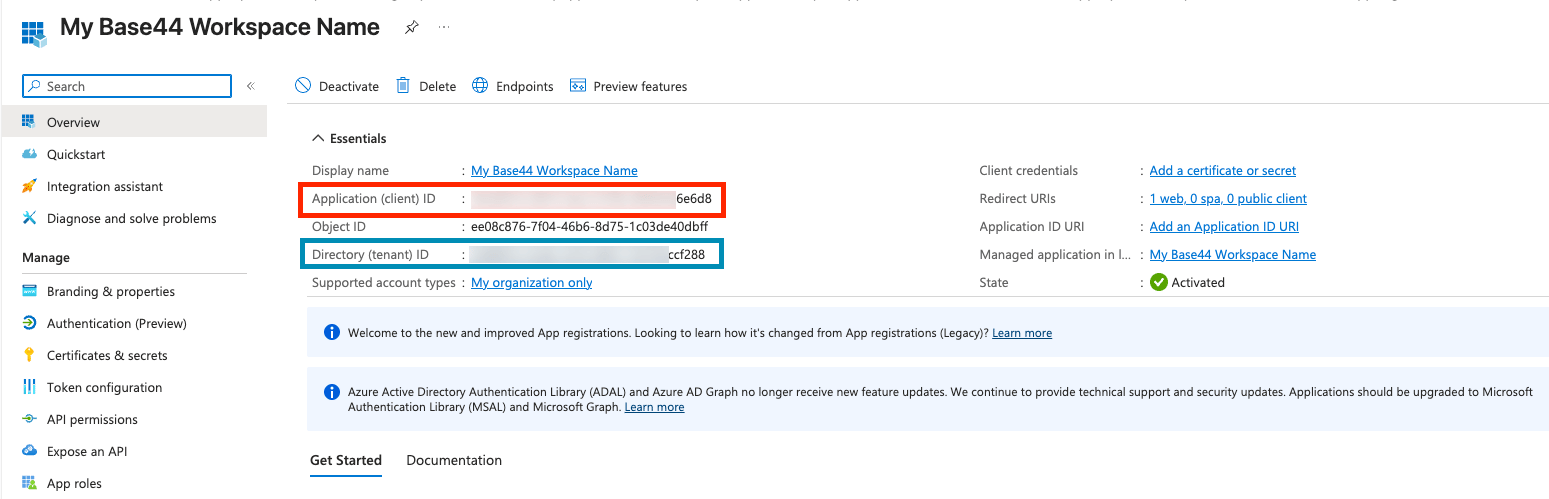
Copying your Client ID and Tenant ID from Microsoft Entra
Step 4: Add your details in Base44
Add the SSO app credentials to your workspace. To configure SSO in Base44:- Click your workspace name at the bottom left of your account.
- Click Settings.
- Click Authentication.
- Enable the toggle next to Single Sign-On Configuration.
- In Select SSO Provider, choose Microsoft Azure AD.
- Enter your Client ID and Client Secret from the SSO app.
- In the Tenant ID field, enter a value based on which accounts you want to allow:
- Your directory (tenant) ID from Entra: Only people from your organization.
common: Personal Microsoft accounts and work or school (Microsoft 365) accounts.organizations: Work and school accounts only (Microsoft 365).
- Keep Scope as
openid email profile. - The Discovery URL fills in automatically from your tenant ID. Confirm it looks correct before continuing.
- Click Enable SSO.
To control which people see SSO on the login page and what role new members get, set up verified domains and the default role in the same Authentication settings.
Step 5: Give your team access
Your team can sign in once you assign them to the SSO app in Entra. To let users sign in:- In the Microsoft Entra admin center, go to Enterprise applications and open your SSO app.
- Click Users and groups, then Add user/group.
- Select the users or groups that should be able to sign in, then click Assign.
FAQs
Select a question below to learn more about Entra SSO.Do I need separate Entra apps for SSO and SCIM?
Do I need separate Entra apps for SSO and SCIM?
Yes. Base44 signs in over OIDC, so SSO uses an App registration, while SCIM provisioning uses a separate Enterprise application. Use the App registration’s Client ID, Client Secret, and Tenant ID for SSO, and set up provisioning separately. See SCIM provisioning for Microsoft Entra ID.
Why does sign-in fail with an email error?
Why does sign-in fail with an email error?
Confirm your app has the openid, email, and profile API permissions and that Scope in Base44 is
openid email profile. These let Entra return the email address Base44 needs to create the member’s account.Can I disable SSO later?
Can I disable SSO later?
Yes. Workspace admins can disable SSO from Authentication in your workspace settings at any time.