Build a custom integration you can use across your apps and share with your team. Keep it in your private catalog, or submit it to the Integration Catalog for review and earn credits if approved. This works for any API-powered integration across a wide range of platforms.
Create a public integration that gets approved and we will add 250 credits to your account.
This video uses an earlier version of the platform, but the flow is the same.
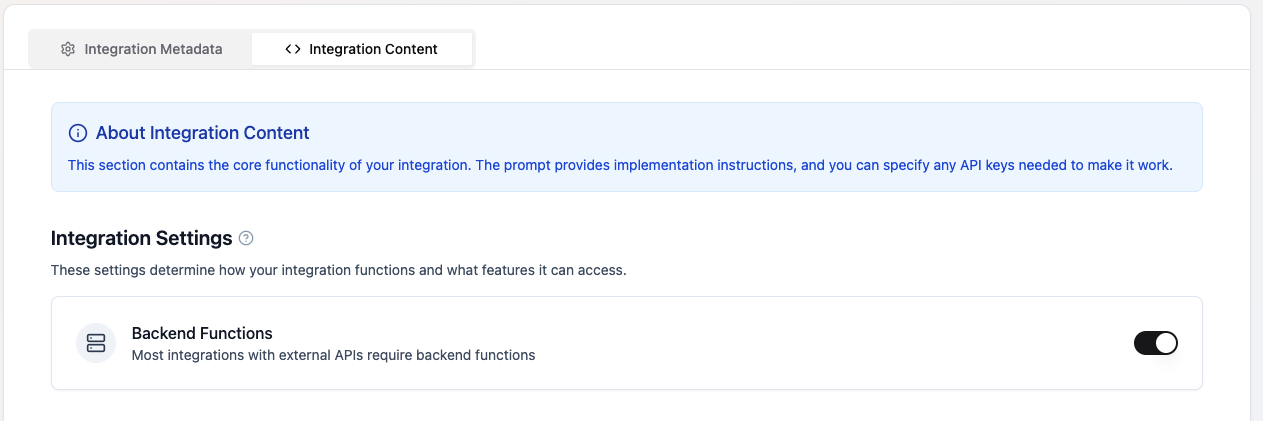
Configure the core functionality of your integration, define required secrets, and add the instructions Base44 will use to run it. When you’re ready, click Save Integration at the bottom.
1. Enable backend functions
Keep Backend function turned on. This lets Base44 call external APIs securely without exposing credentials.
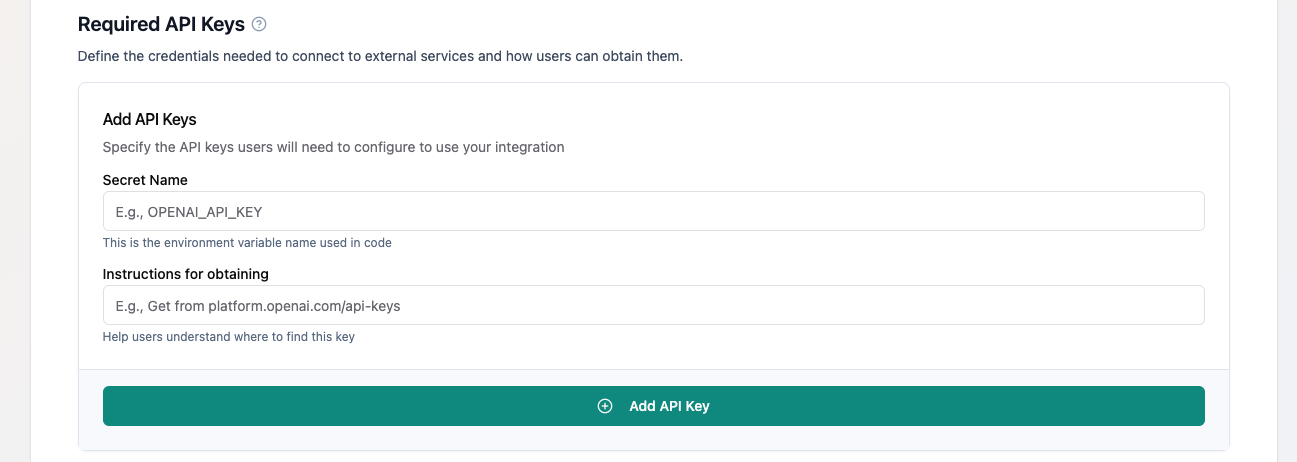
2. Define secrets (required keys)
List the secrets your integration needs. At this stage, you are declaring required secrets, not adding values. When you or your team connect this integration to an app, you will be asked to enter the real values securely.To define secrets:
In the Integration Content tab, enter each required secret:
Repeat for any additional secrets this integration needs.
Secret values are stored per app, not in the catalog. App owners add them in Dashboard → Secrets when they use the integration.
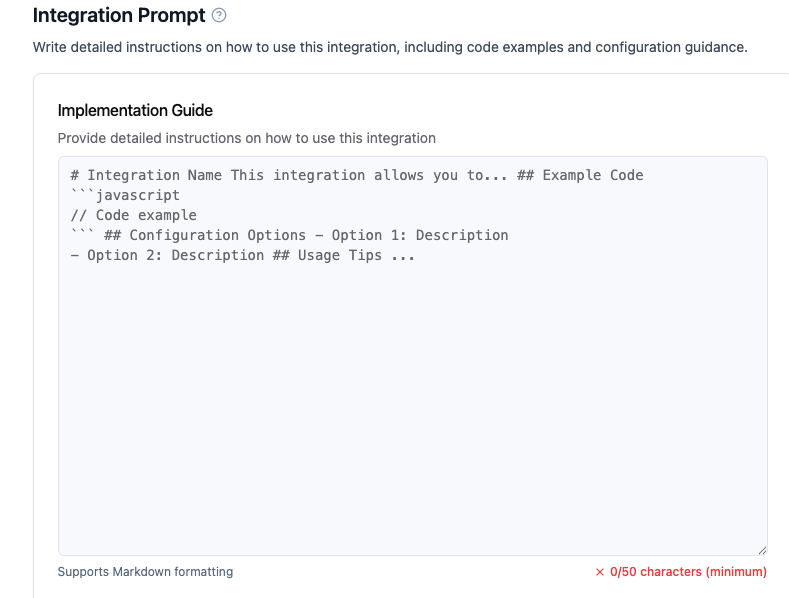
3. Provide the integration prompt
Provide an instruction set (or “integration prompt”) that tells Base44 how to connect and interact with the API. This should include endpoints, parameters, and code samples if needed. The instructions are used by Base44’s AI to run the integration.
Click on the example below to see the prompt for OpenAI’s image generation API. If you are integrating with a different service, replace the endpoint and parameters to match that API.
Example: OpenAI image generation
Only edit the code below if you are comfortable with JavaScript/Deno. If you want to use OpenAI image generation, paste as shown.
Copy
Ask AI
# OpenAI Text to Image Integration## 1. OverviewThis integration generates images based on natural language prompts using OpenAI's DALL·E model.## 2. Environment Variables```json[{"name": "OPENAI_API_KEY","description": "Your OpenAI secret API key (starts with sk-...)","how_to_get": "https://platform.openai.com/account/api-keys"}]```## 3. Backend Function (Deno)```tsDeno.serve(async (req) => {const OPENAI_API_KEY = Deno.env.get("OPENAI_API_KEY");if (!OPENAI_API_KEY) {return new Response(JSON.stringify({ error: "Missing API key configuration" }), {status: 500,headers: { "Content-Type": "application/json" }});}let prompt;try {({ prompt } = await req.json());} catch {return new Response(JSON.stringify({ error: "Invalid JSON" }), {status: 400,headers: { "Content-Type": "application/json" }});}if (!prompt) {return new Response(JSON.stringify({ error: "Missing prompt" }), {status: 400,headers: { "Content-Type": "application/json" }});}const response = await fetch("https://api.openai.com/v1/images/generations", {method: "POST",headers: {"Content-Type": "application/json","Authorization": `Bearer ${OPENAI_API_KEY}`},body: JSON.stringify({prompt,model: "dall-e-3",n: 1,size: "1024x1024"})});const data = await response.json();if (!response.ok) {return new Response(JSON.stringify({ error: data }), {status: response.status,headers: { "Content-Type": "application/json" }});}return new Response(JSON.stringify(data), {status: 200,headers: { "Content-Type": "application/json" }});});```## 4. Frontend Component (Optional)```tsxconst generateImage = async (prompt: string) => {const res = await fetch("/functions/openai-image.js", {method: "POST",headers: { "Content-Type": "application/json" },body: JSON.stringify({ prompt })});const result = await res.json();return result?.data?.[0]?.url || null;};```## 5. Usage & Examples- Prompt: "Generate an image of a futuristic flying car" - User types prompt → Backend calls OpenAI → Returns image URL## 6. Research Summary & Resources- [OpenAI Image Generation Docs](https://platform.openai.com/docs/api-reference/images/create) - API: `POST https://api.openai.com/v1/images/generations`
Customizing the OpenAI example prompt
If you want to customize the prompt, here’s what each main part does:
Read your API key: Securely access the key from environment variables.
Accept a user request: Handle the prompt or input from the user.
Send the request to the API: Make the API call (for example, to OpenAI’s endpoint).
Get the response: Process the API’s result.
Return it to the app: Pass the result back for display in chat or another interface.
For other platforms, update the endpoint, request format, and response handling based on their documentation.
The integration returns a 'missing prompt' or 'missing input' error
Most API-powered integrations require some input to process requests, such as a text prompt. Make sure you’ve entered a prompt or other required input before sending the request to the integration.OpenAI example: For an image generator, a prompt like Generate an image of...
The integration returns an 'invalid API key' error
This usually means the API key or secret entered is incorrect, expired, or missing. Make sure you’ve copied the API key correctly and that it is still valid.OpenAI example: OpenAI keys start with sk-. Get a new key from platform.openai.com/account/api-keys if needed.
Integration does not appear in the catalog
Make sure you clicked Save Integration and set the visibility to Public if you want it reviewed for the catalog. Private integrations only show in your workspace’s private catalog.
I get a generic API error or nothing happens
Some APIs have rate limits, temporary failures, or maintenance windows. Wait a few minutes and try again, or check the provider’s status page for any issues on their end.
The integration returns an error from the provider.
Confirm the secret value, the endpoint URL, required headers, and request body. Check provider status and rate limits. Review responses in your backend function for error messages.
Click on a question below to learn more about creating custom integrations in Base44.
Where do I put my actual API keys?
Enter the real values per app in Dashboard → Secrets, or when prompted during app setup. The catalog never stores your secret values.
Can I use the same secret across multiple apps?
Yes. Add the secret to each app that uses the integration. You can reuse an existing value in the app or paste a new one.
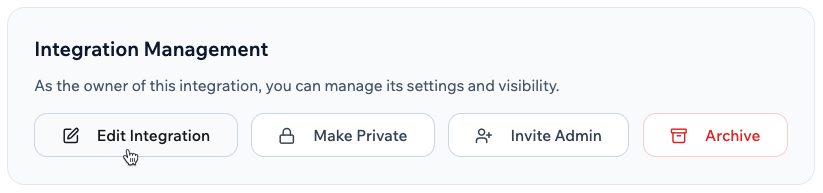
Can I edit an integration after publishing?
Yes, you can update your custom integration at any time. Open it in the My Integrations tab to make any changes. For public integrations, updates may be reviewed again.
Can my teammates use my private integration?
Yes. Anyone in your workspace can use custom integrations in your private catalog once they have access to the app that uses it.
Does the custom integration expose my API key to end users?
No. Keys are stored per app and accessed only by the backend function. They are not shown in the UI or client.
Can I update an API key after I've added it to an app?
Yes, you can update your keys anytime in your app’s Dashboard → Secrets.
What happens if my integration isn't approved for the catalog?
It stays in your private catalog. You can update the description, instructions, or code, and then resubmit for review.