Note: Resend integration is available on the Builder plan and above. If you’re on the Free plan, you’ll need to upgrade your app to use backend functions.
Step-by-step setup
Part 1: The Resend side
If you already have your Resend API keys, you can skip ahead to “Part 2 - The Base44 side” setup1
Create a Resend account
2
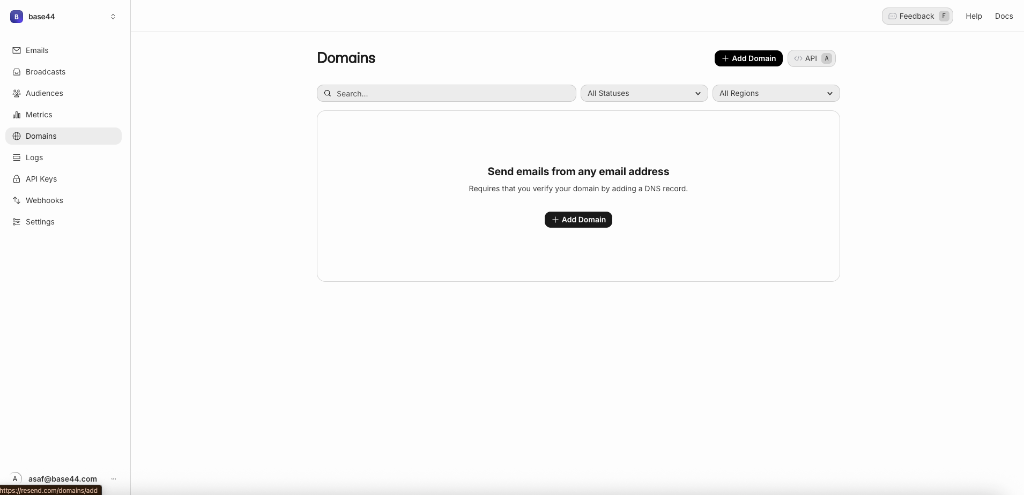
Verify your domain
After adding your domain
- Follow the DNS instructions provided by Resend to complete domain verification. You’ll be given DNS records (TXT, MX) to add via your own DNS provider.
- These will help prevent your emails from being flagged as spam.
3
Create your Resend API key
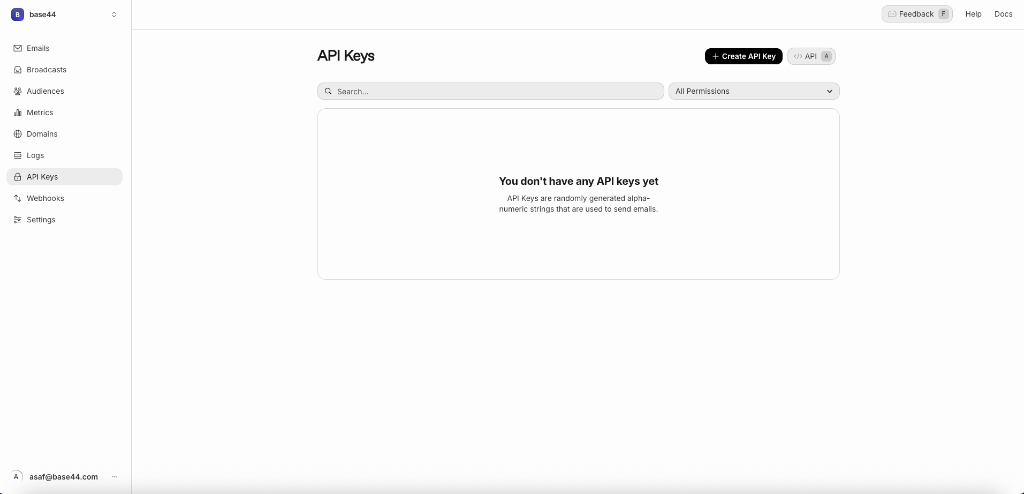
- Go to the API Keys page
- Click on “Generate API key”
- Copy and save the key somewhere secure, but also keep it handy. You’ll need to paste it into Base44 in the next step.
Part 2: The Base44 side
Once you have your Resend API keys, there are two ways to use this integration in Base44. Click the option below to expand and view the instructions.Option 1: Creating an app from scratch (preferred)
Option 1: Creating an app from scratch (preferred)
-
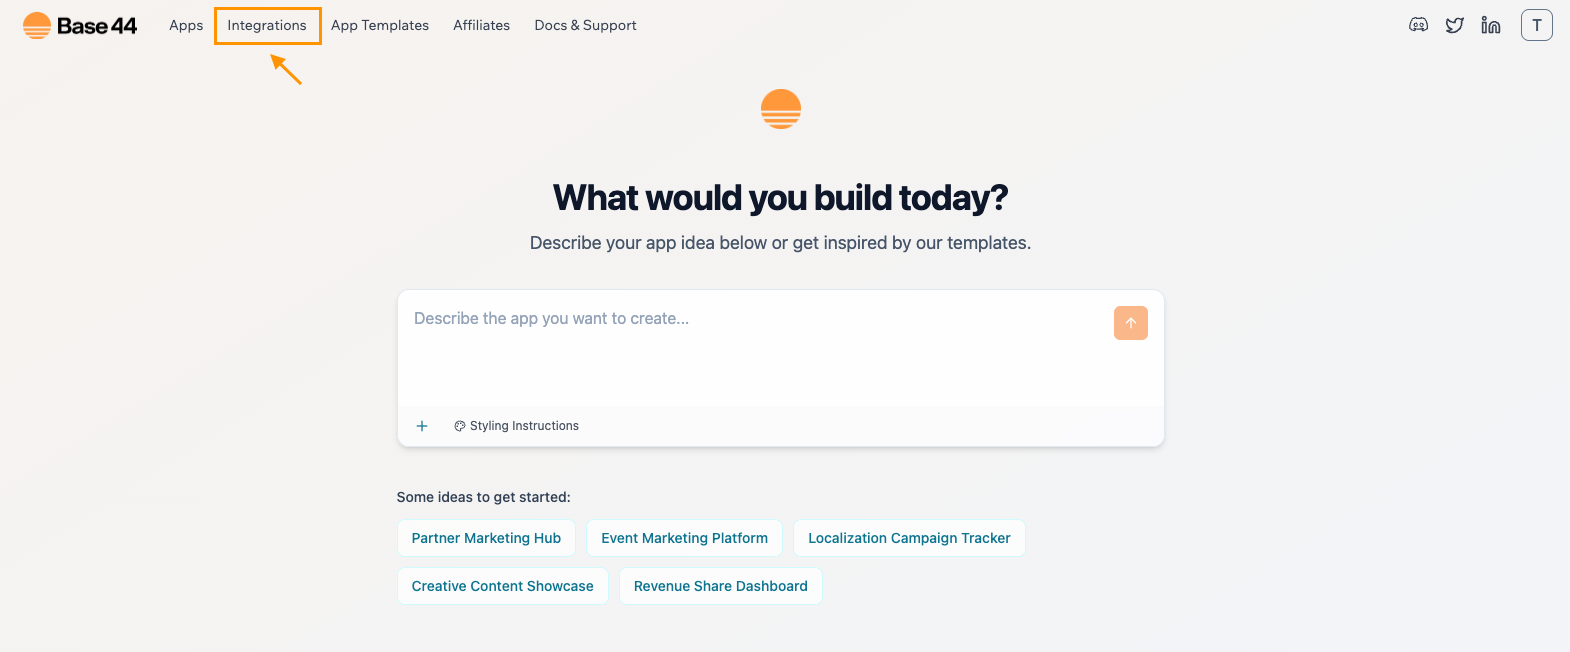
Head over to the integrations catalog page
Make sure you’re logged into Base44 to view this page
-
Find Resend and click “Use this integration”
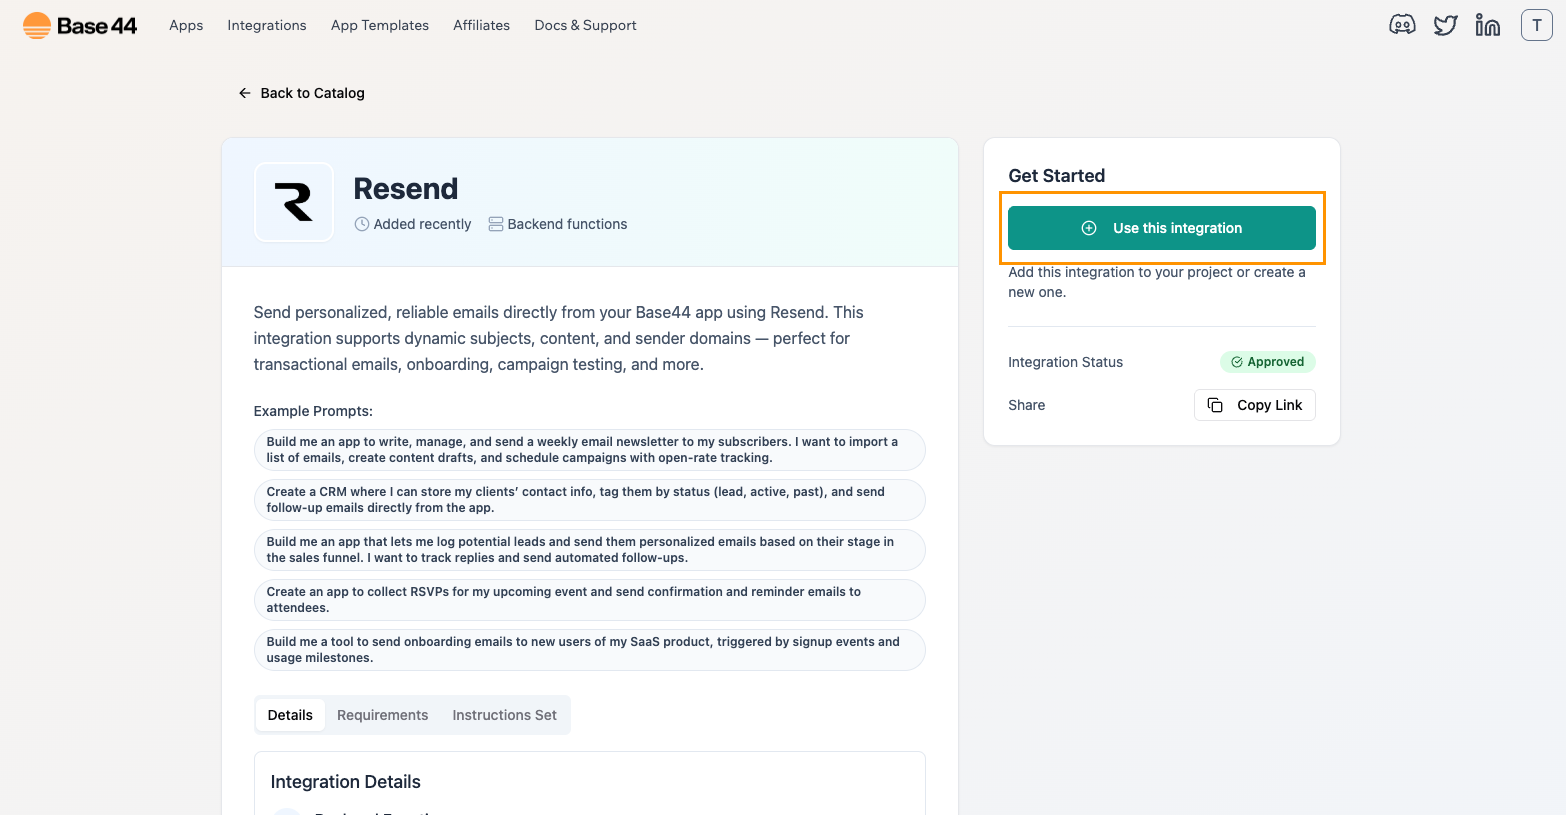
-
When prompted, paste your API key from Step 3. Your app is now connected to Resend.

-
Type out your idea / prompt into the AI chat box to build your app
“Build me an app to create and send welcome emails when someone signs up.”
Base44s AI will walk you through setting it up.
Option 2: Working with an existing app
Option 2: Working with an existing app
If you’re working in an existing app, you can use the chat to ask:
“Add the Resend integration to my app. Prompt me for the API key and send a welcome email when someone subscribes.”The AI chat will then walk you through the steps to set up this integration and will prompt you for your API keys.
Common use cases for the Base44 x Resend integration
Here are some examples of how Resend can be used in your Base44 app:- Welcome emails when someone signs up
- Password reset links or account recovery emails
- Order confirmations or status updates
- Internal team alerts when forms are submitted
- Reminder emails for actions left incomplete
- Newsletter campaigns for subscribers or users
- Survey or feedback requests after key actions
- Trigger-based updates to users or admins
FAQ
What is Resend?
What is Resend?
Resend is a modern email API platform. It helps developers send transactional and marketing emails easily, with a focus on deliverability and ease of use.
Do I need a paid Resend plan?
Do I need a paid Resend plan?
No. The free tier lets you send emails from a verified domain and supports up to 3,000 contacts.
How does Resend handle unsubscribes?
How does Resend handle unsubscribes?
Unsubscribes are processed automatically:
- You must include an unsubscribe link in all broadcast emails.
- Resend will remove users who unsubscribe from.
- This ensures compliance with laws like CAN-SPAM and GDPR.
Can I set up double opt-in?
Can I set up double opt-in?
Yes, manually:
- Send a confirmation email after form submission.
- Include a link for users to click.
- Only add users to your audience after they confirm.
Why are my emails going to spam?
Why are my emails going to spam?
A few common reasons:
- Your domain isn’t verified
- Missing plain-text version
- Using a generic sender (e.g., onboarding@resend.dev)
- No unsubscribe link in marketing emails
Can I customize how my emails look?
Can I customize how my emails look?
Yes, you can use tools like React Email, which is an open-source library for building styled emails with React components.
Does Resend support transactional and marketing emails?
Does Resend support transactional and marketing emails?
Yes, Resend supports both types of emails:
- Transactional emails - like account confirmations, password resets, and real-time notifications
Can I send emails to people who are not signed up with my app?
Can I send emails to people who are not signed up with my app?
If you want to send emails to people who are not signed up to your app, you can use an external email service such as Resend. Resend lets you email any recipient, whether they have registered with your app or not.The built-in email function can only send emails to users who have signed up with your app.