

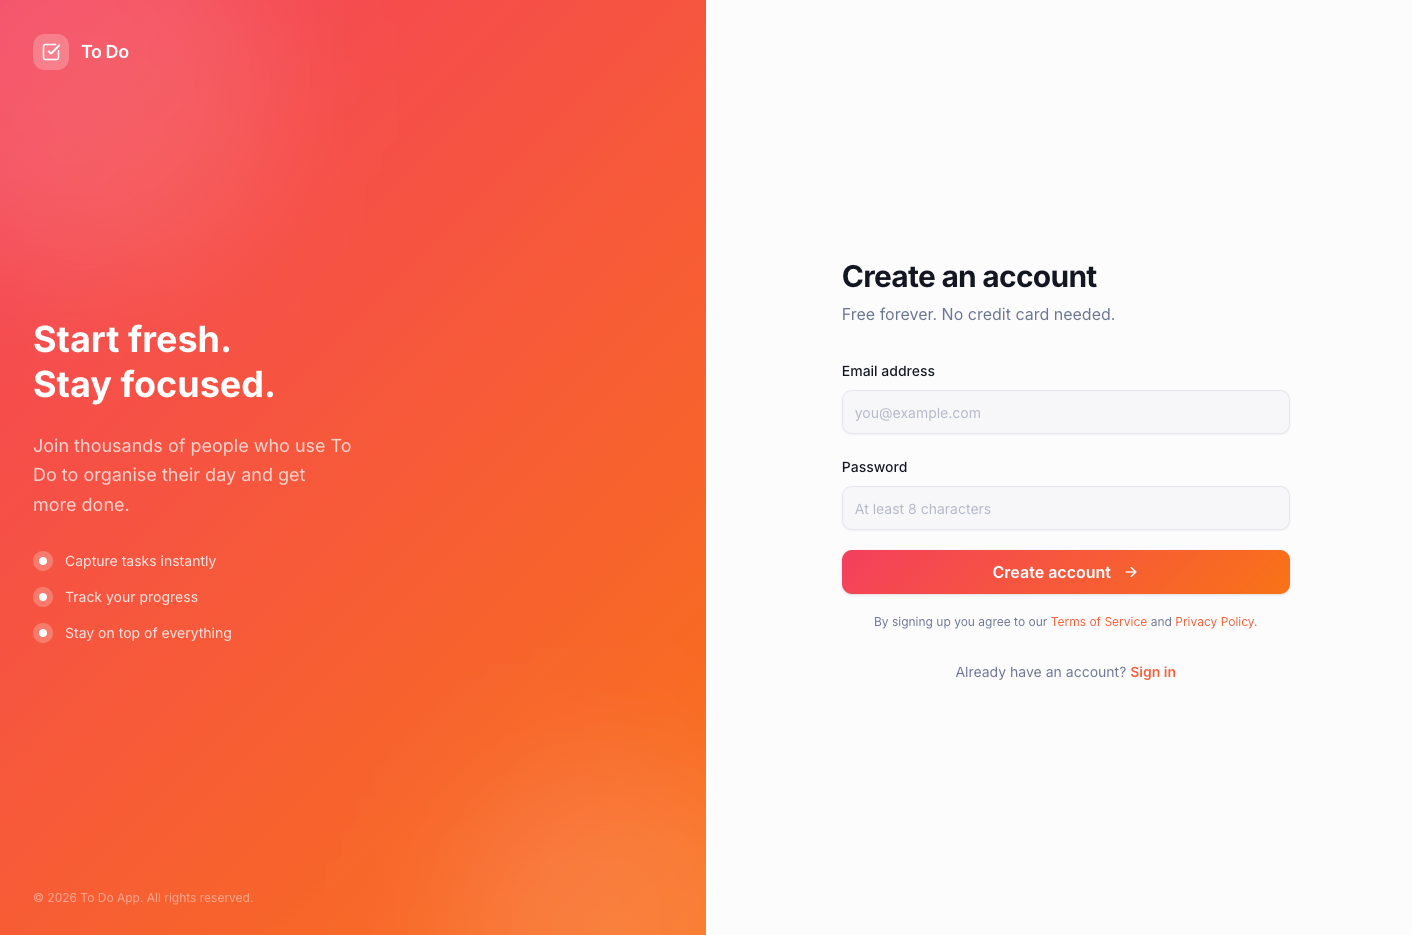
An example custom login page built inside a Base44 app
About your login pages
If your app requires login, Base44 sets up login and registration pages for you. They live inside your app, so you can customize the design, translate them into any language, and add your own branding. Your app comes with the following pages ready to customize:- Login page: Where your app’s visitors sign in.
- Register page: Where new visitors create an account.
- Forgot password page: Where visitors can request a password reset email.
- Reset password page: Where visitors set a new password after requesting a reset.
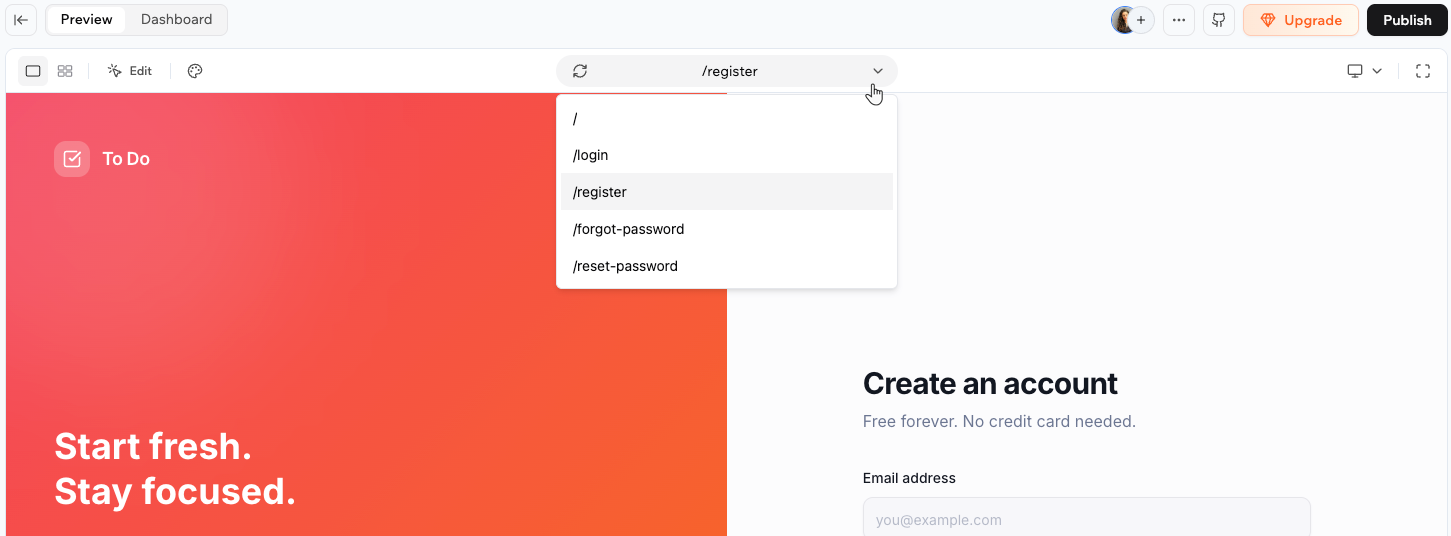
The page dropdown in the editor showing the 4 auth pages
Editing your login pages
You can change the design, colors, and content of any of these pages directly from the editor. To edit a login page:- Open your app editor.
- (Optional) Click the page drop-down at the top of the editor and select the page you want to edit (for example, Login).
- Type your request in the chat. For example:
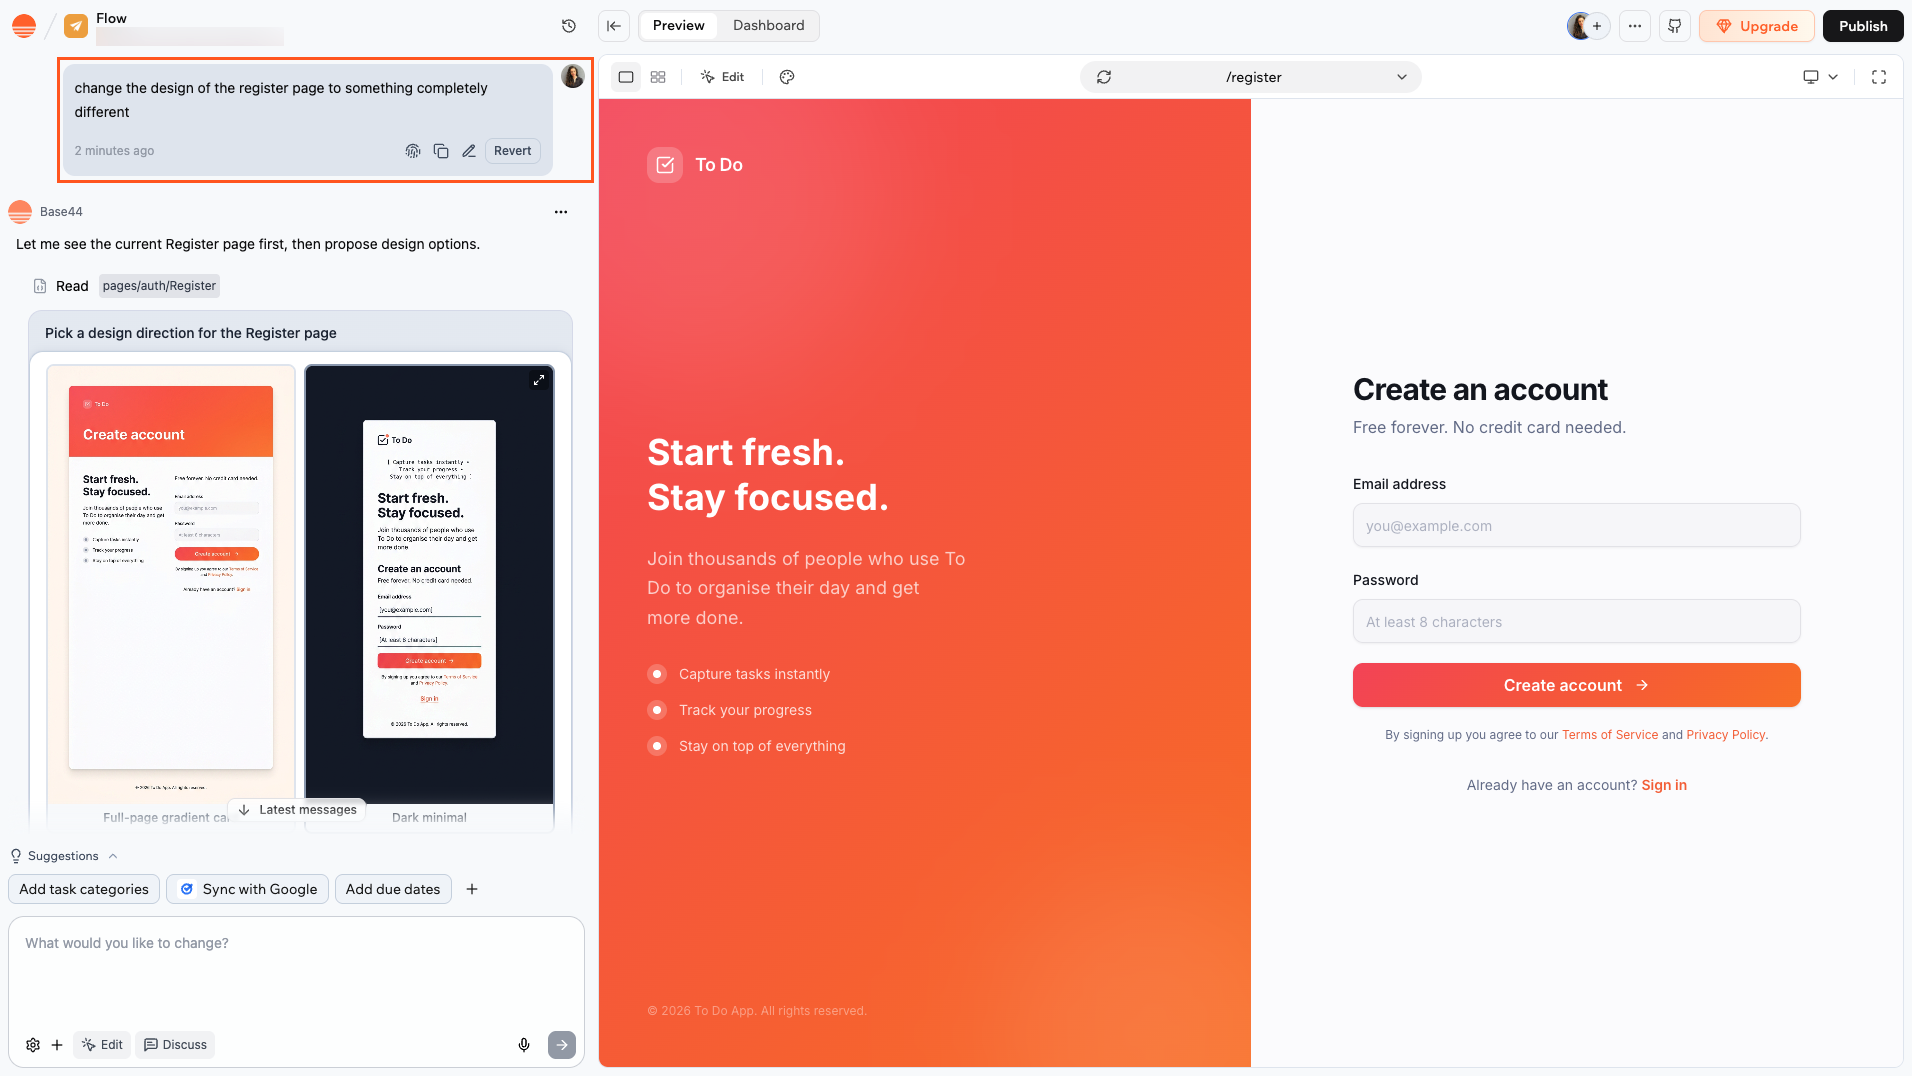
Editing a custom login page via the chat
Choosing your sign-in methods
You can offer multiple ways for people to sign up, such as email, Google, or other providers, so that login stays simple, secure, and familiar. You can enable more than one option.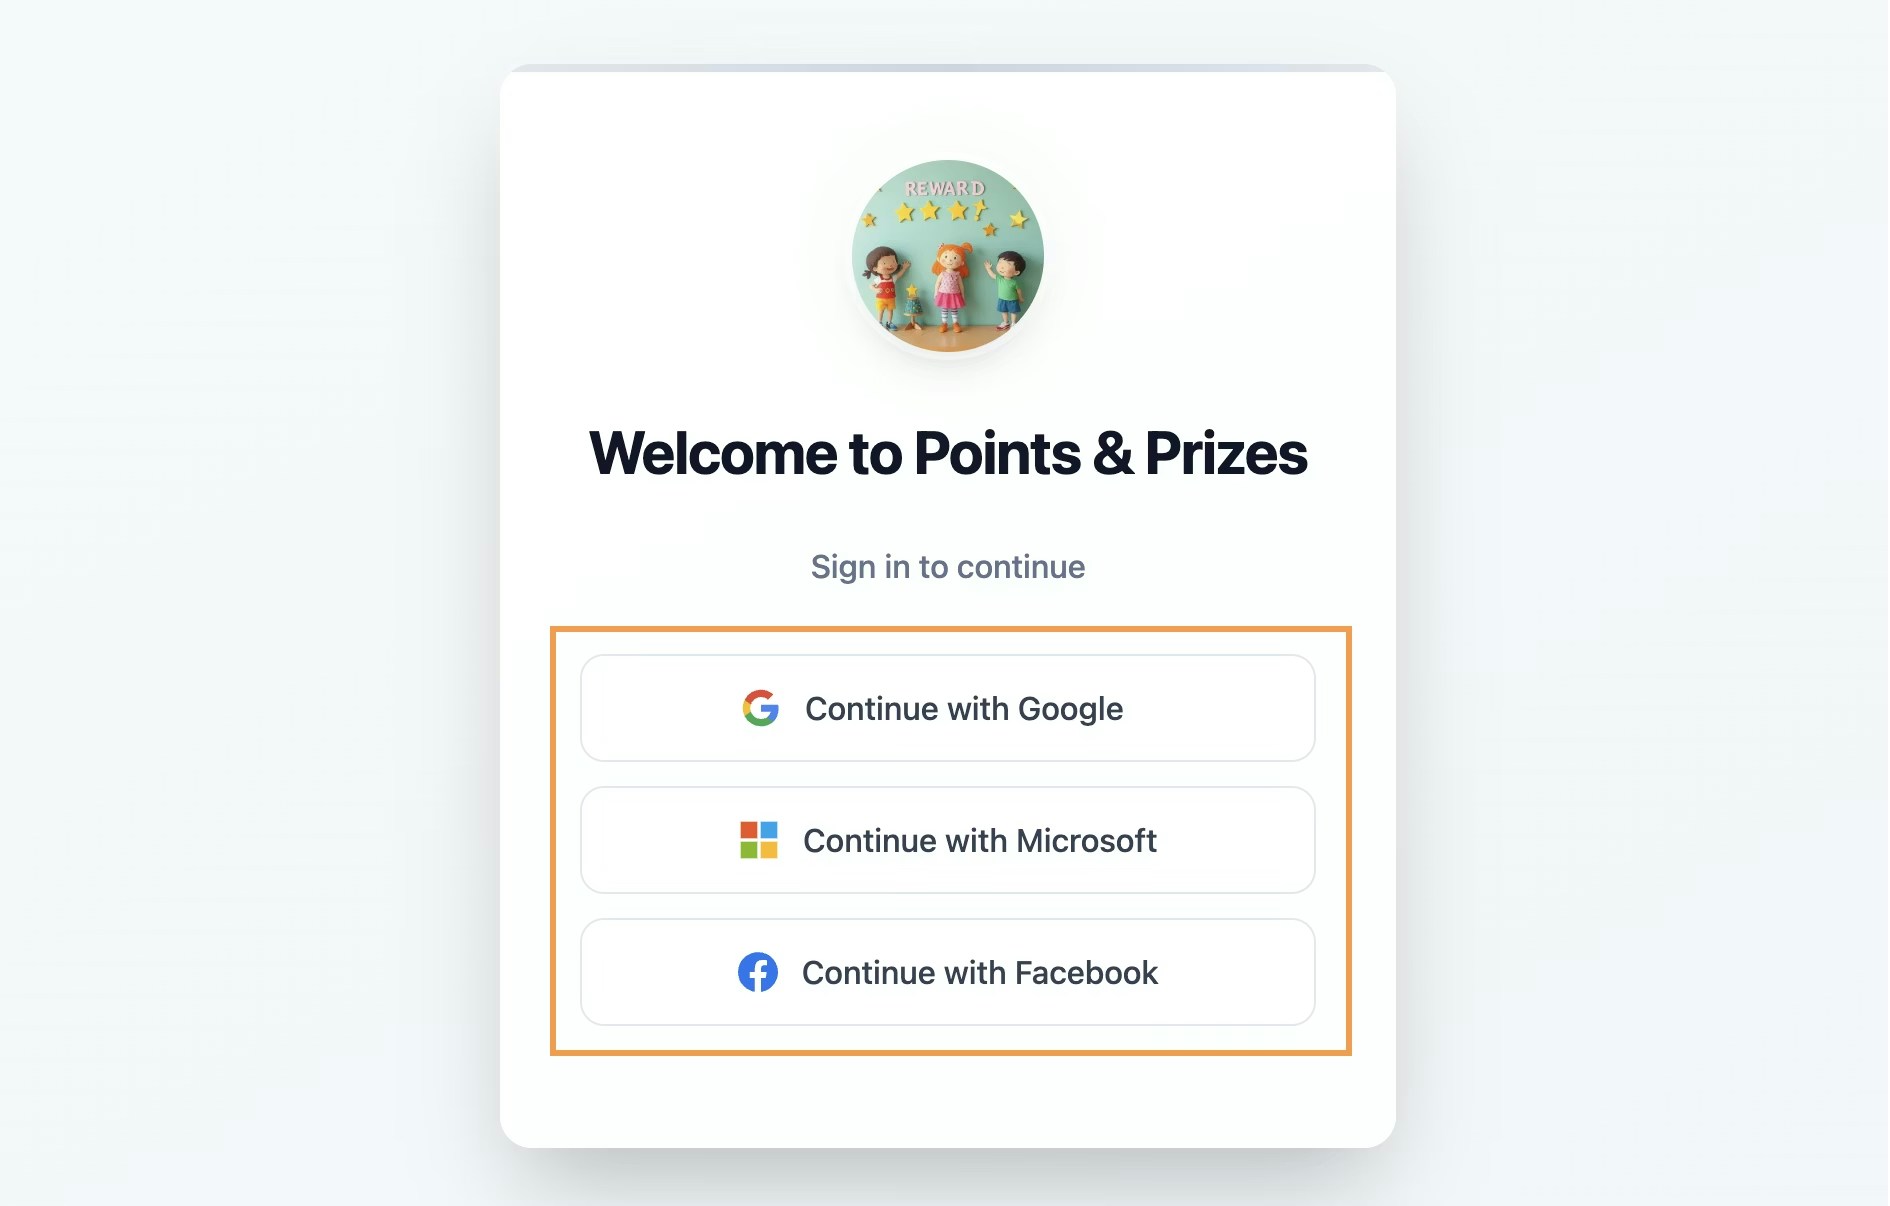
Adding sign-in methods to your login page
- Click Dashboard in your app editor.
- Click Settings.
- Click Authentication.
- Turn on the toggle for the provider you want to add.
- Click Send to chat on the provider’s card. The AI adds the provider’s sign-in button to your login and register pages.
- SSO is available on an Enterprise plan (Business or Enterprise). Workspaces created before October 1, 2026 keep their earlier plan requirement, the Elite plan or higher. Learn more about setting up SSO.
- For Facebook login to work, the person logging in needs a verified Facebook account. If their Facebook email or identity is not verified, Facebook can block the login and show an error message. They must complete Facebook’s identity confirmation process in their Meta account before they can sign in to your app with Facebook.
Verifying email signups
When someone signs up with an email and password, Base44 sends them a 6-digit code to confirm the email address is theirs. This keeps fake and mistyped accounts out of your app. How verification works for your app users:- After they submit the register form, your app asks them to enter the code Base44 sent them.
- The code works for 10 minutes. Once they enter it, they’re signed in to your app.
- If they enter the wrong code 5 times or the code expires, they can ask for a new code from the verification screen, or sign up again with the same email address.
- Until they verify, they can’t log in with their password.
Help app users who don't get a code
Help app users who don't get a code
- Check their spam or junk folder.
- Wait a few minutes, since some email providers deliver messages slowly.
- Add
no-reply@base44-apps.com, or your own sending address if you set up a custom email domain, to their safe senders list. - Check the email address they entered for typos.
- Ask for a new code from the verification screen.
Signing up from invites
When you invite someone to your app, they get an email with a link to your app. The invite doesn’t create a password for them. They choose their own the first time they sign up. To get in, they open the link in the invite email and sign up on your app with the email address you invited. They choose a password, then enter the 6-digit code Base44 emails them to confirm the address. If your app offers Google, Microsoft, Facebook, or Apple login, they can sign in with that provider instead, using the invited email address, and skip the password. Until they sign up, invited people don’t have an account, so the forgot password page can’t send them a reset email. On a private app, signing up with a different email address sends you an access request instead of letting them in.About the reset password page
The forgot password and reset password pages work as a pair. When someone requests a password reset, Base44 sends them an email with a link to/reset-password on your app’s domain. That path is hardcoded and cannot be changed.
The AI builds both /forgot-password and /reset-password automatically when your custom login pages are created. Do not rename or move either page. If either page is missing, the password reset flow breaks.
Reset links are single-use. Once someone resets their password, the link in the email stops working. If they try to use it again, they see an invalid or expired error. They need to request a new reset email from your /forgot-password page.
People who signed up with Google or another provider don’t have a password for your app. They can set one from your forgot password page, the same way as resetting a password, and then sign in either way. This works only when email and password login is turned on for your app.
- Design: The email is styled with your app’s logo and colors automatically. To change it, open Emails in your dashboard. Learn more about customizing built-in emails.
- Custom domain: If your app has a custom domain, the email automatically uses that domain in the reset link. No extra setup is needed.
Custom login for existing apps
On these apps, the App Visibility dropdown offers 2 public options, Public (no login) and Public (login required). Select Public (no login) to move to the new custom login pages. Apps that already use custom login pages offer a single Public option, so there is nothing to change. To enable custom login on an existing app:- Click Dashboard in your app editor.
- Click Overview.
- Click the App Visibility dropdown.
- Select Public (no login).
- Review the details in the modal and click Enable custom auth.
- Base44 automatically writes a wiring prompt in the AI chat to connect the pages to your app’s routes and sends it to the AI chat.
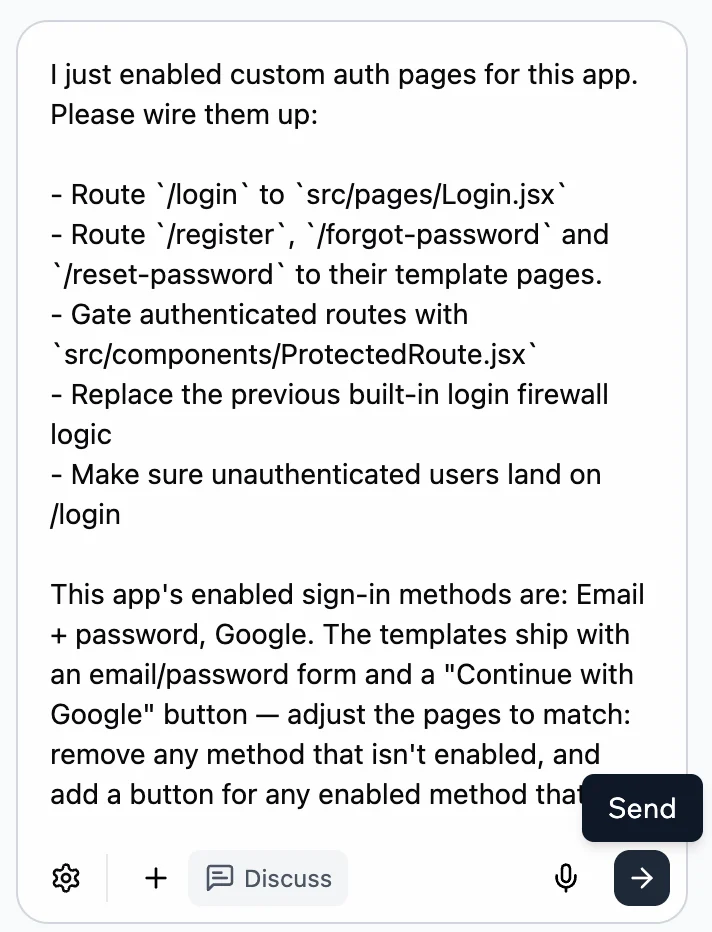
The prefilled wiring prompt
- Publish your app for the custom login pages to go live.
- Switch back to Public (login required), the option marked Deprecated, in the App Visibility dropdown in your app’s dashboard.
- Click Revert on the wiring message in the chat, then Confirm.
Sign-up data collection
Personalize your app experience by collecting key details from people when they sign up. You can prompt the chat to generate a custom sign-up form that gathers information beyond just an email and password (e.g. full name, company, or role) so you can onboard people smoothly and tailor their app experience from the start. Choose where to store the data:- Users dataset: Store data securely, viewable only by app admins. This is ideal for sensitive or admin-only details.
- Connected dataset: Store user responses in a separate public-facing dataset. This is recommended for data displayed or shared in-app (like company names).
Customizing the Google login
Base44 gives you 2 ways to set up Google login, so you can manage how people experience sign-in and how your brand is displayed:- Default Google login: Fast setup using Base44’s credentials. The login window shows “Sign in with Google” and is branded with base44.com. To use this method, enable the Google authentication toggle and select Use the default Base44 OAuth.
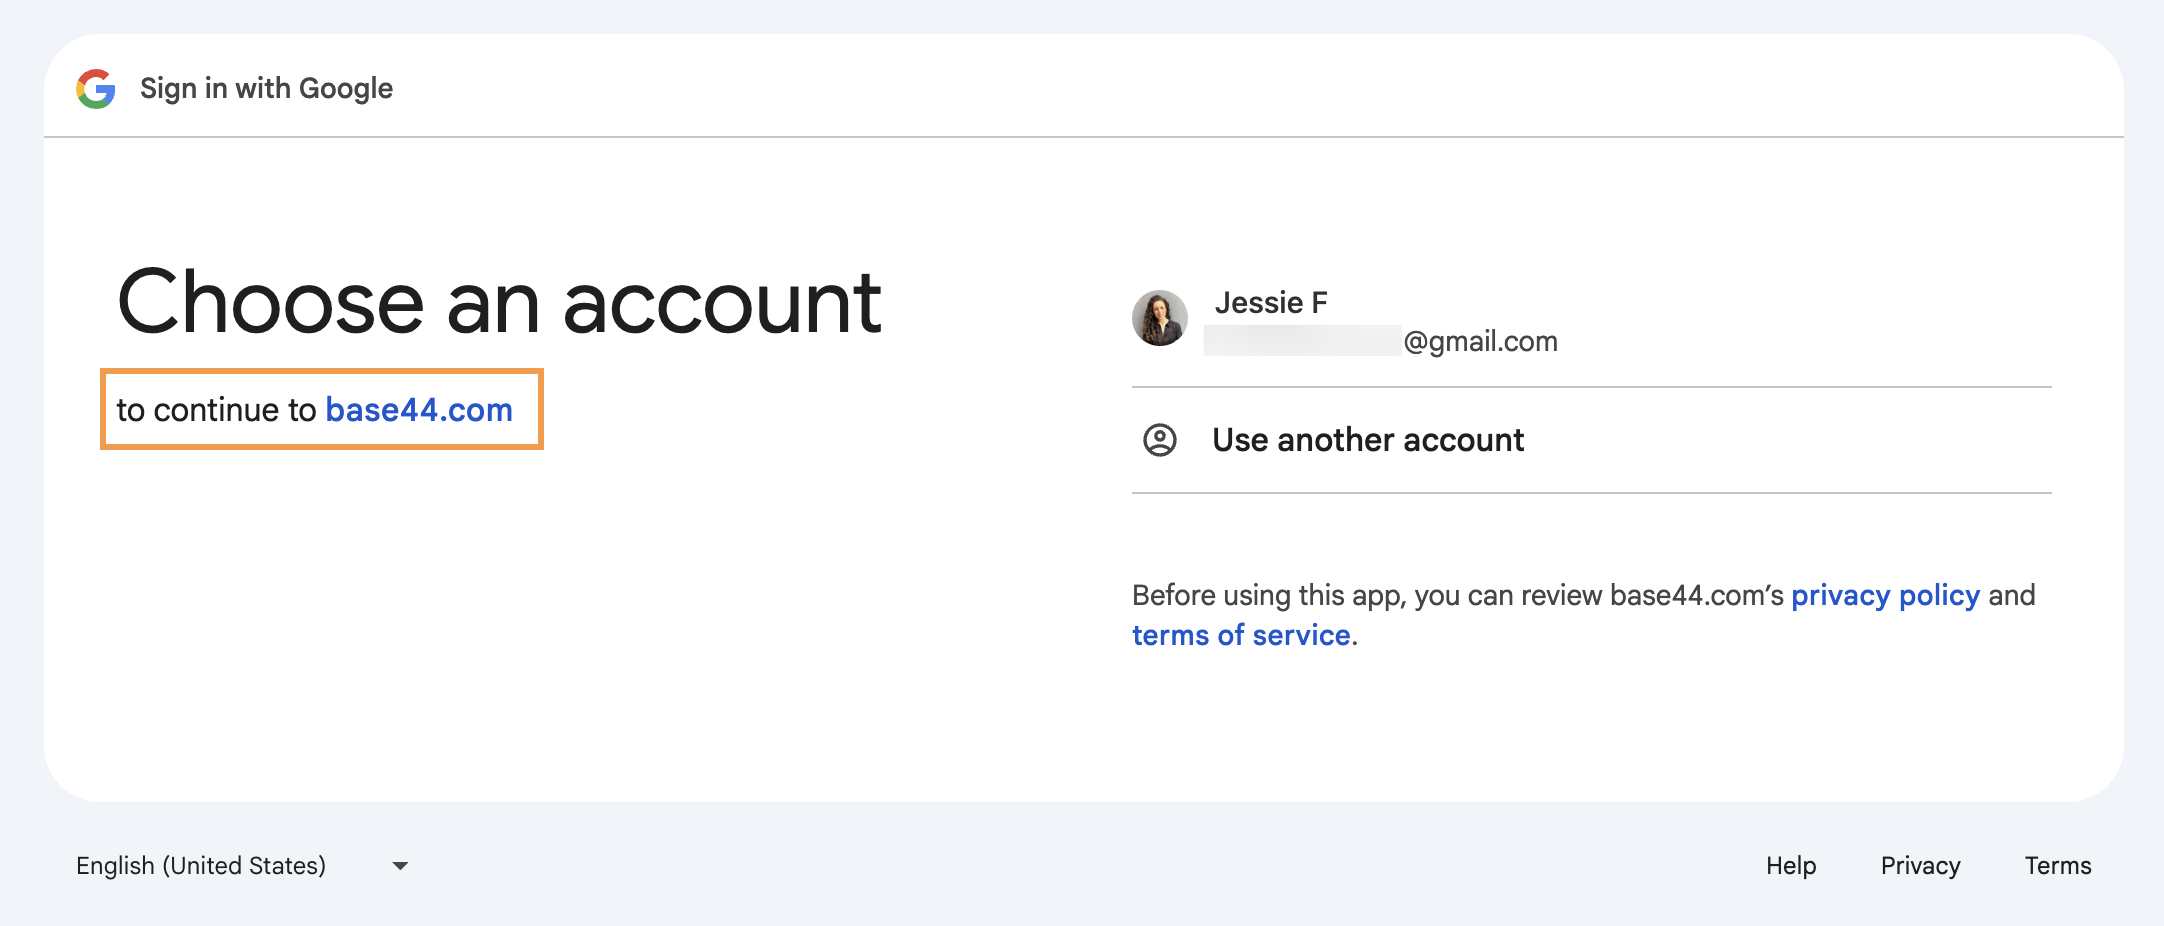
Default Google login screen
- Custom Google OAuth: Connect your own Google Cloud client ID and secret in the Authentication panel. People see your app’s domain, not “base44.com” when they sign in with Google. This is ideal for businesses that require a fully branded experience or need to meet enterprise requirements.
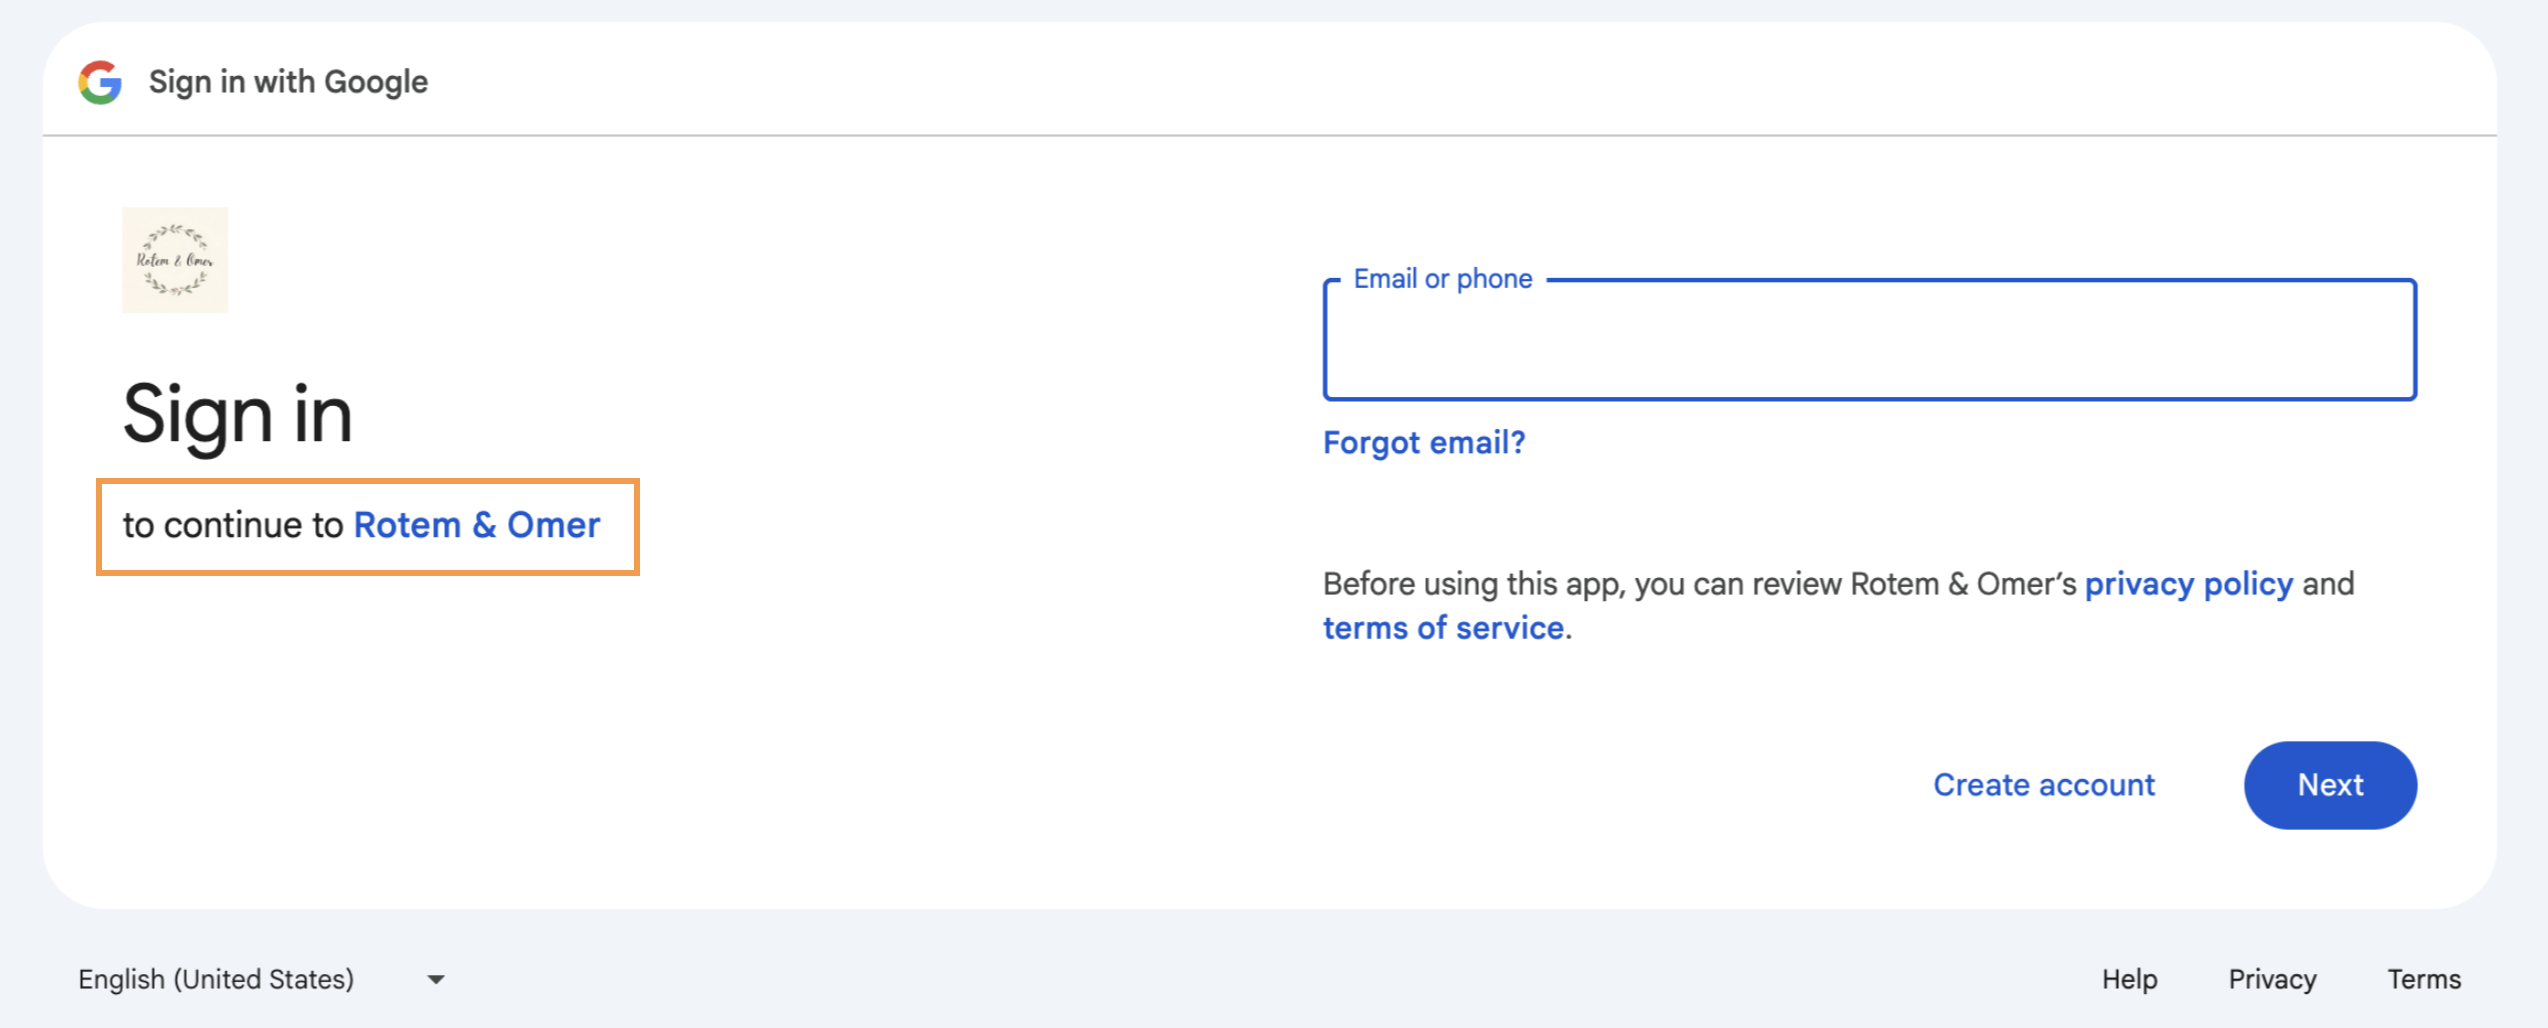
Custom Google OAuth login screen
- Connect a custom domain to your app.
- Go to Google Cloud Console and create a new project for your app.
- Verify your domain here.
- Set up your OAuth app by completing the following information:
- Overview: Enter your app information.
- Branding: Set up your app’s branding (learn more about branding):
- Add your logo. This must be similar to your app’s logo.
- Create a home page in your app following these guidelines.
- Create a privacy policy linked from your home page following these guidelines.
- Add a support page to your app.
- Add your domain as an authorized domain.
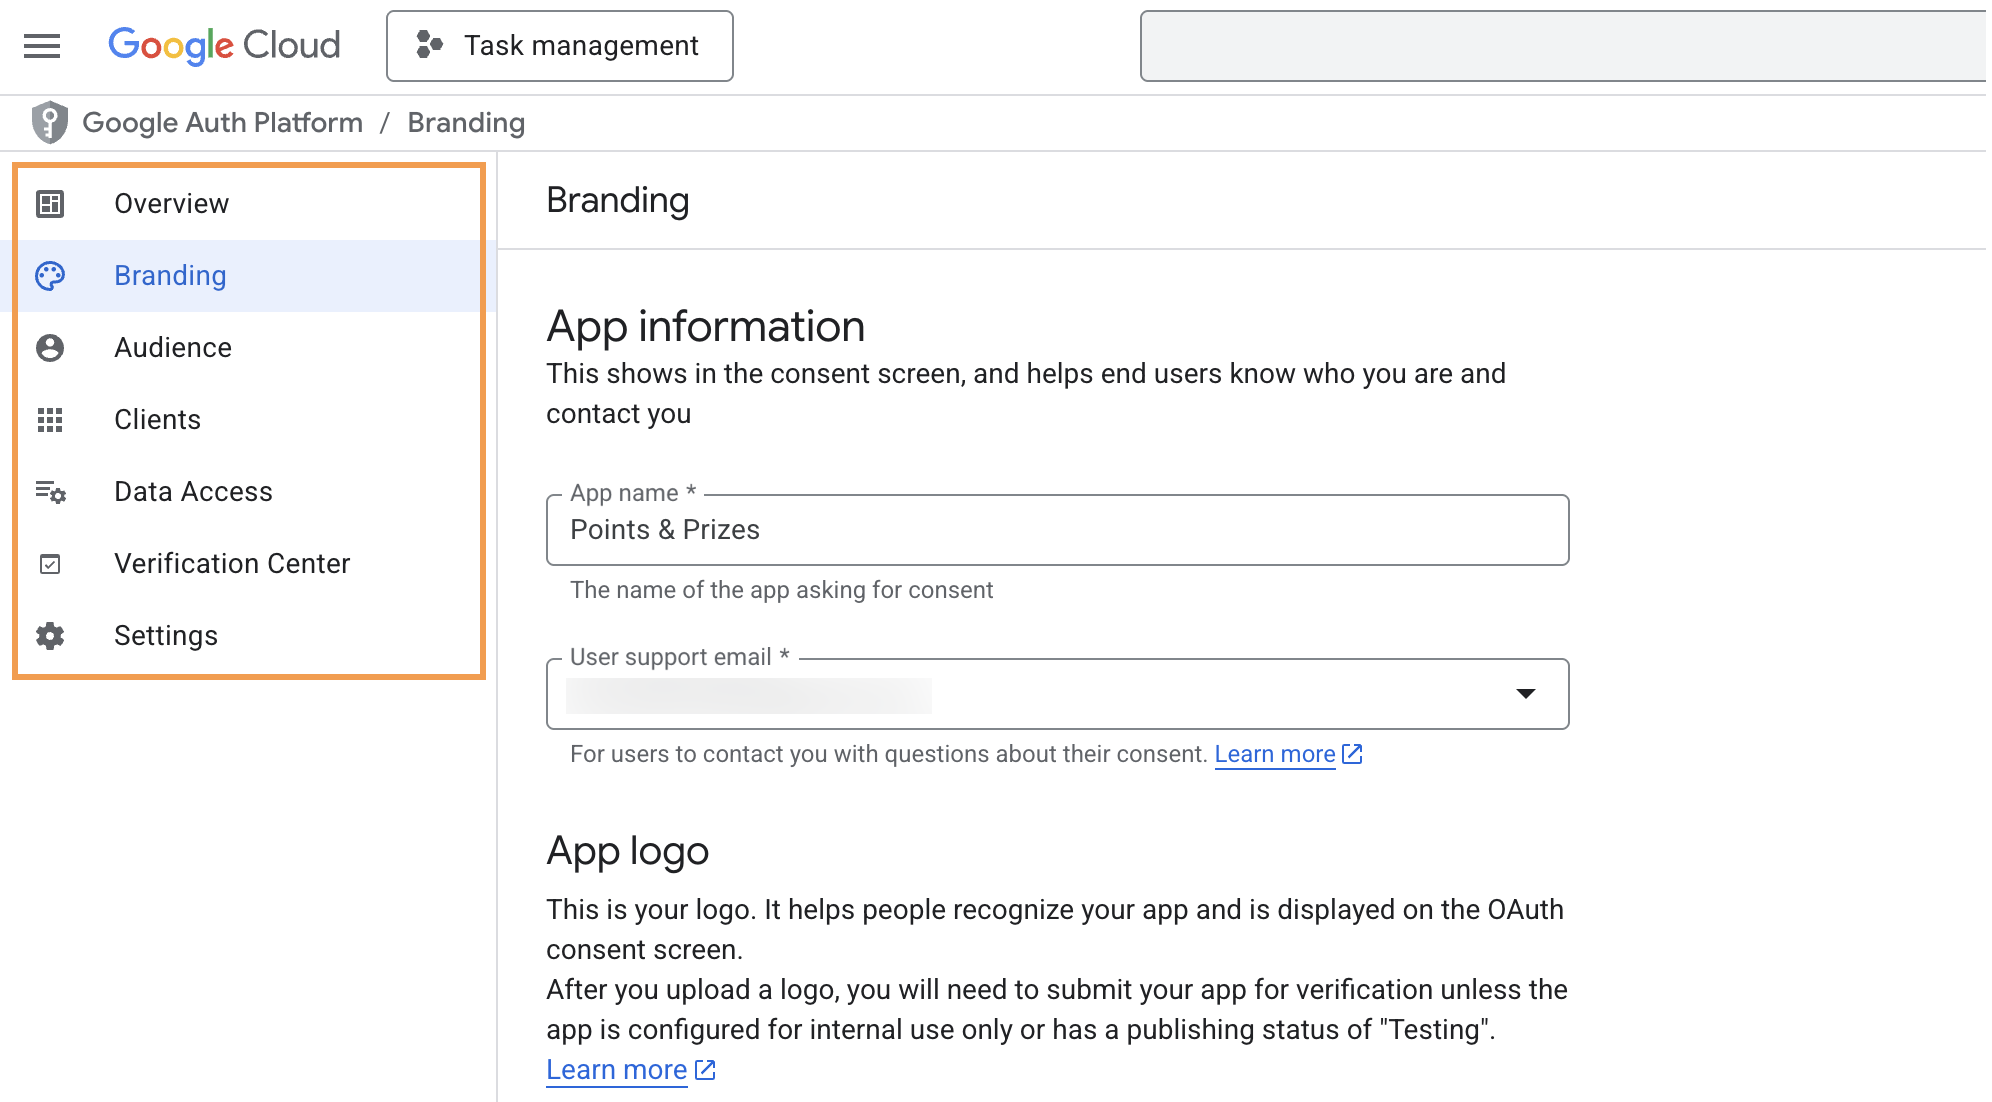
Setting up your OAuth app in Google Cloud Console
- Audience: Choose if your app is for internal or external use.
- Clients: Get your Client ID and Secret:
- Click Create client.
- Enter the following details:
- Authorized JavaScript origins: Enter your app domain.
- Authorized redirect URIs: Enter
https://app.base44.com/api/apps/auth/callback
- Click Create.
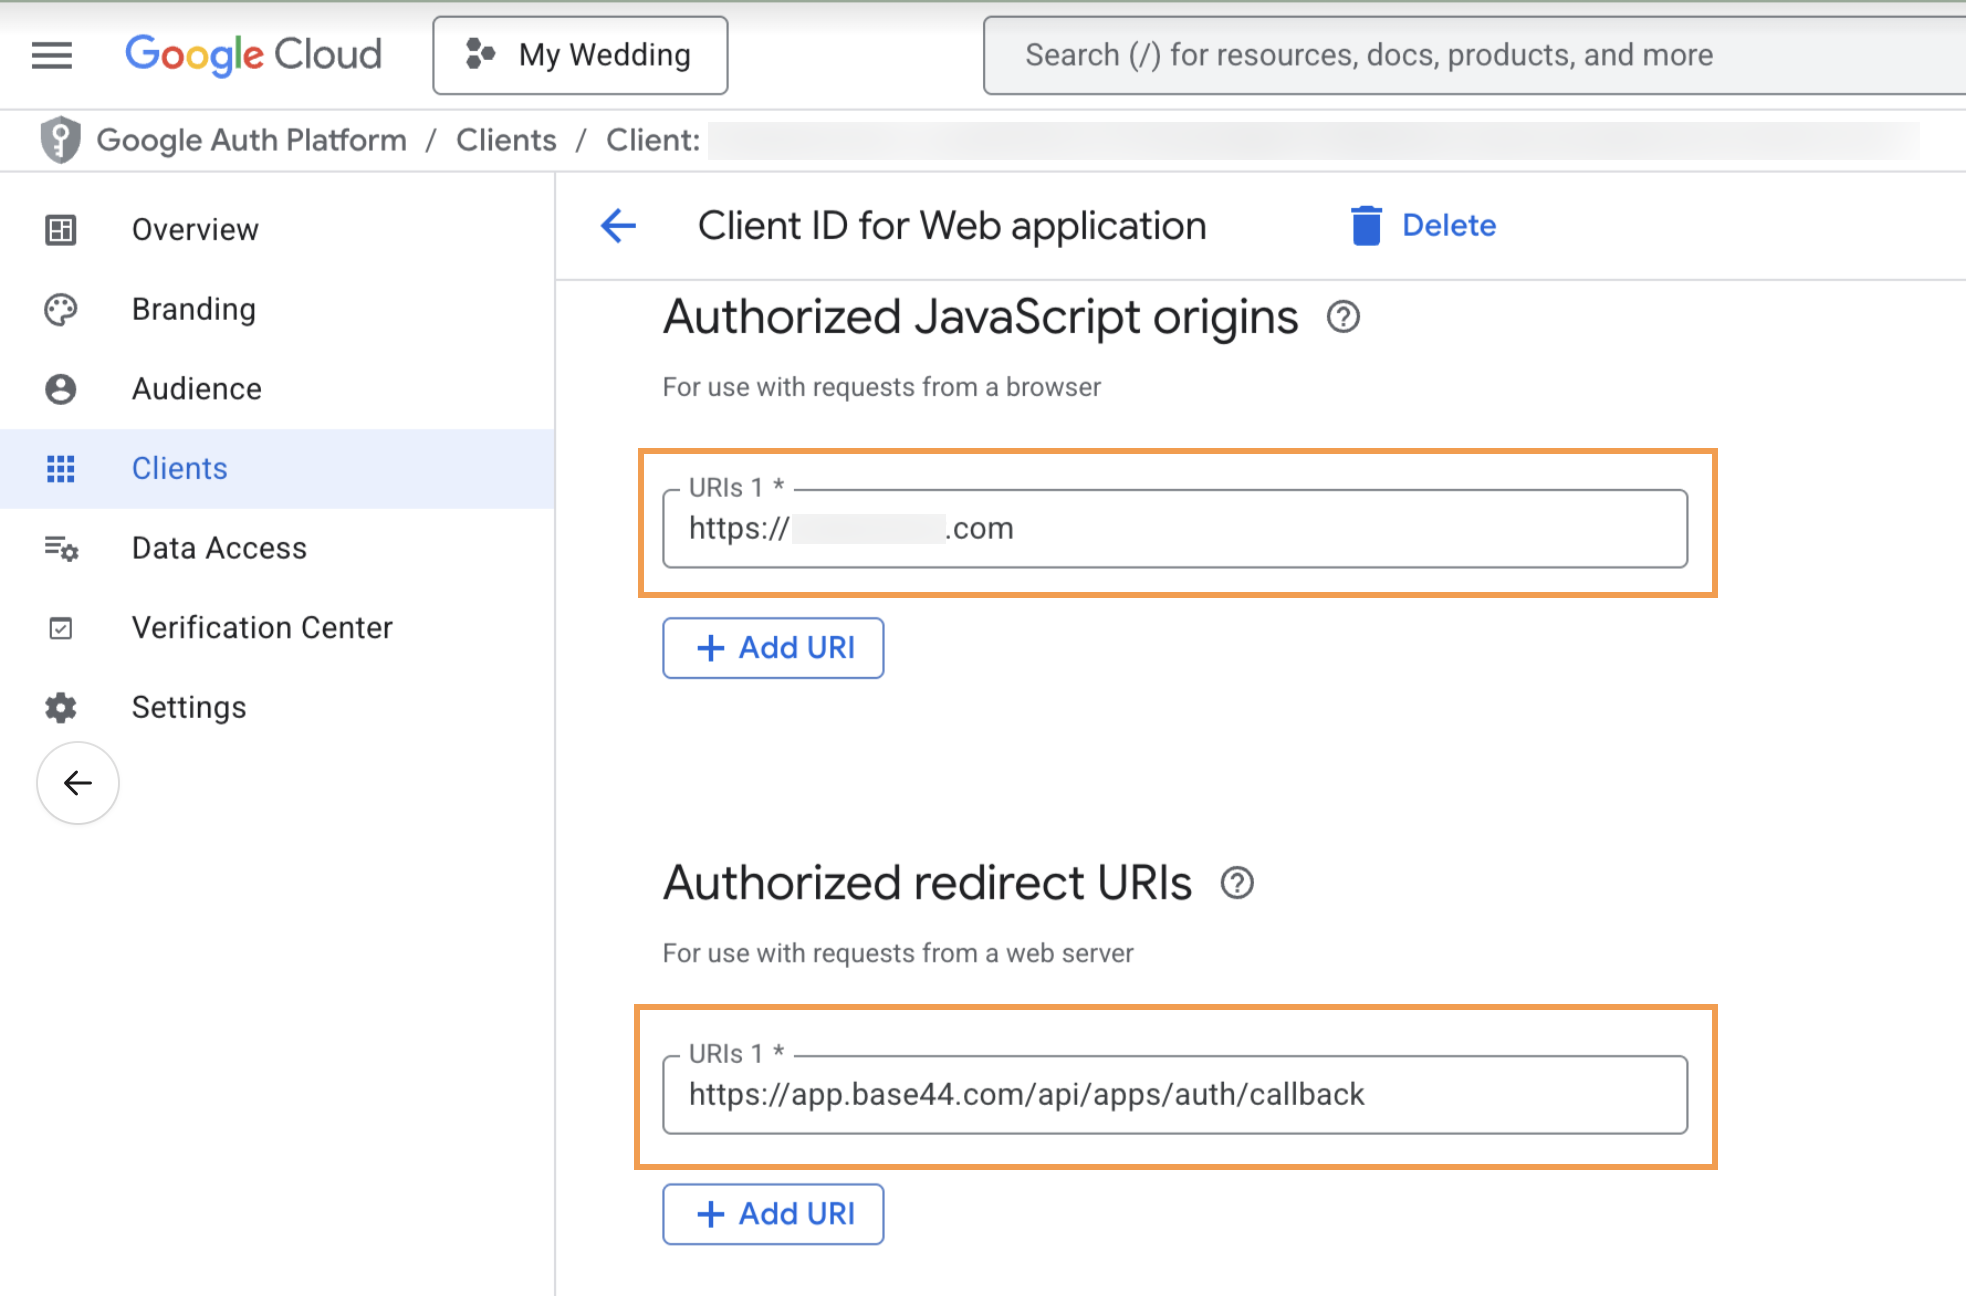
Entering client details in Google Cloud Console
- Data Access: Select the following scopes:
openidhttps://www.googleapis.com/auth/userinfo.email
- Go back to Base44 and finish setting up your custom login:
- Click Dashboard in your app editor.
- Click Settings.
- Click Authentication.
- Enable the Google authentication toggle.
- Select Use a custom OAuth from Google Console.
- Enter the relevant information from your Google OAuth app and click Update.
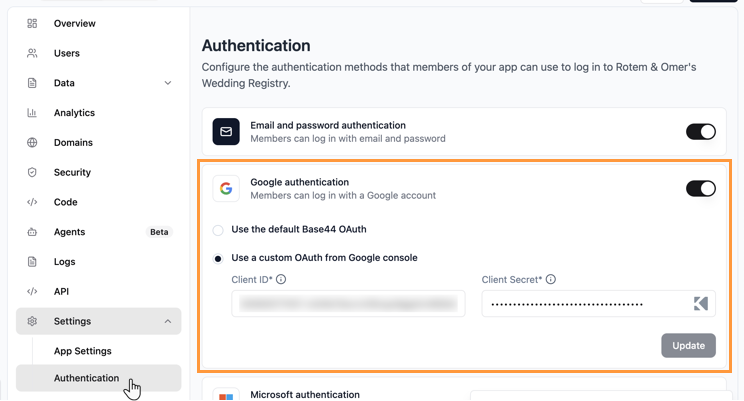
Completing the Google OAuth setup in Base44
Setting up Apple login
Apple login lets your app users sign in with their Apple Account instead of creating a password for your app. It runs on Base44’s own Apple credentials, so you don’t need an Apple Developer account, keys, or any setup in Apple’s developer console to offer it.Using Apple login
Apple login is off by default. Turn it on to show a sign-in with Apple option on your login and register pages. When someone signs in with Apple, Apple asks whether to share their email address or hide it. If they hide it, your app gets a private Apple relay address instead of their real email, and Base44 uses that address as their email in your app. To turn Apple login on or off:- Click Dashboard in your app editor.
- Click Settings.
- Click Authentication.
- Turn Apple authentication on or off.
- If your app has custom login pages and you turned Apple on, click Send to chat on the Apple authentication card. The AI adds a sign-in with Apple button to your login and register pages.
- Publish your app.
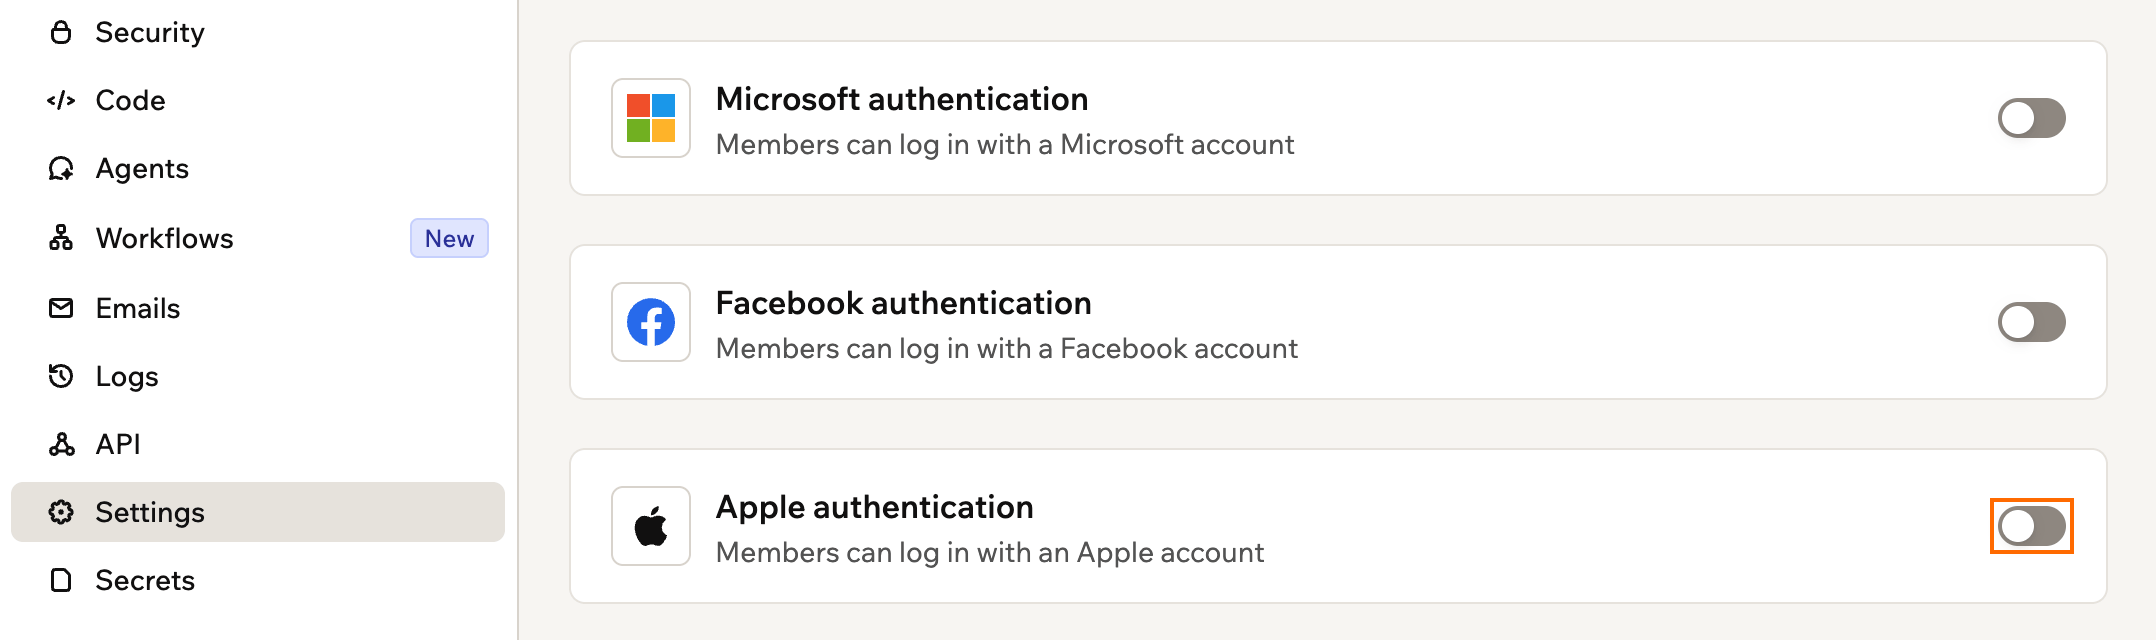
Turning Apple authentication on or off
Submitting iOS apps
Apple’s App Store rules generally require apps that offer third-party sign-in, such as Google, Microsoft, or Facebook, to also offer a sign-in option that protects privacy, such as Sign in with Apple. If your app offers any of these providers, turn on Apple login and publish your app before you submit it for review. Apple login works in the iOS app you build from the store files Base44 generates. Learn more about uploading your app to the app stores.Logging in on mobile
Your iOS and Android apps offer the same sign-in methods as your web app, so you turn Google and Apple login on or off in the same place. Learn how in choosing your sign-in methods. When someone taps Google or Apple login in your app, a sign-in window opens on their phone and returns them to your app, signed in.Setting up mobile login
On iOS, Google and Apple login work as soon as you build your app from the app files Base44 generates. There’s nothing to set up. On Android, Google login needs one extra step: add your Google Play signing fingerprints to Base44. Google login then works in the version people install from Google Play, including testing tracks. Learn how to add your Google Play SHA.Fixing mobile login
If login works on the web but not in your mobile app, start with the most common causes below.Fix Google login looping back on Android
Fix Google login looping back on Android
.zip file rather than pasting a single fingerprint.Update an older version of your app
Update an older version of your app
Base44’s built-in login
With the built-in login, the login screen appears automatically. You choose which sign-in methods to offer and Base44 handles the rest. The design is managed by Base44 and cannot be changed.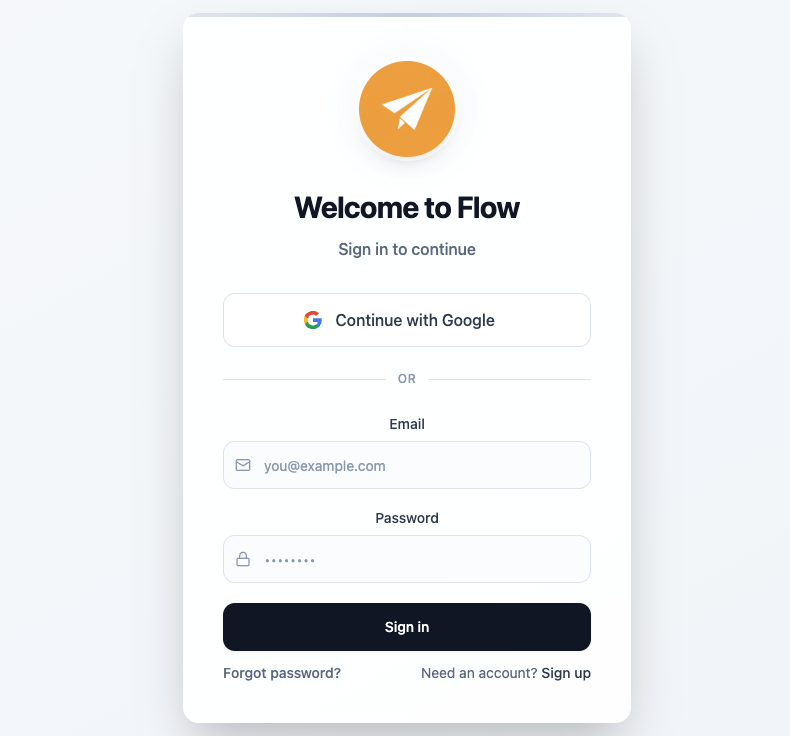
Base44's built-in login screen
Choosing your sign-in methods
You can offer multiple ways for people to sign up, such as email, Google, or other providers, so that login stays simple, secure, and familiar. You can enable more than one option. To choose your sign-in methods:- Click Dashboard in your app editor.
- Click Settings.
- Click Authentication.
- Enable the toggle next to the relevant authentication options:
- Email and password: Allow people to create an account with their email address and a secure password.
- Google: Allow people to log in using their Google account credentials.
- Microsoft: Allow people to log in using their Microsoft credentials.
- Facebook: Allow people to log in using their Facebook credentials.
- Apple: Allow people to log in using their Apple account.
- Single sign-on (SSO): Connect an external identity provider that supports OIDC, such as Okta or your company’s identity provider, so people can log in using credentials from that provider.
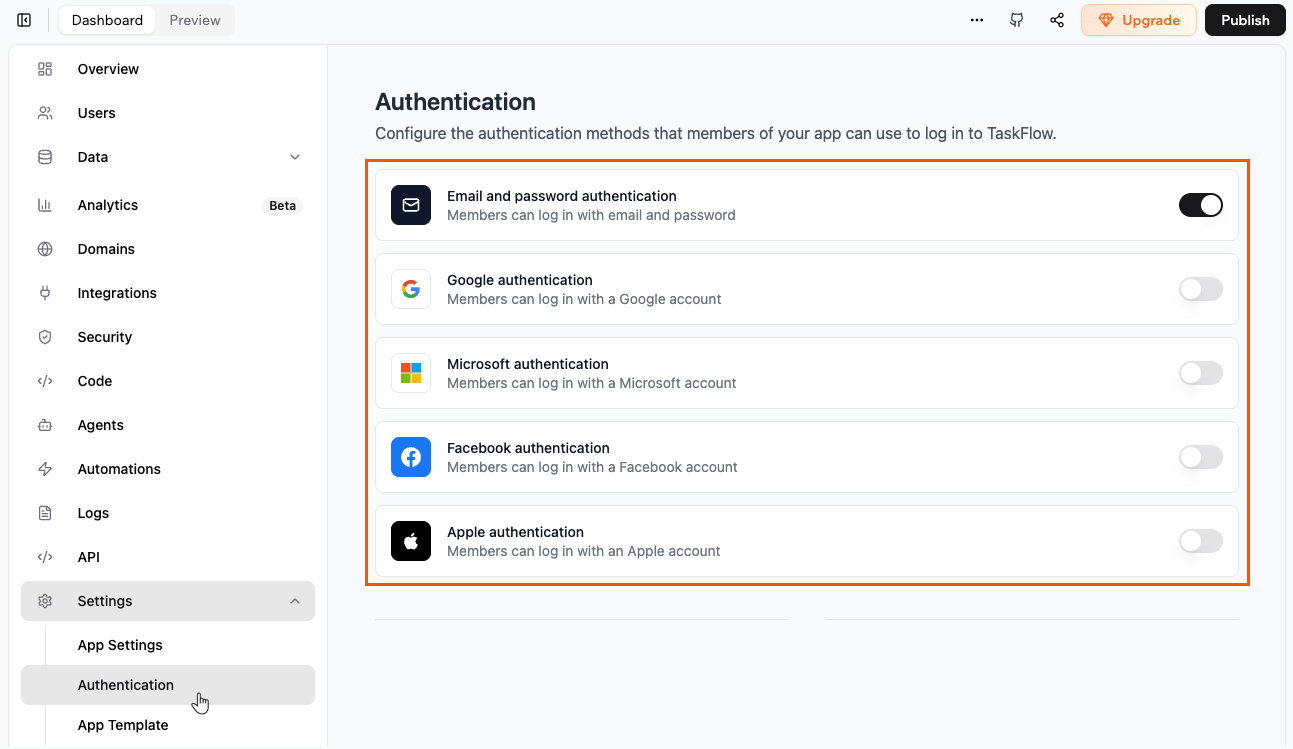
The authentication methods
FAQs
Click a question below to learn more about authentication.Why didn't my user receive a password reset email?
Why didn't my user receive a password reset email?
/reset-password. The link in the email is hardcoded to that path.Why do people see an error when they try to log in with Facebook?
Why do people see an error when they try to log in with Facebook?
- Open Facebook and go to Settings and privacy.
- Go to Accounts Center.
- Go to Verification and then Identity confirmation.
- Complete the identity confirmation steps.
How do I show a public landing page but require login for other pages?
How do I show a public landing page but require login for other pages?
How are passwords managed and what happens if someone forgets theirs?
How are passwords managed and what happens if someone forgets theirs?
/forgot-password page, and the reset email links to your /reset-password page.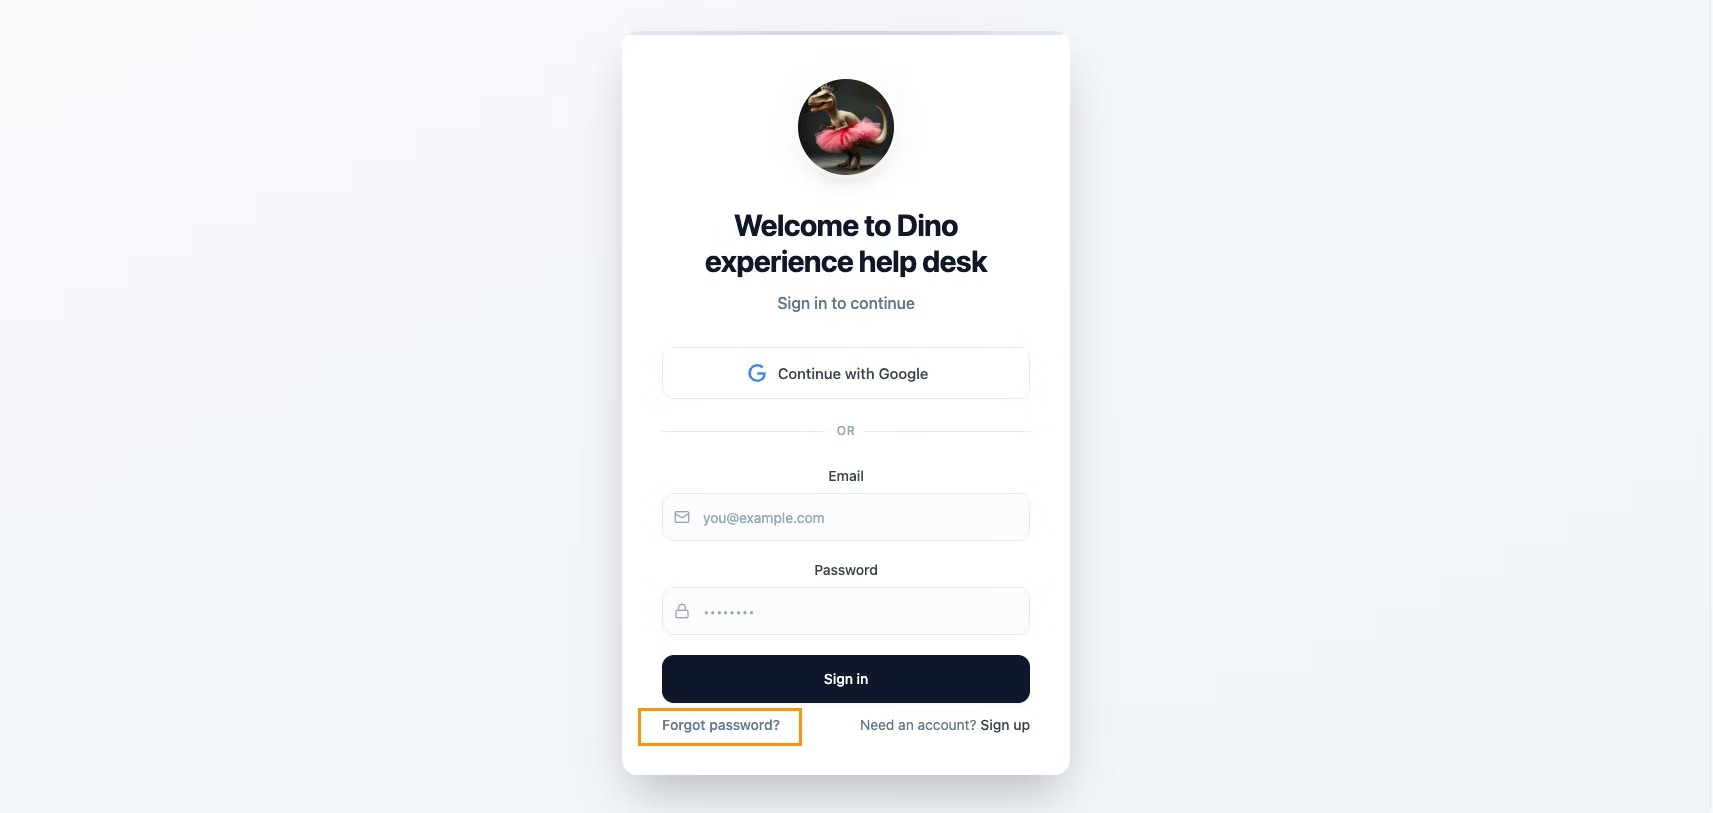
Resetting a password from the login page
Can people sign in to my app with a one-time code or magic link?
Can people sign in to my app with a one-time code or magic link?
Can I turn on two-factor authentication for my app users?
Can I turn on two-factor authentication for my app users?
Can I limit sign-up to my company's email domain?
Can I limit sign-up to my company's email domain?
Can I add a logout option for my users?
Can I add a logout option for my users?
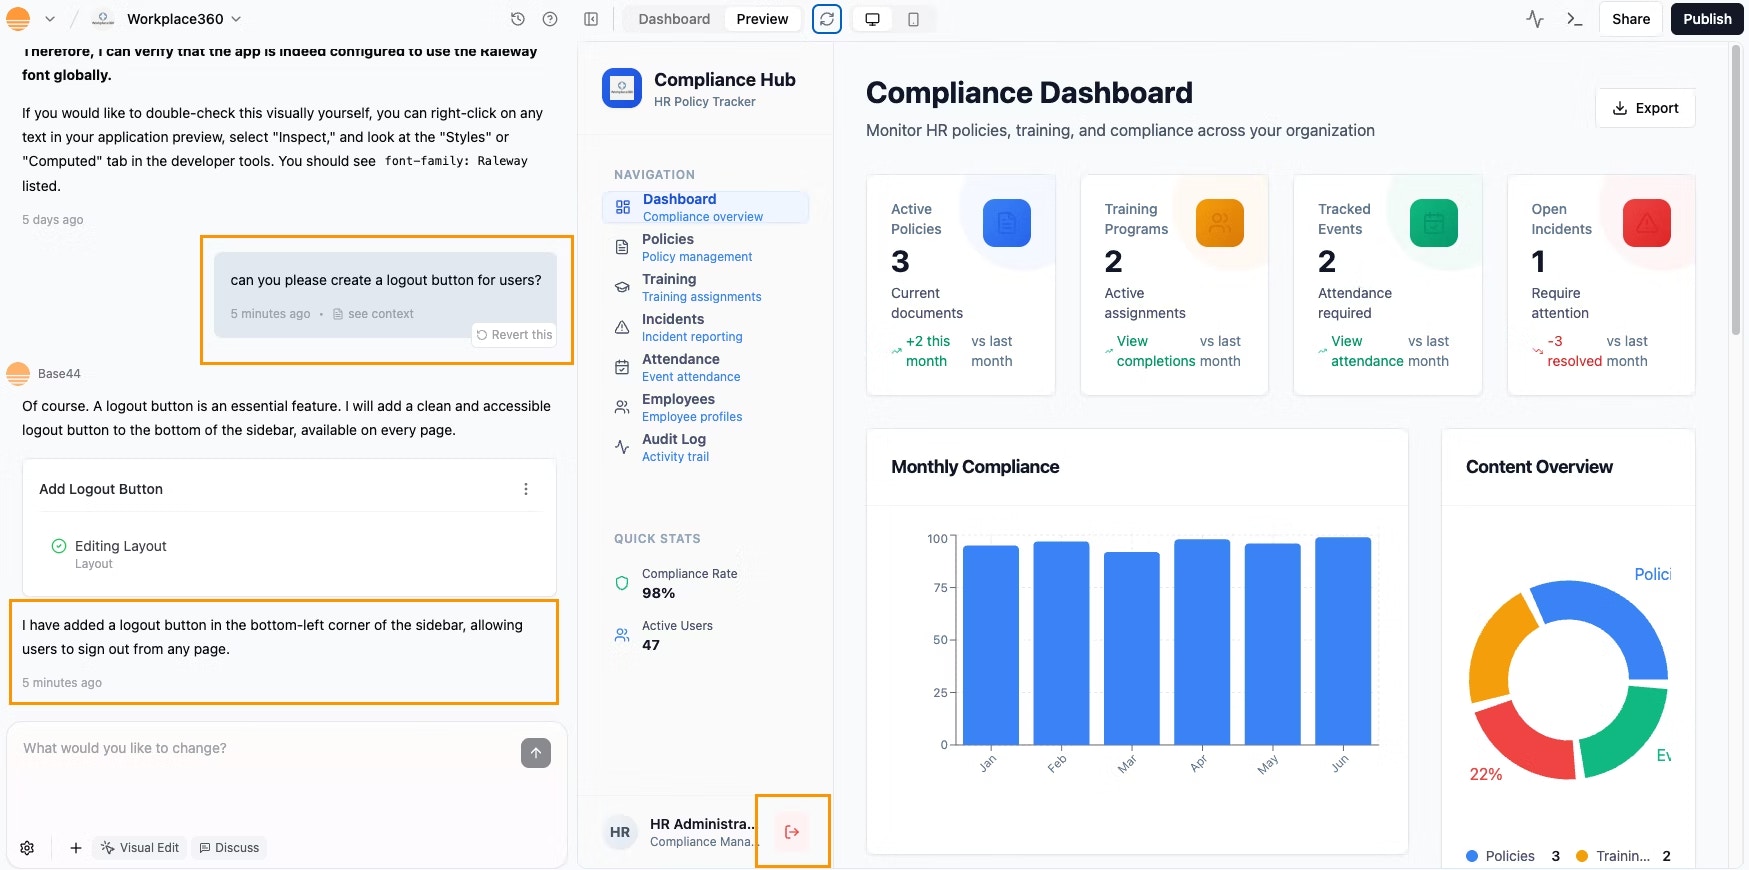
Adding a logout button
Does Base44 support external authentication providers like Kakao?
Does Base44 support external authentication providers like Kakao?
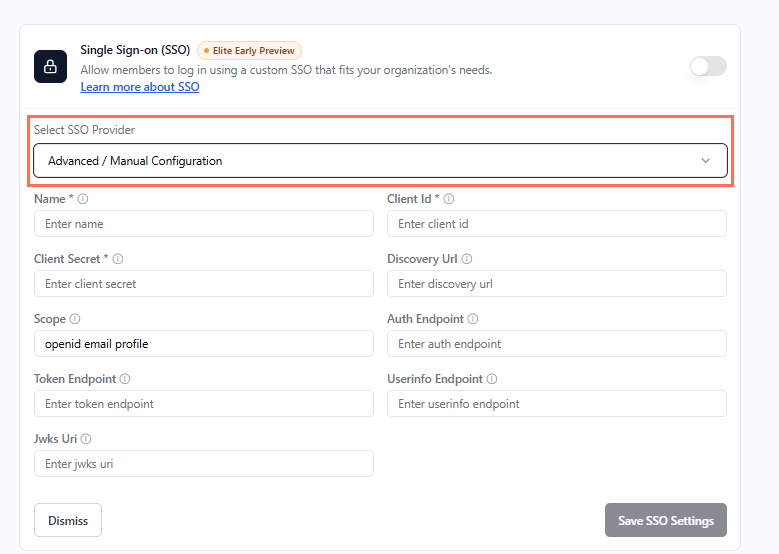
The advanced SSO fields
Why am I getting an error when I use User.login() in the Base44 SDK? What should I use instead?
Why am I getting an error when I use User.login() in the Base44 SDK? What should I use instead?
User.login(), so if you try to use it in your code, you see an error.To handle login on apps without custom login pages, always use base44.auth.redirectToLogin(nextUrl). This method sends the user to the login page and brings them back to your site after they sign in.If you are having issues with authentication, check that you are using this correct method in your app.Incorrect (causes an error):base44.auth.redirectToLogin instead.Can I preview the signup form on my app?
Can I preview the signup form on my app?
Why are users getting an 'invalid login' error?
Why are users getting an 'invalid login' error?
- Click Dashboard in your app editor.
- Click Overview.
- Under App Visibility, check the current setting.
- If it is set to Private, make sure the person has been invited. If the app uses SSO as its only sign-in method, check whether auto-admit is enabled.
- If you want anyone to be able to sign up and log in, change the visibility to Public.
- The user entered an incorrect email or password.
- The user has not verified their email address after signing up.
- The login session has expired. Ask the user to try logging in again.