

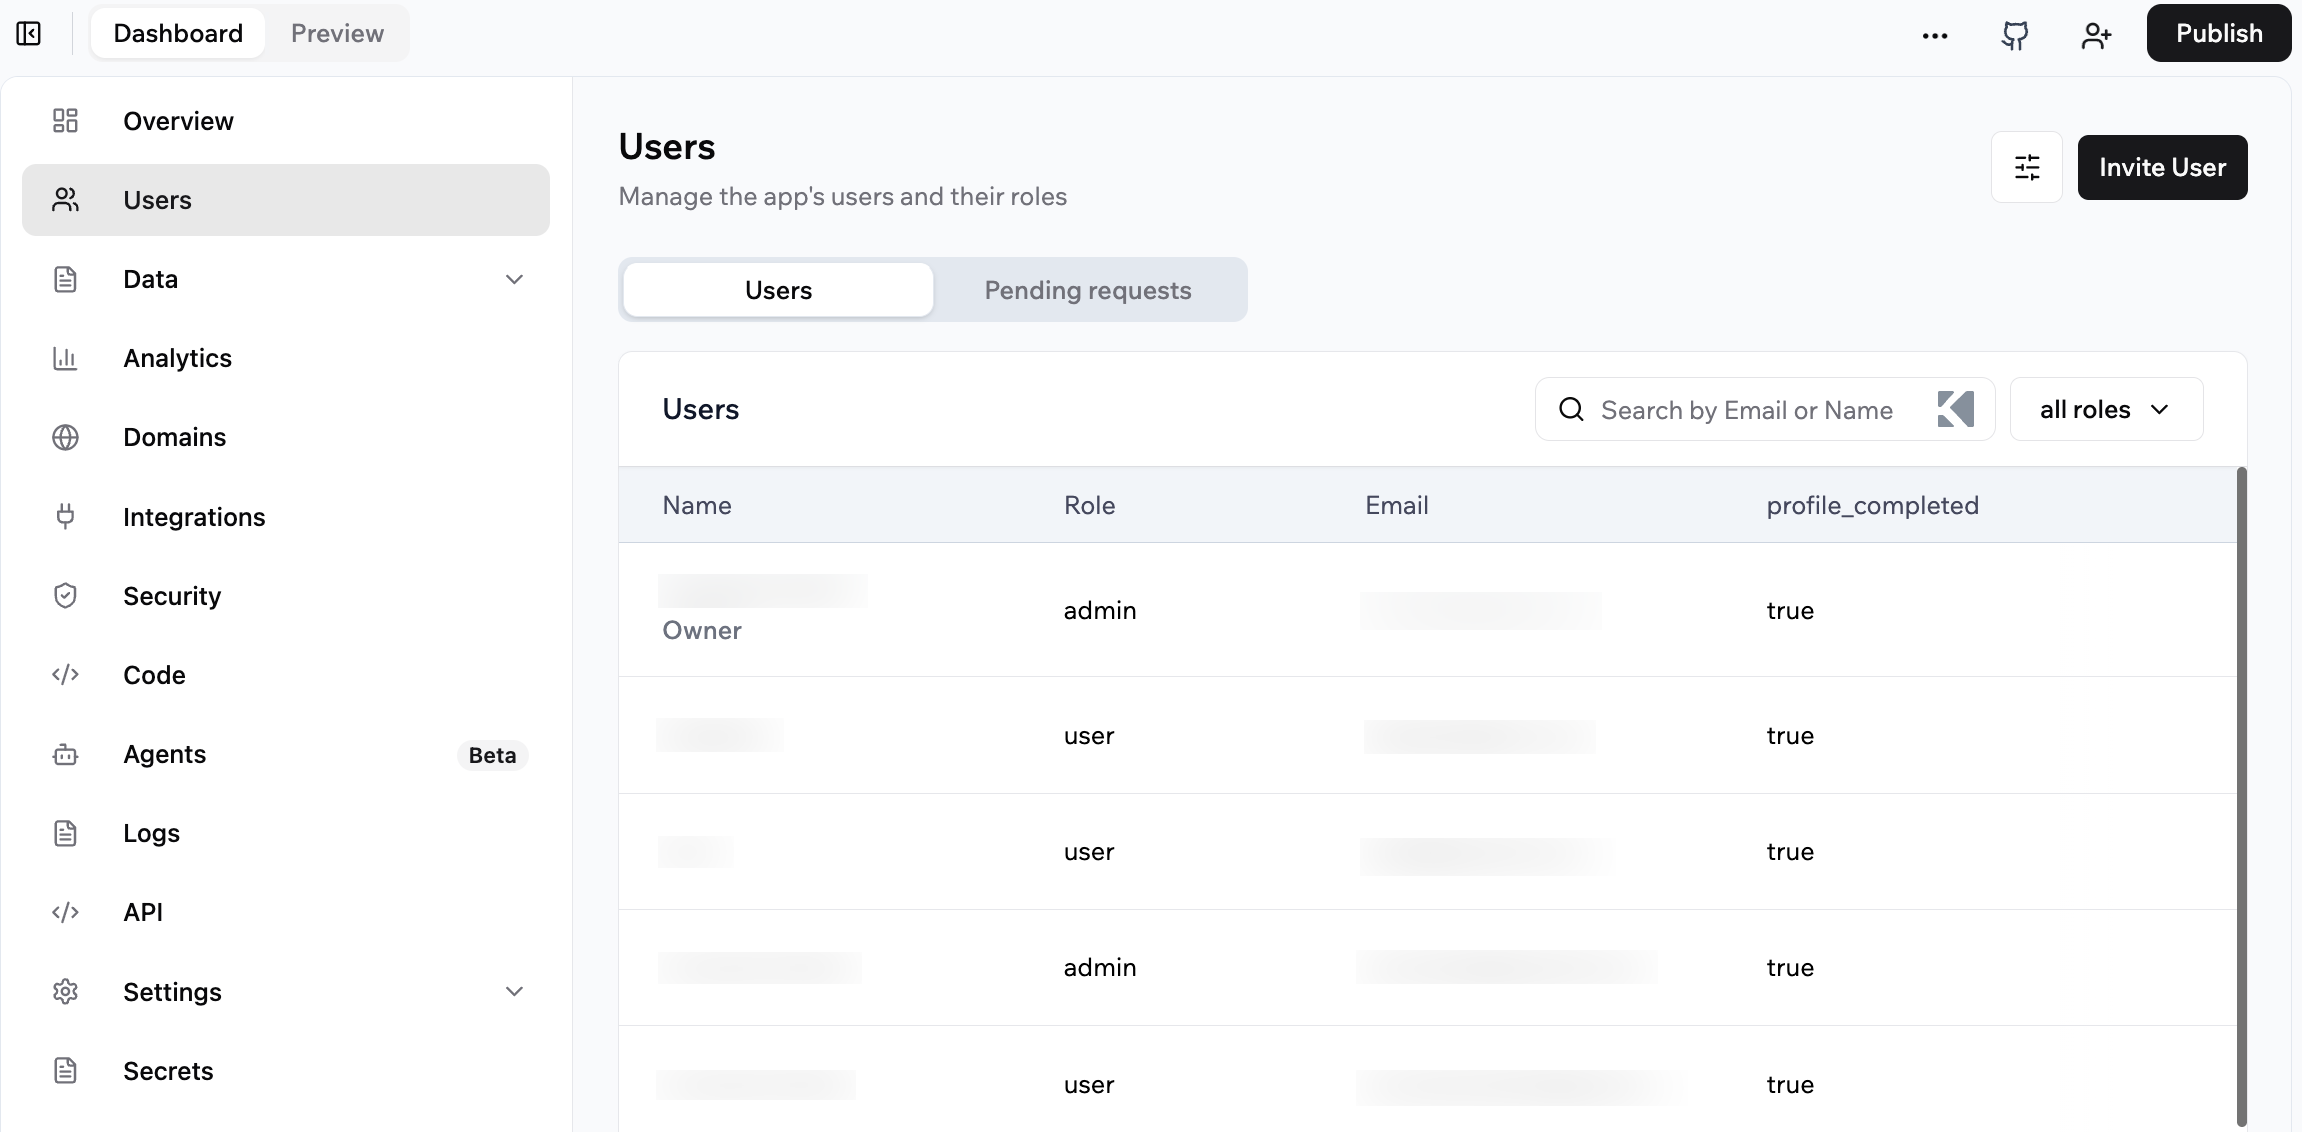
Managing your app users and their roles
Setting your app visibility
App visibility decides who can open your app and whether they need to sign in. Pick the level that fits your app. Visibility is only about who can get in. How people sign in, such as with email and password or Google, is a separate setting on the Authentication page. Learn more about managing login and registration. Base44 uses smart app visibility to suggest a starting point for you. Apps that act like public sites, such as landing pages or portfolios, are automatically set to Public without requiring login. You can change this setting at any time.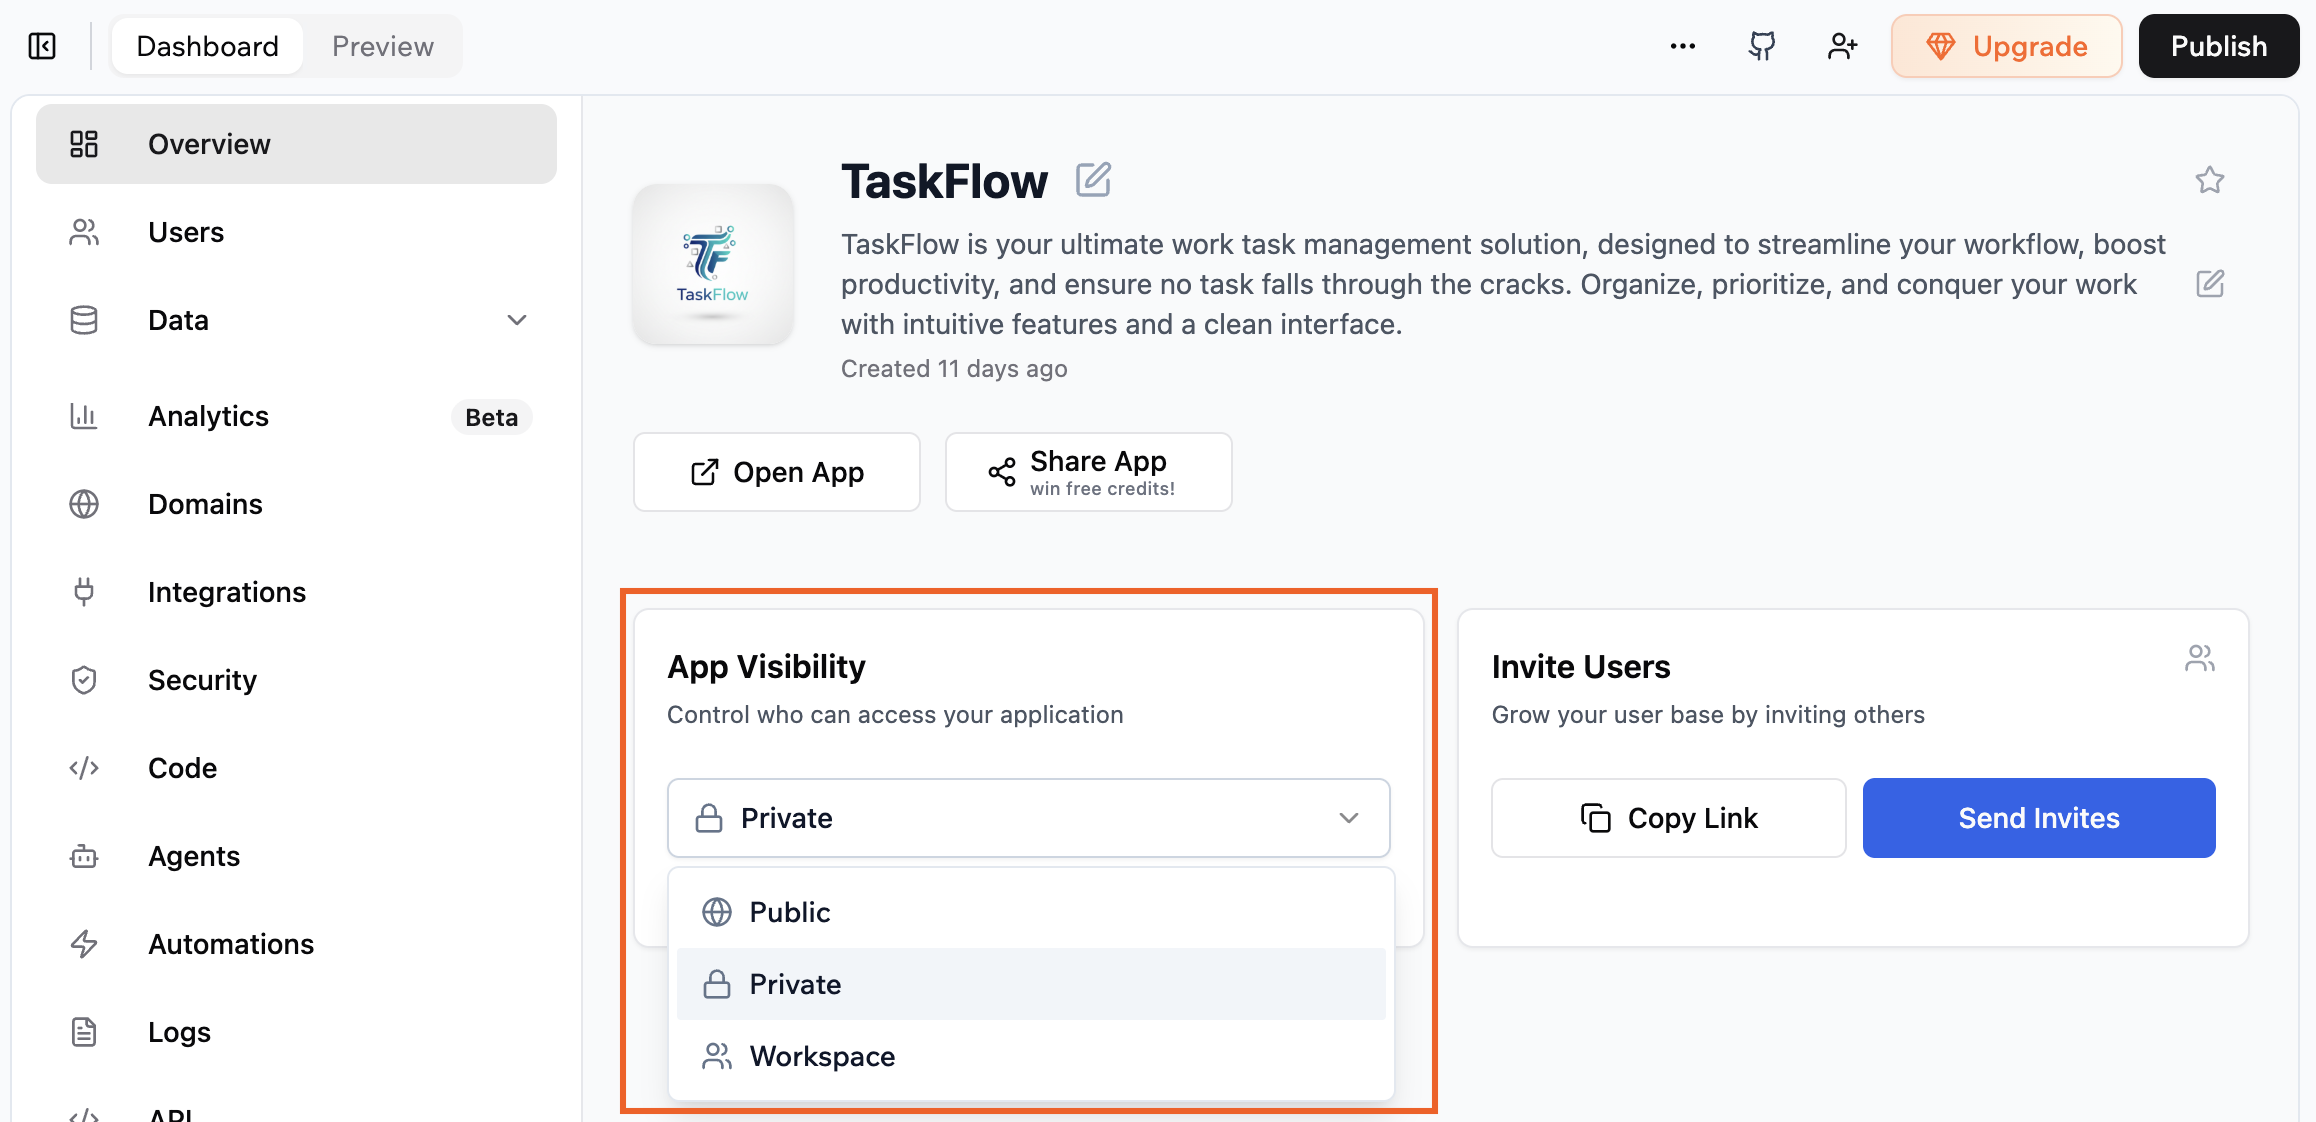
Choosing your app visibility from your app's dashboard
- Go to your app’s Dashboard.
- Click Overview.
- Click the App Visibility drop-down.
- Select a visibility level.
- If your app does not require login, it cannot identify who each visitor is. Features that depend on user identity, such as user profiles or saved per-user data, will not work.
- If your workspace enforces SSO, people sign in to public apps through your identity provider. On an app that offers both public options, select Public (login required) so sign in matches the rest of your workspace, because Public (no login) is unavailable while enforcement is on. Learn more about Enterprise SSO and app visibility.
Inviting users to your app
Invite people to use your app by sending them an email invitation from your dashboard or from inside your app. Inviting someone as a user or admin controls what they can do in the live app. It does not give them access to the app editor or your app’s dashboard.- If your app is set to Workspace visibility, all workspace members automatically have access and do not need individual invites.
- If your app is private, SSO is its only sign-in method, and auto-admit is on, people are added automatically when they sign in and do not need individual invites.
- If your app is not published yet, the invitation dialog shows Your app isn’t published yet. You can still send the invitations, but invitees cannot access the app until you publish it.
- Invite permissions depend on your app’s visibility:
- Private app: Only admins can invite people and can choose whether the role is user or admin.
- Public app: Admins can invite people and choose roles. People with the user role can invite other users.
From your dashboard
Send invitations from your app’s dashboard and choose the role for each person. To invite people from your dashboard:- Click Dashboard in your app editor.
- Click Overview.
- In the Invite Users section, click Send Invites.
- Enter the email address for each person you want to invite.
- Click the Access level drop-down and choose a role.
- Click Send Invitation.
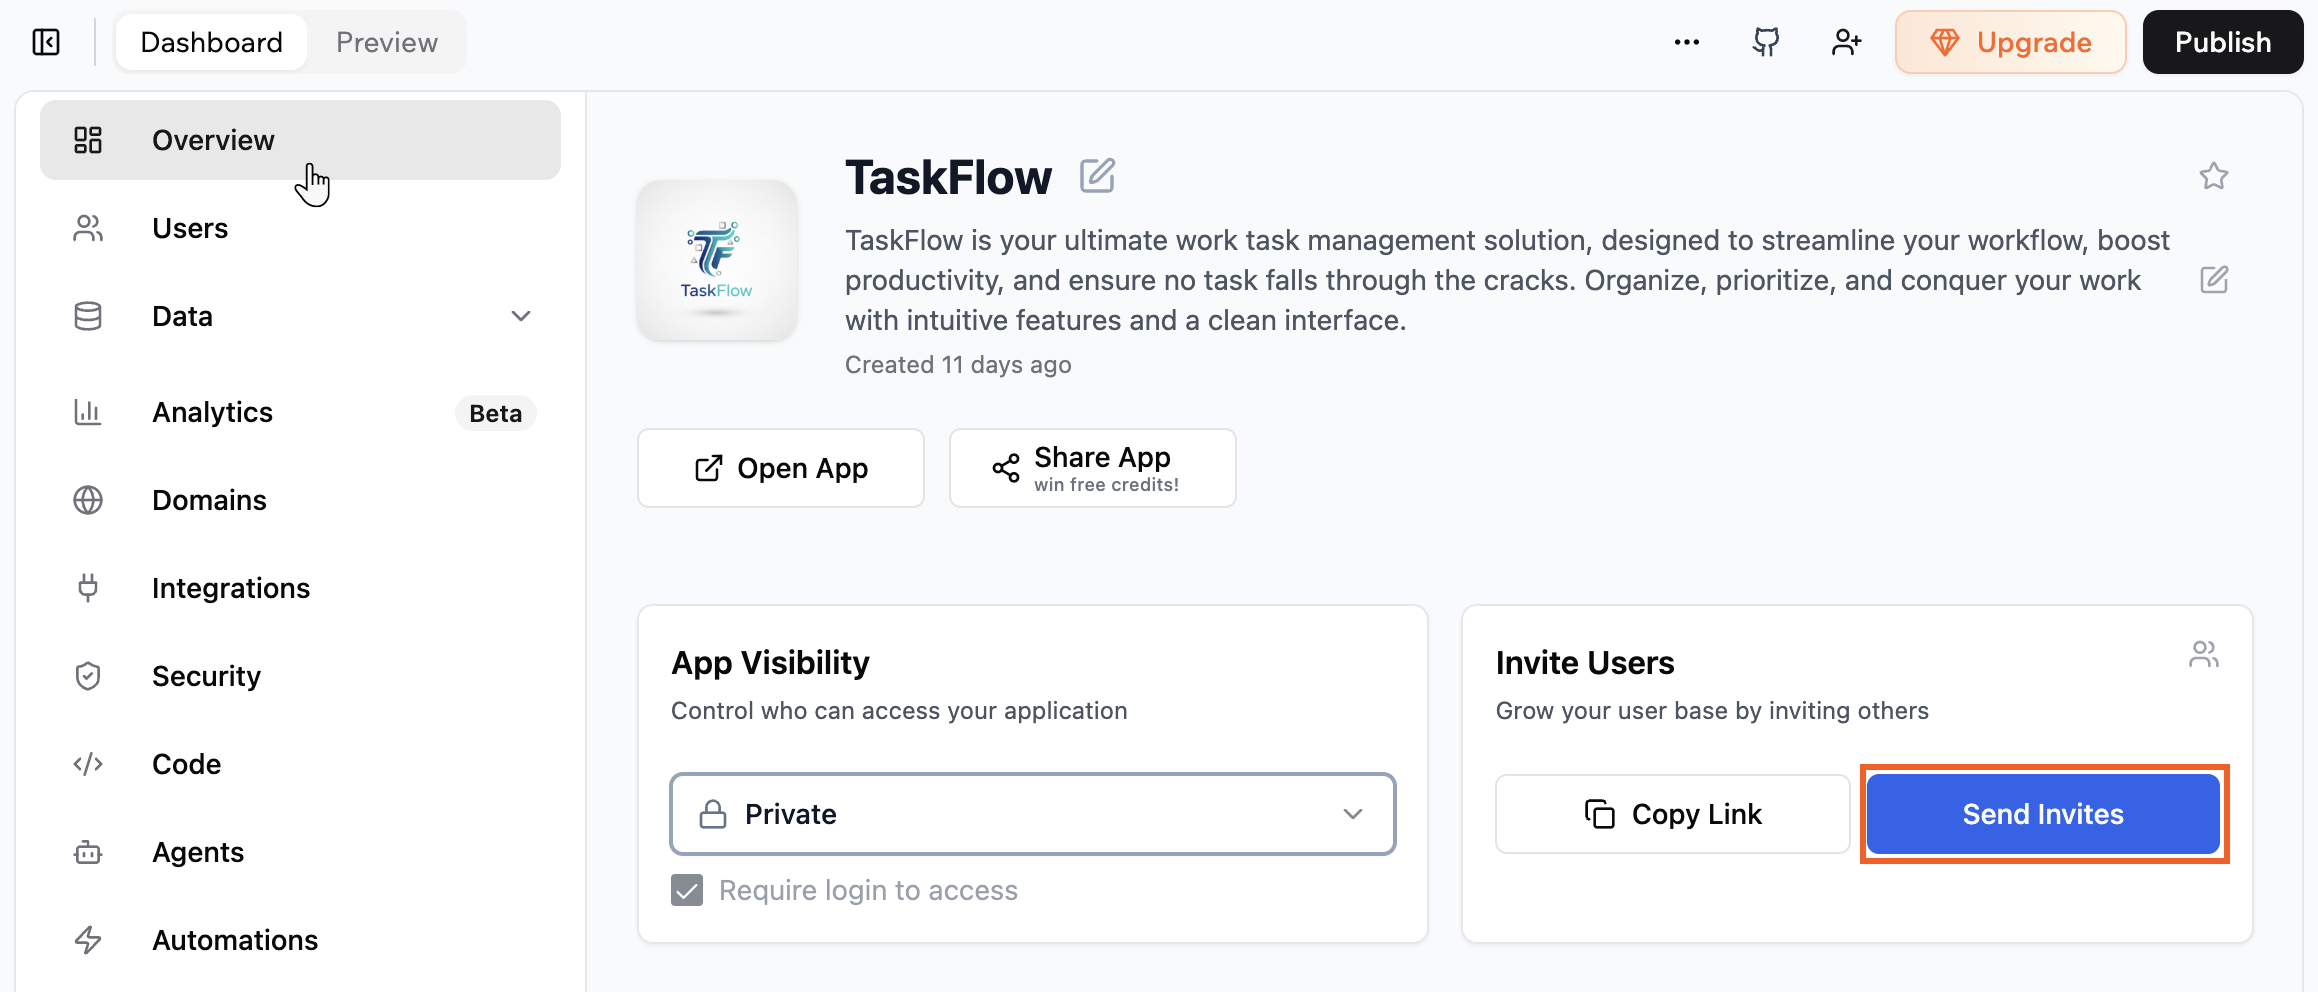
Inviting people to your app from your dashboard
From your app
You can also invite people directly from inside your app by asking the AI chat to set up in-app invites. Use the invite option it adds to enter each person’s email address and, if prompted, choose the role you want to give them. Example prompt:Add the option to invite users to the app from inside the app
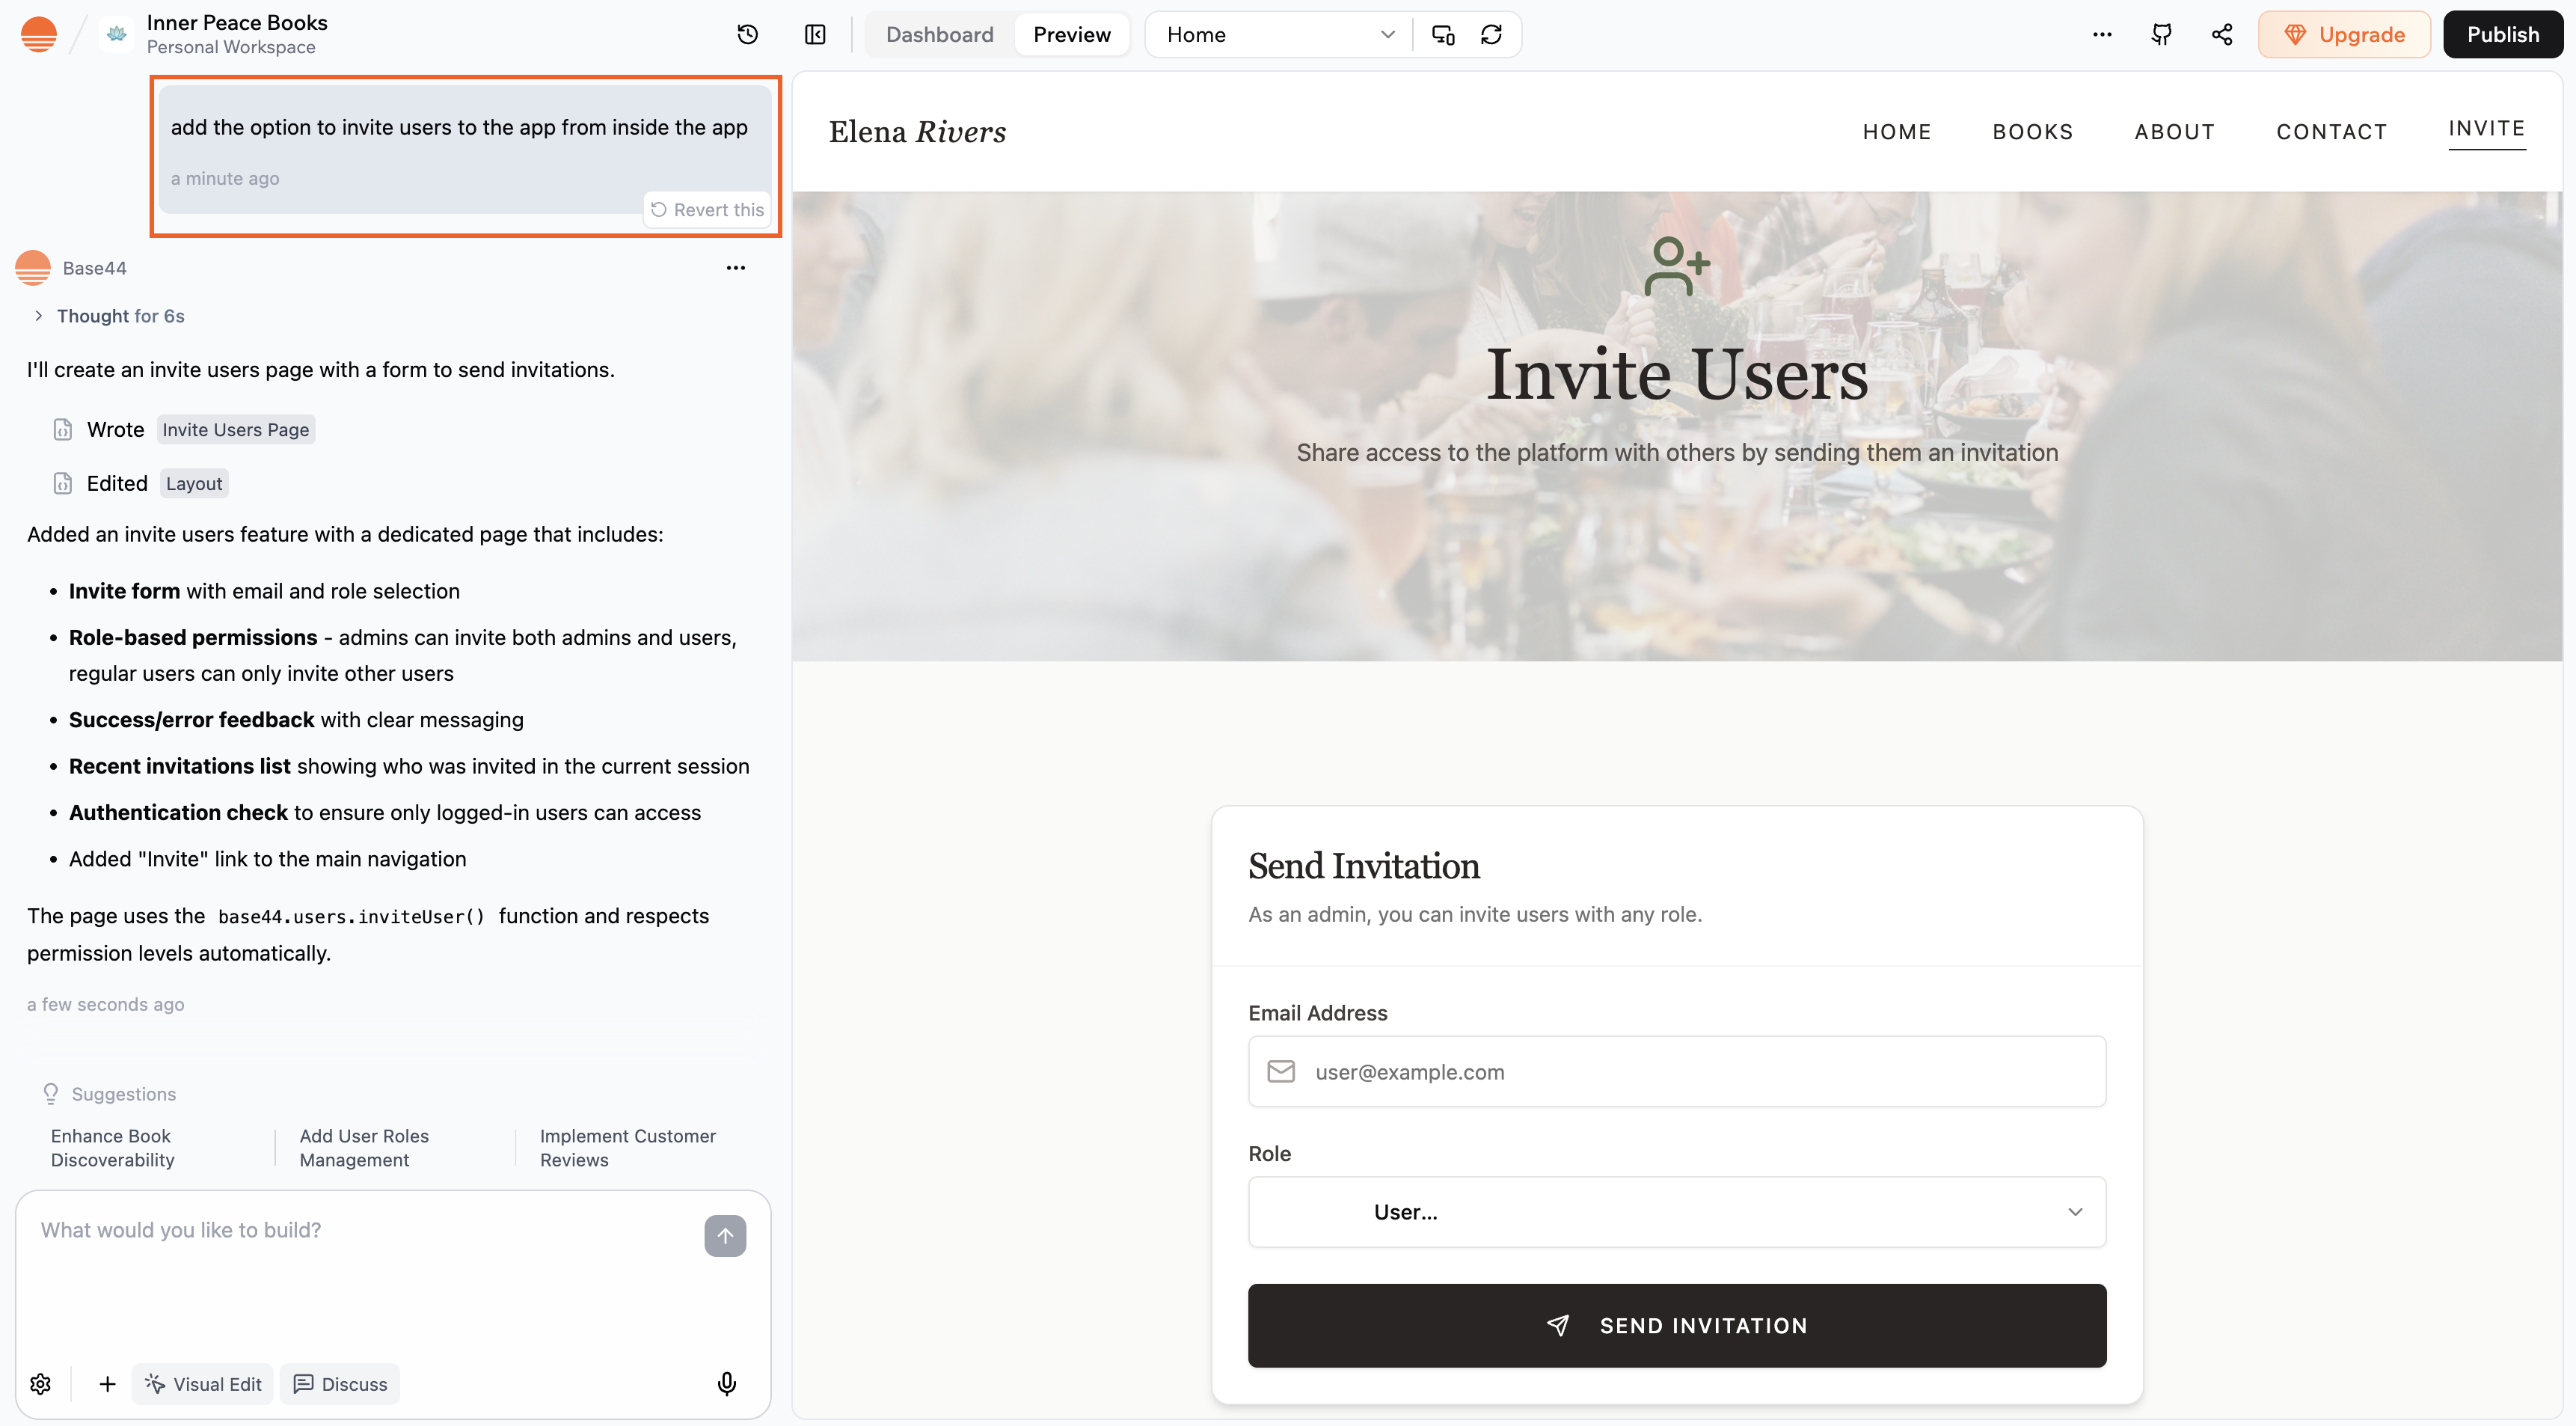
Asking the AI chat to add the ability to invite users from inside your app
Sharing your app link
Share a link to your app so people can access it directly. To share your app link:- Click Dashboard in your app editor.
- Click Overview.
- In the Invite Users section, click Copy Link.
- Share the link wherever you want people to access your app.

Sharing a link to your app
Choosing your users’ roles
Roles control what each person can do on your live app. By default, every app includes 2 roles:- Admin: Can manage areas that are restricted to admins on the live app.
- User: Can view and use the app with no special permissions.
- Click Dashboard in your app editor.
- Click Users.
- Select the user whose role you want to change.
- Click the Role drop-down and choose Admin or User.
- Click Submit.
Giving a group access to your app
Instead of adding people one at a time, you can give a whole workspace group access to your app at once. Everyone in the group gets access with the role you choose, and access stays in sync automatically as people join or leave the group.- Groups are created and managed in your workspace settings, not in your app, so you can only share groups that already exist there.
- On a private app, all members of the invited groups get access to your app and receive an email letting them know.
- On a workspace app, everyone already has access, so inviting a group only sets the role for its members.
Adding a group
Invite a workspace group from your app’s Groups tab and choose the role its members get. To give a group access to your app:- Click Dashboard in your app editor.
- Click Users.
- Click the Groups tab.
- Click Invite group.
- In the Search for a group box, find the group you want to add and select its checkbox.
- Click the Assign role to group drop-down and choose the role you want everyone in the group to have.
- Click Invite group.
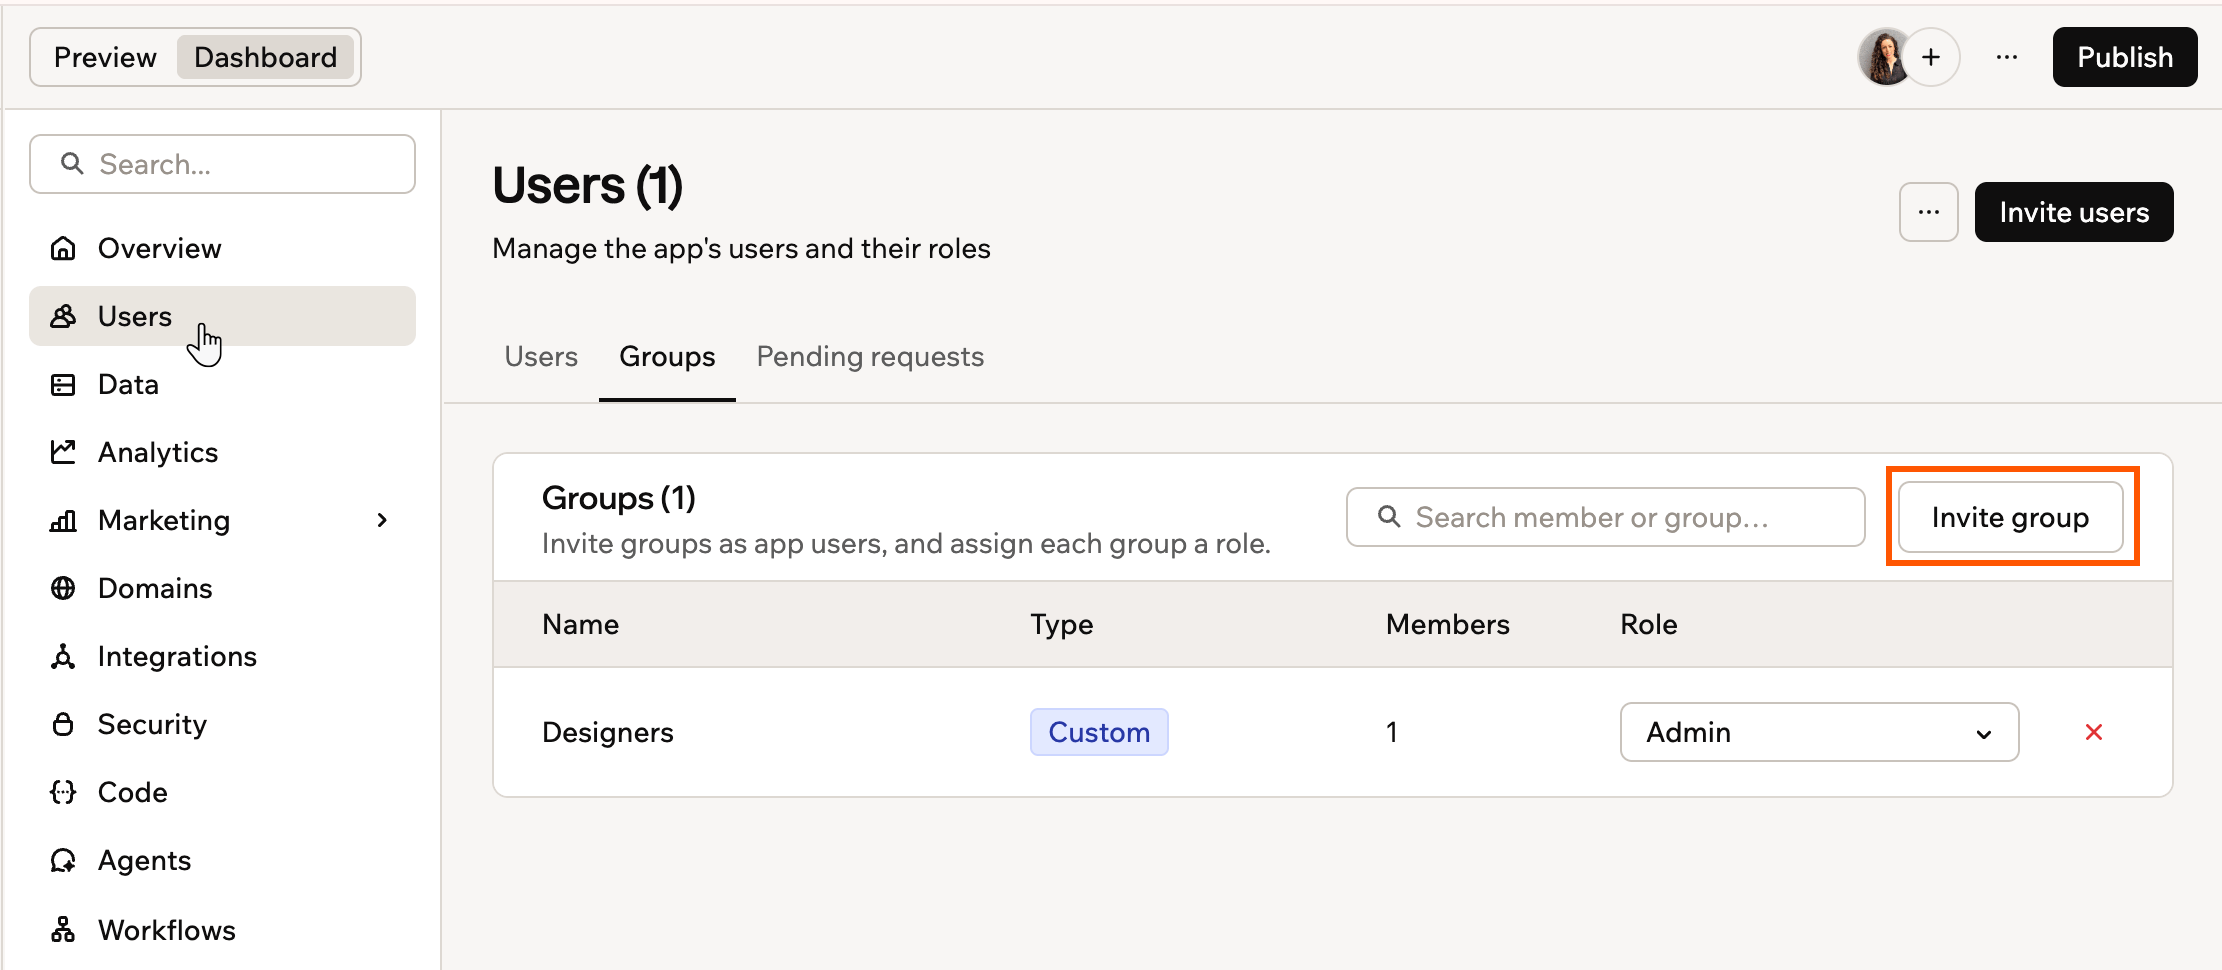
Inviting a group to your app
Managing group access
The Groups tab lists every group that has access, along with its type, member count, and role. From there, you can change a group’s role or remove its access at any time. To manage group access:- Click Dashboard in your app editor.
- Click Users.
- Click the Groups tab.
- Do one of the following:
Change a group's role
Change a group's role
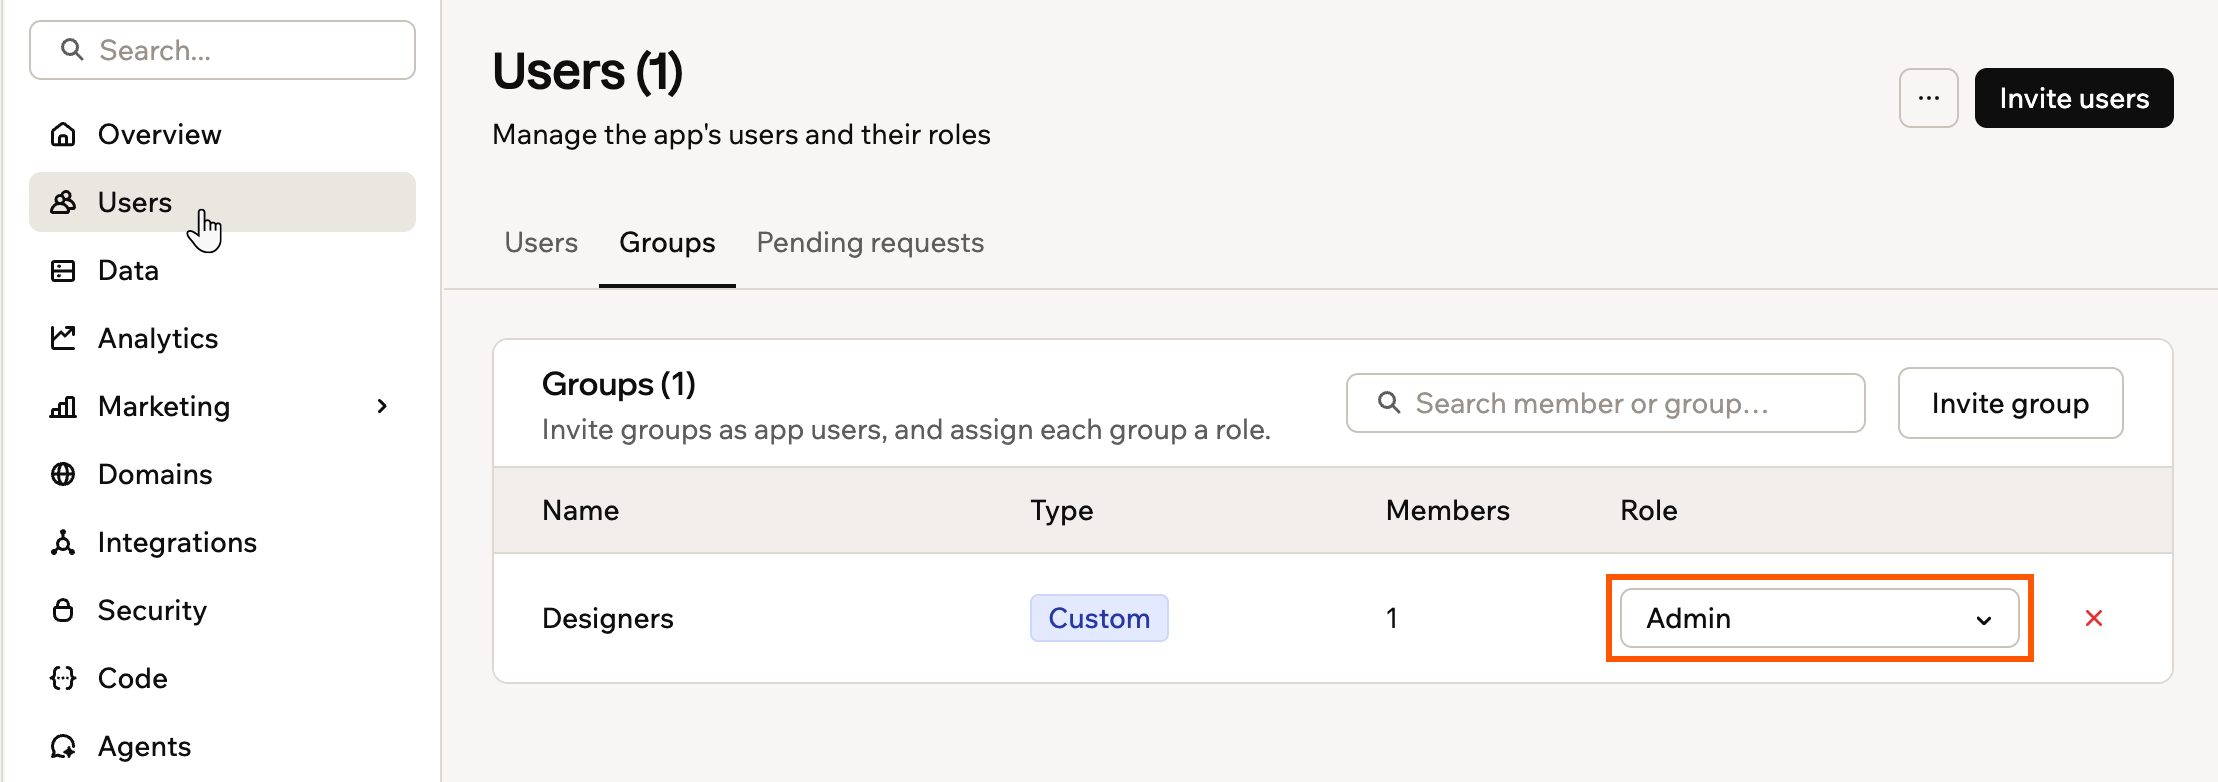
Changing a group's role in your app
Remove a group's access
Remove a group's access
- On the group’s row, click the remove icon.
- In the confirmation window, click Remove group.
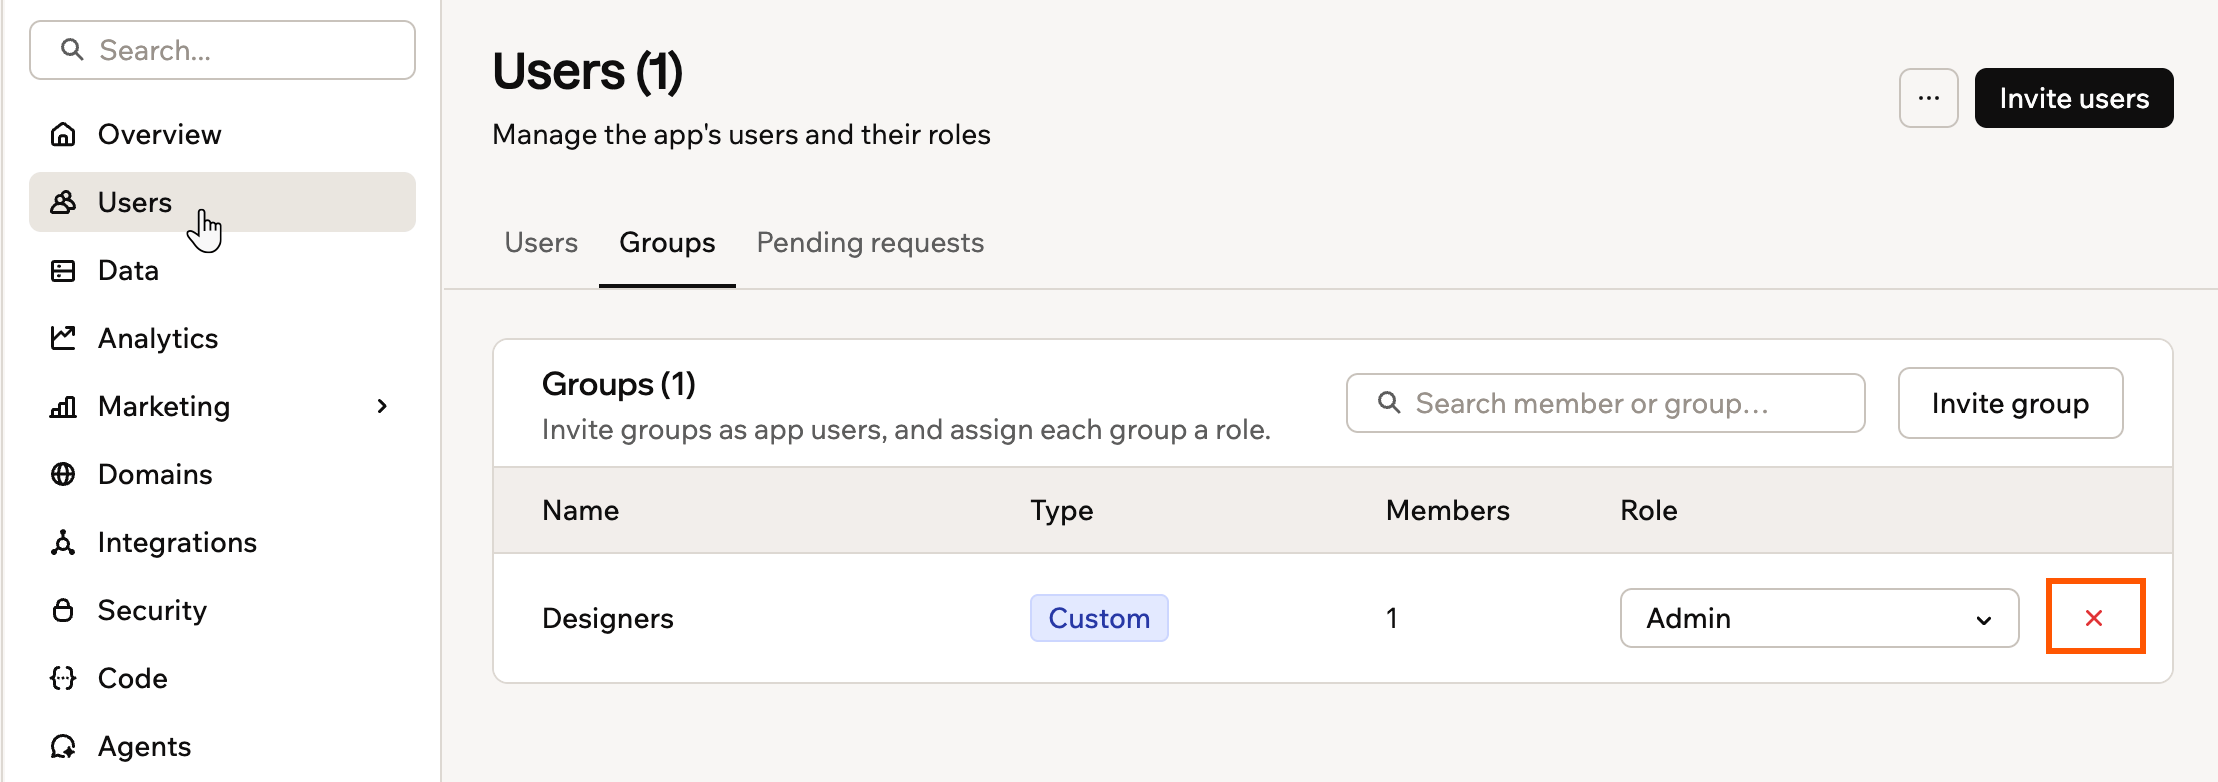
Removing a group from your app
Working with collaborators
Collaborators are people who help you build your app in your app editor. Add collaborators when you want someone to design, configure, or maintain the app with you.- Collaborators
- Can open the app editor and your app’s dashboard.
- Help you design pages, change logic, connect data, and configure settings.
- Are invited from the Invite collaborators icon in the app editor.
- Admins
- Sign in to the live app.
- Access admin-only areas on the live app, such as protected reports or management tools.
- Cannot open the app editor or your app’s dashboard unless they are also collaborators.
Inviting collaborators
Invite collaborators directly from your app editor.- Go to your app editor.
- Click the Add collaborator icon at the top.
- Enter the email addresses of the people you want to invite, separated by commas.
- Click the Send invite icon .
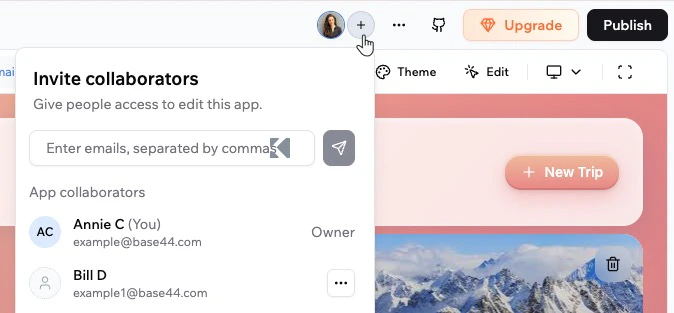
Inviting collaborators to your app in Base44
Managing collaborators
Remove a collaborator when they no longer need access to the app editor. To manage collaborators:- Go to your app editor.
- Click the Add collaborator icon at the top.
- Find the relevant collaborator and click the More Actions icon.
- Click Remove Collaborator.
- In the confirmation window, select an option:
- Remove collaborator access only: Immediately revoke their access to the app editor and prevent them from making changes, but keep them in the Users list with their existing role so they can still use the live app.
- Remove from app entirely: Revoke their collaborator access and remove them from the Users list so they can no longer sign in or use the app.

Restricting external collaborator invites
By default, any workspace member can invite people from outside the workspace as app collaborators. You can restrict this so that only workspace owners and admins can send these invitations. To configure who can invite external collaborators:- Click your workspace name at the bottom left of your account.
- Click Settings.
- Click Governance.
- Click the External Collaborators toggle:
- Enabled: Only workspace owners and admins can invite people from outside the workspace as app collaborators.
- Disabled: Any workspace member can invite people from outside the workspace as app collaborators.

External Collaborators setting in Base44
Testing your app as a user
View and interact with your app as any user or role to check permissions, troubleshoot issues, or test user flows.Why would you want to test your app as a user?
- Realistic testing: Test the app exactly as a specific user or role sees it
- Permission visibility: Quickly verify what each role or user can and cannot access
- Faster troubleshooting: Reproduce and debug reported issues in the person’s real context
- Flow validation: Run end to end checks, such as onboarding and key tasks, before releases
- Go to your app editor.
- Click the More Actions icon at the top right.
- Select Act as a user.
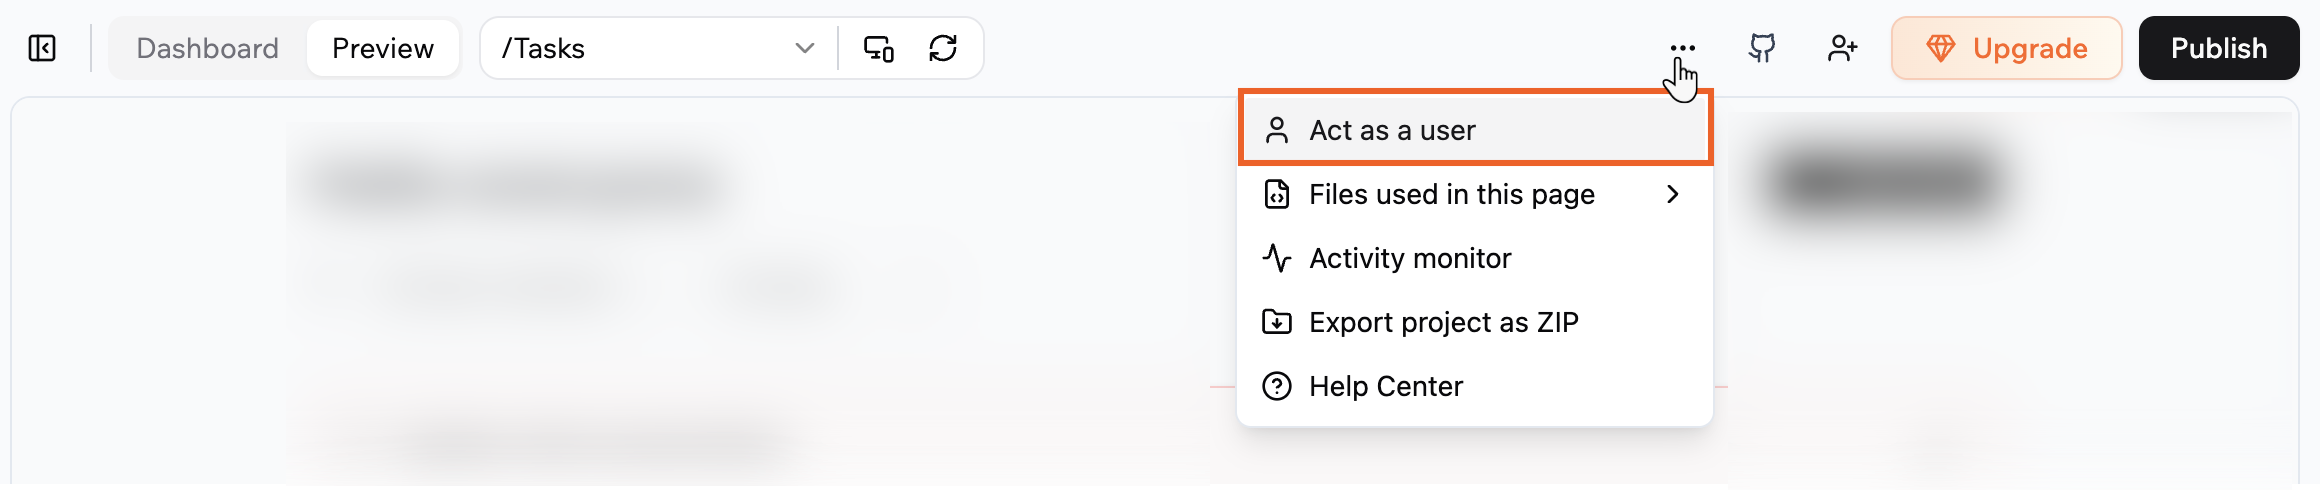
Selecting "Act as a user" in the Base44 app editor
- Click the drop-down next to You’re acting as and select the relevant user.
- Preview and interact with the app as that user.
- Click Exit mode when you’re done testing as another user.
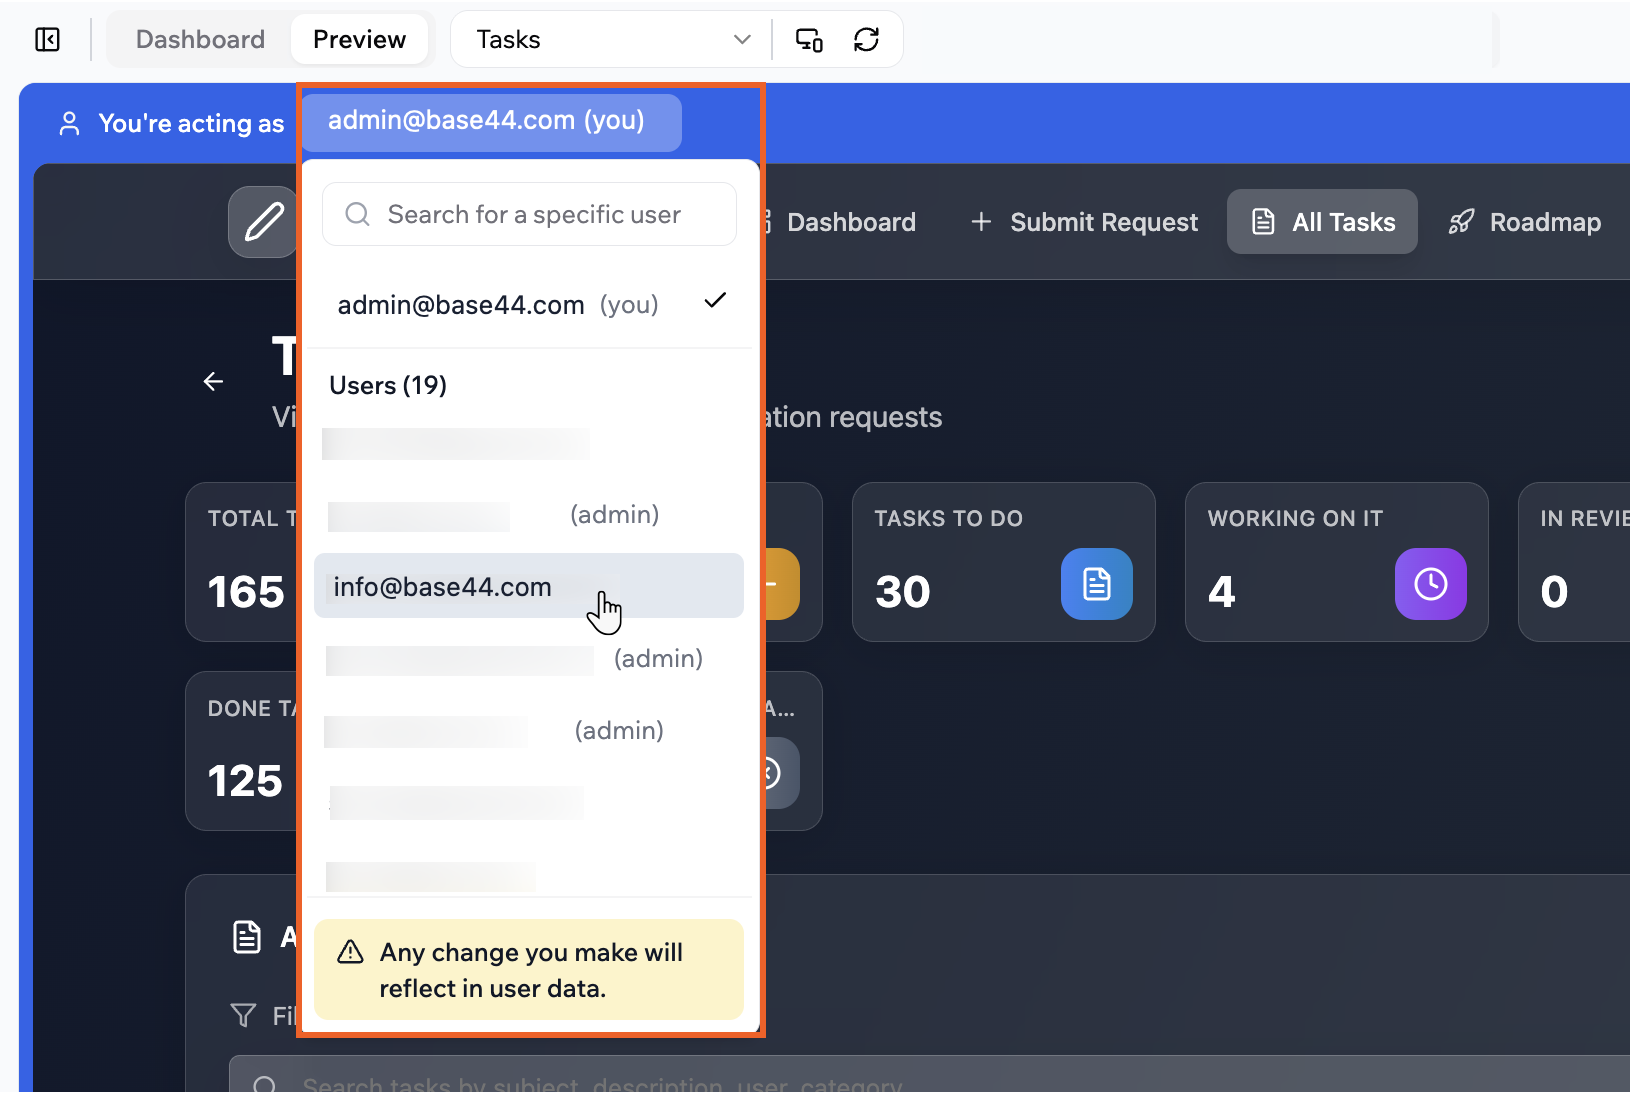
Testing your app as a user in Base44
FAQs
Click below to learn more about managing access to your app.Can people sign up to use my app on their own?
Can people sign up to use my app on their own?
Can I require login on only some pages of a public app?
Can I require login on only some pages of a public app?
How can I protect a public app?
How can I protect a public app?
What visibility options do apps created before custom login pages have?
What visibility options do apps created before custom login pages have?
How do I review access requests for my private app?
How do I review access requests for my private app?
- Click the notifications icon in your workspace.
- Click Review to open the request and decide whether to grant access.
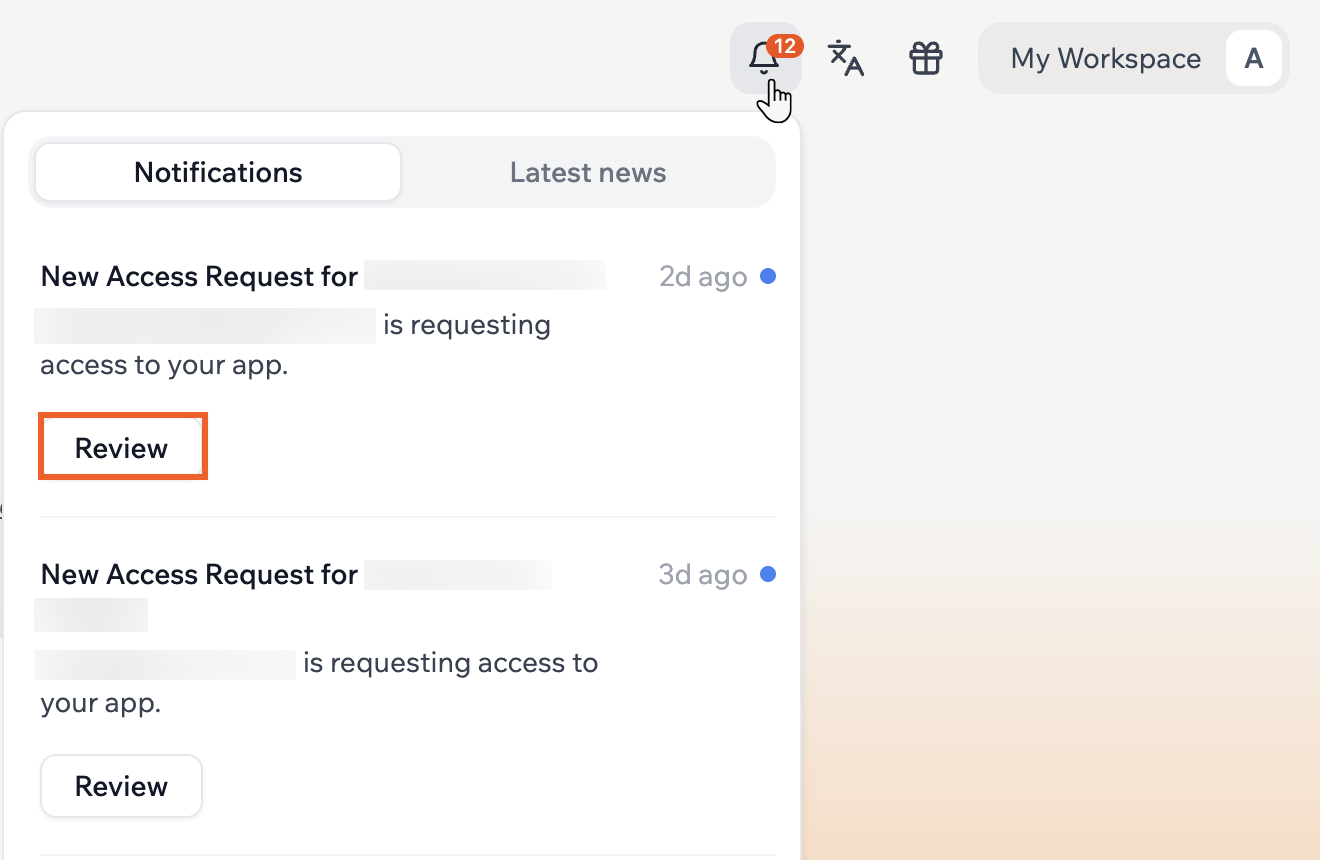
Reviewing an access request
What is the difference between an app user and a collaborator?
What is the difference between an app user and a collaborator?
Do I need to make someone an admin in Users so they can edit my app?
Do I need to make someone an admin in Users so they can edit my app?
How can I manage app security settings?
How can I manage app security settings?
Can I remove a user from my app?
Can I remove a user from my app?
Why does a feature I built for members only work for admins?
Why does a feature I built for members only work for admins?
Users list to protect sign-in data, so only collaborators and the app owner can read it. Any feature that reads from the Users entity, such as a member profile page or personalized content, works for admins but not for regular members. Reading it directly can also trigger an Authentication required to view users error.The fix is to store member data in a separate entity, such as UserProfile, and point your features at that instead of the built-in Users entity.To set this up, paste this prompt into the AI chat:Create a new entity called UserProfile. Move custom fields from the Users entity to UserProfile. Establish a 1:1 relationship between Users and UserProfile. Ensure a UserProfile is automatically created when a new user signs up. Update the app to fetch user details from UserProfile instead of Users. Set permissions so users can only edit their own profile, but anyone can read it.After the AI makes the changes, go to your app’s Dashboard, click Security, and review the RLS rules on your new UserProfile entity to make sure they match your intended access levels.How can I create fake users to safely test user flows?
How can I create fake users to safely test user flows?
- Go to your app’s Dashboard.
- Click Users.
- Click Invite User to send an invitation, or register a new account using your app’s public signup page.
- Assign the desired role or permissions to the test profile.