Connect a domain you own to your app. Let Base44 set up your DNS or add the records manually, connect a subdomain, and claim a domain another workspace used.
Use a domain you already own with your Base44 app. Base44 shows you what your DNS needs to point to, and you can either set up your DNS with Base44 or add the records manually at your domain provider.Your domain stays registered with your provider or DNS host, such as GoDaddy, Namecheap, or Cloudflare. Base44 hosts your app, and once your records are correct and your domain is active with your registrar, Base44 issues and renews your SSL certificate automatically.
Before you connect an external domain, keep the following in mind:
Custom domains are available on the Starter plan and above. Connecting a domain you already own has no extra Base44 charge, and you keep paying your domain provider for the domain itself.
Add your records where your domain’s DNS is managed. If your domain’s nameservers point to another DNS host, such as Cloudflare, add the records there, not at the company you bought the domain from.
If you add your DNS records manually, make sure they match exactly what is shown in your Base44 dashboard.
Remove any AAAA (IPv6) records for hostnames used with Base44, as they can block connections.
Remove or update any CAA records that could block certificate authorities used by Base44.
If your DNS host offers proxying, set the Base44 records to DNS only.
The SSL certificate is issued automatically once your domain is verified and DNS is resolving correctly.
If you are reusing an old domain from an app deleted before June 5, 2025, contact Customer Care so we can clear it from our system.
Domains ending in uk.com, gb.com, eu.com, us.com, uk.net, gb.net, and similar: When you connect a root domain with one of these endings (for example, mybusiness.uk.com), the www version is not set up automatically, and visiting www.yourdomain returns an SSL error. This is a permanent limitation of these domain types, not a temporary issue. Your root domain works normally. Use and share your app’s address without www. Ordinary domains such as example.com, example.co.uk, or example.com.au are not affected. If you run into an SSL error on the www version of your domain, contact Customer Care.
You add your domain on your app’s Domains page, then point it to Base44 in one of 2 ways. Base44 can set up your DNS for you after you sign in to your domain provider, which is the option that opens by default, or you can add the records yourself at your provider.Enter your root domain, such as mycoolapp.com. Base44 connects the www version with it, so there’s no need to add www.mycoolapp.com separately. To connect a subdomain such as app.mycoolapp.com, see Connecting a subdomain.To connect your domain:
Click Dashboard in your app editor.
Click Domains.
Click Connect existing domain.
Enter your domain, for example mycoolapp.com, then click Add.
Do one of the following:
Let Base44 set up your DNS
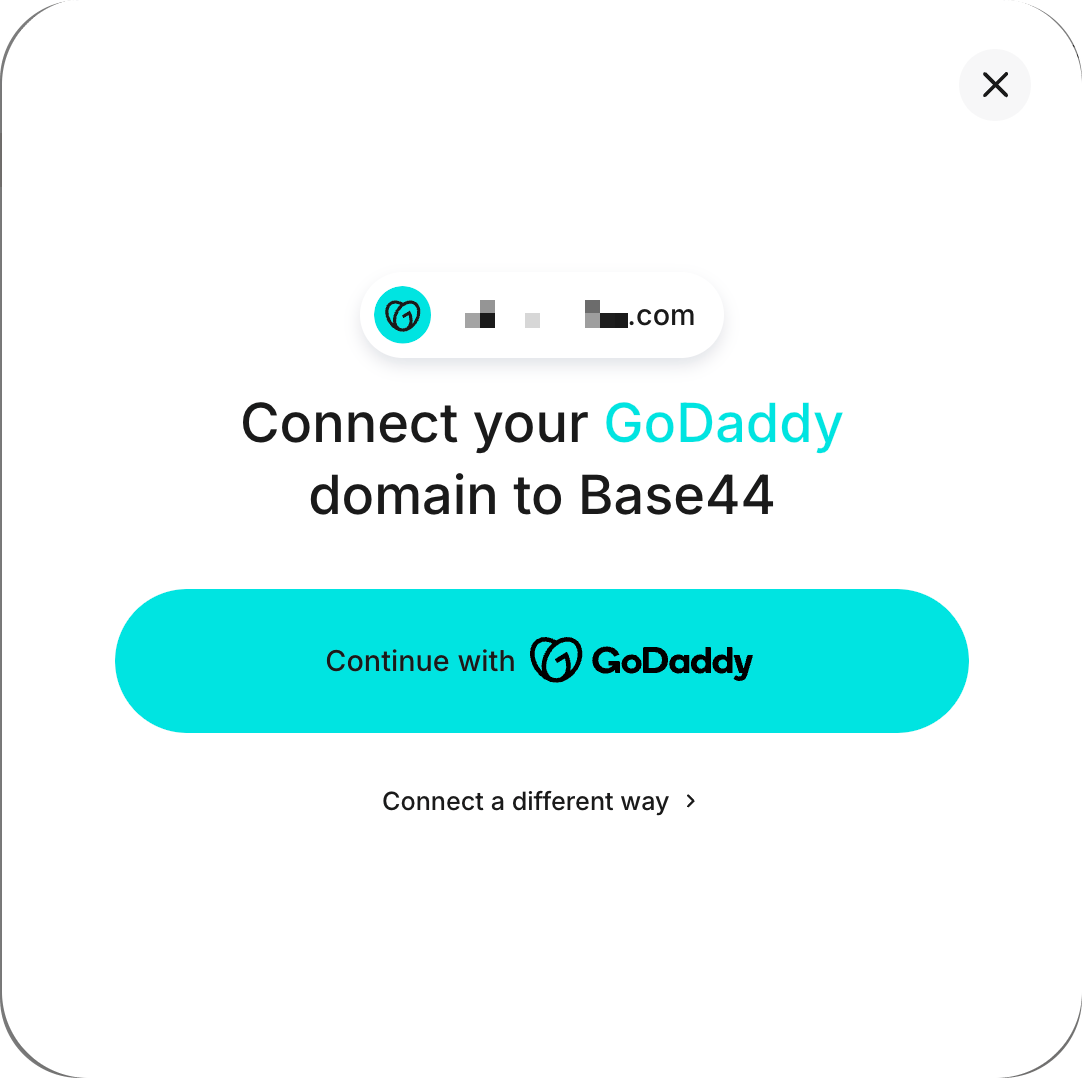
After you click Add, a setup window opens and shows the domain provider Base44 detected for your domain. You sign in there and approve the changes yourself, and Base44 adds an A record for your root domain and a CNAME record for www. Base44 then verifies your domain automatically, and your app is usually live and secured at your domain within 30 minutes. If you’re the workspace owner, you may also see an offer to add a business email on your new domain.If your provider isn’t the one shown, or someone else manages your DNS, click Connect a different way in the setup window:
Set up manually: Shows you the records to add at your provider.
Send login link to admin: Emails a setup link to whoever manages your DNS.
Change provider: Lets you pick your provider yourself.
Replacing existing records: If the names you are connecting already point somewhere else, Base44 replaces those records so your domain reaches your app, and any site currently served at those names may stop resolving. The setup window lists every record it changes before you approve. Base44 only replaces the records for the names you connect, and doesn’t change your MX or TXT records.
To let Base44 set up your DNS:
Click Continue with [your provider] in the setup window, for example Continue with GoDaddy.
Sign in to your domain provider.
Review the DNS changes, then approve them.
Signing in to your domain provider
Add your DNS records manually
Add the records yourself when you prefer to make the change at your provider, or when your provider isn’t offered in the setup window. Your DNS instructions show the records on 2 tabs. Use ANAME/ALIAS if your provider offers that record type for your root domain. If it doesn’t, use A record.
Type
Host
Value
ANAME or ALIAS
@
base44.onrender.com
A, if your provider has no ANAME or ALIAS
@
216.24.57.1
CNAME
www
base44.onrender.com
Add one record for your root domain and the CNAME record for www. In the host or name field, enter only @ or www, not your full domain, because most providers add your domain automatically. If you see a TTL field, leave it at the default.To add your DNS records manually:
Close the setup window if it opened.
Click the More actions icon next to your domain, then click DNS instructions.
Choose the ANAME/ALIAS or A record tab.
Add the records shown at your domain provider, and remove any other A or AAAA records for your root domain, such as parking or default records.
Click Verify domain in the DNS instructions window.
DNS changes can take up to 48 hours to spread. If your domain still doesn’t verify after that, run a WHOIS lookup on your domain to check that it’s active and not on a status such as clientHold or serverHold. If it’s on hold, contact your registrar to resolve it.
If you close the setup window before you finish, your domain stays pending verification and both options stay available. Hover the badge and click Set up DNS for me to start again, or open DNS instructions from the menu next to your domain.
You can connect a subdomain you already own, such as app.yourdomain.com, to give your Base44 app its own address while your main domain keeps serving whatever is already there. Enter the full subdomain in Connect existing domain, then let Base44 set up your DNS or add the record yourself, the same way as for a root domain.
Subdomain limits:
Wildcard subdomains aren’t supported. Connect each subdomain you want to use, such as app.yourdomain.com.
SSL certificates are issued for the exact subdomains you connect.
Base44 sets up only the subdomain you entered. For the www version, such as www.app.yourdomain.com, Customer Care needs to add it to your app’s custom domains, and the CNAME record on its own isn’t enough. Contact Customer Care with your subdomain.
A subdomain needs only a CNAME record. Your DNS instructions also list an optional record for the www version.
Type
Name
Value
CNAME
app
base44.onrender.com
CNAME, optional
www.app
base44.onrender.com
To add the subdomain record manually:
Click Dashboard in your app editor.
Click Domains.
Click the More actions icon next to your subdomain, then click DNS instructions.
Add a CNAME record at your domain provider, with the name set to just the prefix, for example app for app.yourdomain.com, and the value base44.onrender.com.
Remove any A, AAAA, or other records at the same name.
Click Verify domain in the DNS instructions window.
If your domain was connected to an app in a different workspace, Base44 keeps it reserved for that workspace even after that app is deleted. You can take it over yourself by proving you control the domain, so there’s no need to contact Customer Care. Moving a domain between apps in your own workspace is different, and connects straight away.When you click Add, the dialog tells you the domain is registered to another workspace and shows you a TXT record to publish. Adding that record proves the domain is yours today, which the DNS records pointing at Base44 can’t do on their own.
Finishing your claim:
The record is issued to your workspace and to the domain you entered, so finish the claim from the same workspace. Changing the domain in the dialog clears the record, and you get a new one when you try again.
If the domain is still connected to a live app, you see an error saying the domain already exists instead of the record. Whoever owns that app needs to remove the domain from it first.
To claim a domain another workspace used:
Click Dashboard in your app editor.
Click Domains.
Click Connect existing domain.
Enter your domain, then click Add. If the domain is reserved, the dialog shows the record you need to add.
Copy the Type, Name, and Value of the record, using Copy to clipboard on each row. The name looks like _b44-verify.yourdomain.com, and the value starts with base44-domain-claim=.
Add that TXT record at your domain provider, and allow time for it to propagate.
Back in Base44, click Add again, then set up your DNS as described in Connecting your domain.
After your domain is verified, your app loads at your custom domain and still loads at its built-in base44.app address. Find what you want to do with your app’s addresses below.
Redirect your base44.app address
There’s no setting to redirect your built-in base44.app address to your custom domain, and that address keeps working while your domain is connected. Base44 points search engines to your custom domain as your app’s main address, so share your custom domain wherever you link to your app.
Pick a primary domain
There’s no setting to mark one domain as primary. When your app has several domains, Base44 chooses one for search engines and for the links in app invitations, and prefers a root domain such as mycoolapp.com over its subdomains.To make one domain your app’s only address, redirect your other domains to it. See redirecting a whole domain.
Serve uploaded files from your domain
This isn’t possible. Links to files uploaded to your app, such as images and documents, use a base44.app address, and they don’t change when you connect a domain. Your app’s pages still load on your custom domain, and the file links keep working there.
Most problems with an external domain come from DNS records that are missing, mistyped, or left over from an earlier site. Your domain shows Pending verification on the Domains page until Base44 confirms your records, then Verified, and the line under it shows when it was last checked.Find the case that matches what you see. Each fix happens at your domain provider, then back on your Domains page.
My domain still isn't verified
Your status only changes when it’s checked again, so a domain with correct records can still show Pending verification for a while. Open your domain in a browser first, and if your app loads, your domain is connected.If you added your records manually, compare them with the values in your DNS instructions, then ask Base44 to check them again. A Verification initiated message means the check started and your status updates within a few minutes. An error means your records don’t point to Base44 yet, so fix them at your domain provider and try again. To let Base44 add the records for you instead, hover the badge and click Set up DNS for me.To check your domain again:
Click Dashboard in your app editor.
Click Domains.
Click the refresh icon next to your domain to check its status again.
Click the More actions icon next to your domain, then click Verify.
Each name you connect, such as your root domain (@) and www, needs only the Base44 record from your DNS instructions. Records left at your domain provider from an earlier site or a default setup can send visitors somewhere else, or stop your domain from verifying.At your domain provider, check every record for the names you connect:
Remove any other A records for your root domain, including parking or default records your provider added.
Remove any AAAA (IPv6) records. Base44 uses IPv4, and these records can block connections.
Remove or replace an old CNAME record for www that points to another host.
Turn off domain forwarding, URL redirects, or parking for the domain. These can add a hidden A record that public DNS tools show but your DNS settings don’t.
Leave your MX and TXT records as they are. They’re used by your email and other services, not by your app’s address.
My www or root domain doesn't load
When you connect a root domain such as mycoolapp.com, Base44 sets up www as well and sends www visitors to your root domain. If you enter www.mycoolapp.com, Base44 connects mycoolapp.com instead.Each version needs its own record at your domain provider:
If your root domain doesn’t load, check the @ record. It’s an ANAME or ALIAS to base44.onrender.com, or an A record to 216.24.57.1 if your provider doesn’t support ANAME or ALIAS.
If the www version doesn’t load, add or fix the CNAME record for www, pointing to base44.onrender.com.
For a subdomain, the www version needs extra setup from Customer Care. See Connecting a subdomain. Some domain endings, such as uk.com, can’t use www at all. See Important information.
My domain still shows my old site
If your domain still shows an earlier website or a parking page, your DNS still points somewhere else for some visitors.To stop your domain showing your old site:
At your domain provider, confirm you edited the records at the service your domain’s nameservers point to. If your nameservers point to a different DNS host, records you add at your registrar have no effect.
Allow time for DNS propagation. Some locations and devices show the old site until their cached records expire.
I see SSL or security warnings
A security warning or an error such as ERR_SSL_PROTOCOL_ERROR usually means something is still stopping your certificate. Base44 issues your SSL certificate automatically once your domain is verified and your records resolve correctly, with no separate certificate step.At your domain provider, check that:
There are no AAAA records for the names you connect.
No CAA records block the certificate authorities Base44 uses. Remove or update them.
The Base44 records are set to DNS only, not proxied, if your DNS host offers proxying, such as Cloudflare’s grey cloud. Keep them that way, because proxying also makes newly added pages return 404 on your custom domain.
My domain is connected to another hosting account
If you see a message saying your domain is connected to another hosting account, the domain is still set up on a different hosting service. Remove the domain from that service’s settings, or ask whoever owns that account to remove it, then add or verify it in Base44 again.This is different from a domain another Base44 workspace used, which you can take over yourself. See Claiming a domain another workspace used.
My registry only lets me change nameservers
Some country registries, such as NIC.ar for .ar domains, only let you set nameservers and don’t let you add DNS records. In that case, use a DNS provider such as Cloudflare to hold your records.To connect a domain through another DNS provider:
Create an account with a DNS provider, such as Cloudflare, and add your domain to it.
Copy the nameservers the DNS provider gives you.
In your registry, set those nameservers for your domain, then wait for the change to spread.
DNSSEC signs your domain’s DNS records, and your registrar holds a DS record that has to match your DNS host. If they don’t match, for example after you move your nameservers to another DNS host, lookups for your domain fail, so your domain doesn’t load and Base44 can’t verify it.To fix a DNSSEC mismatch:
At your DNS host, check whether DNSSEC is on, and copy the DS record it gives you.
At your registrar, replace the DS record with that one, or turn DNSSEC off.
Allow time for the change to spread across the internet, then check your domain again from your Domains page.
If your domain still doesn’t connect after full DNS propagation, contact Customer Care with your domain name, a link to your app, and a screenshot of your DNS records.
Click a question below to learn more about connecting an external domain.
Should I set up my DNS with Base44, or add the records manually?
Setting up your DNS with Base44 is the quickest option, and it is the one that opens by default once you add your domain. Base44 detects your domain provider and displays it in the setup window. You sign in to your provider and approve the changes, then Base44 adds the records and verifies the domain, so there are no values to copy.Add the records manually when you prefer to make the change at your provider, when your DNS is managed by someone else on your team, or when your provider is not shown in the setup window. The record values are always available from the More actions icon next to your domain.If someone else on your team manages your DNS, you can also click Connect a different way in the setup window, then click Send login link to admin to email them a setup link.
What is DNS propagation and how do I check it?
When you update your DNS settings, the changes need to spread to servers around the world. This process is called DNS propagation. It can take up to 48 hours, although it is often much faster.You can check the progress by visiting whatsmydns.net, entering your domain, and selecting the record type (A, CNAME, etc.) to see which locations have updated.
Can I reuse a domain from a deleted app?
Yes. If the domain was used in an app deleted before June 5, 2025, contact Customer Care to clear it from our records before you add it again.
Is there a way to set up domain redirects in Base44?
Yes. You can send one page to another, or send a whole domain to another domain on the same app, from your app’s Domains page. See Setting up 301 redirects.
Can I disable the redirect from www.domain.com to domain.com?
No. There is no setting in Base44 to stop or reverse the www → root redirect.You may want www to be your primary domain for SEO or personal preference. From Google’s perspective, both www and the root domain are treated the same as long as your canonical setup is consistent.As a workaround, make sure you have a CNAME record for www pointing to base44.onrender.com in your DNS settings. This ensures www.domain.com loads your app. If you need finer control over redirect behavior, set this up with your DNS or hosting provider outside of Base44.If you want more control over this feature in the future, you can submit a feature request to the Base44 product team.
Was this page helpful?
Assistant
Responses are generated using AI and may contain mistakes.