


A finished deck in the editor, with every slide in the rail
Creating your presentation
Describe the deck you want in the same place you would describe any app. Say how many slides you want and what each one should cover, and Base44 writes the content, designs the slides, and generates speaker notes for you.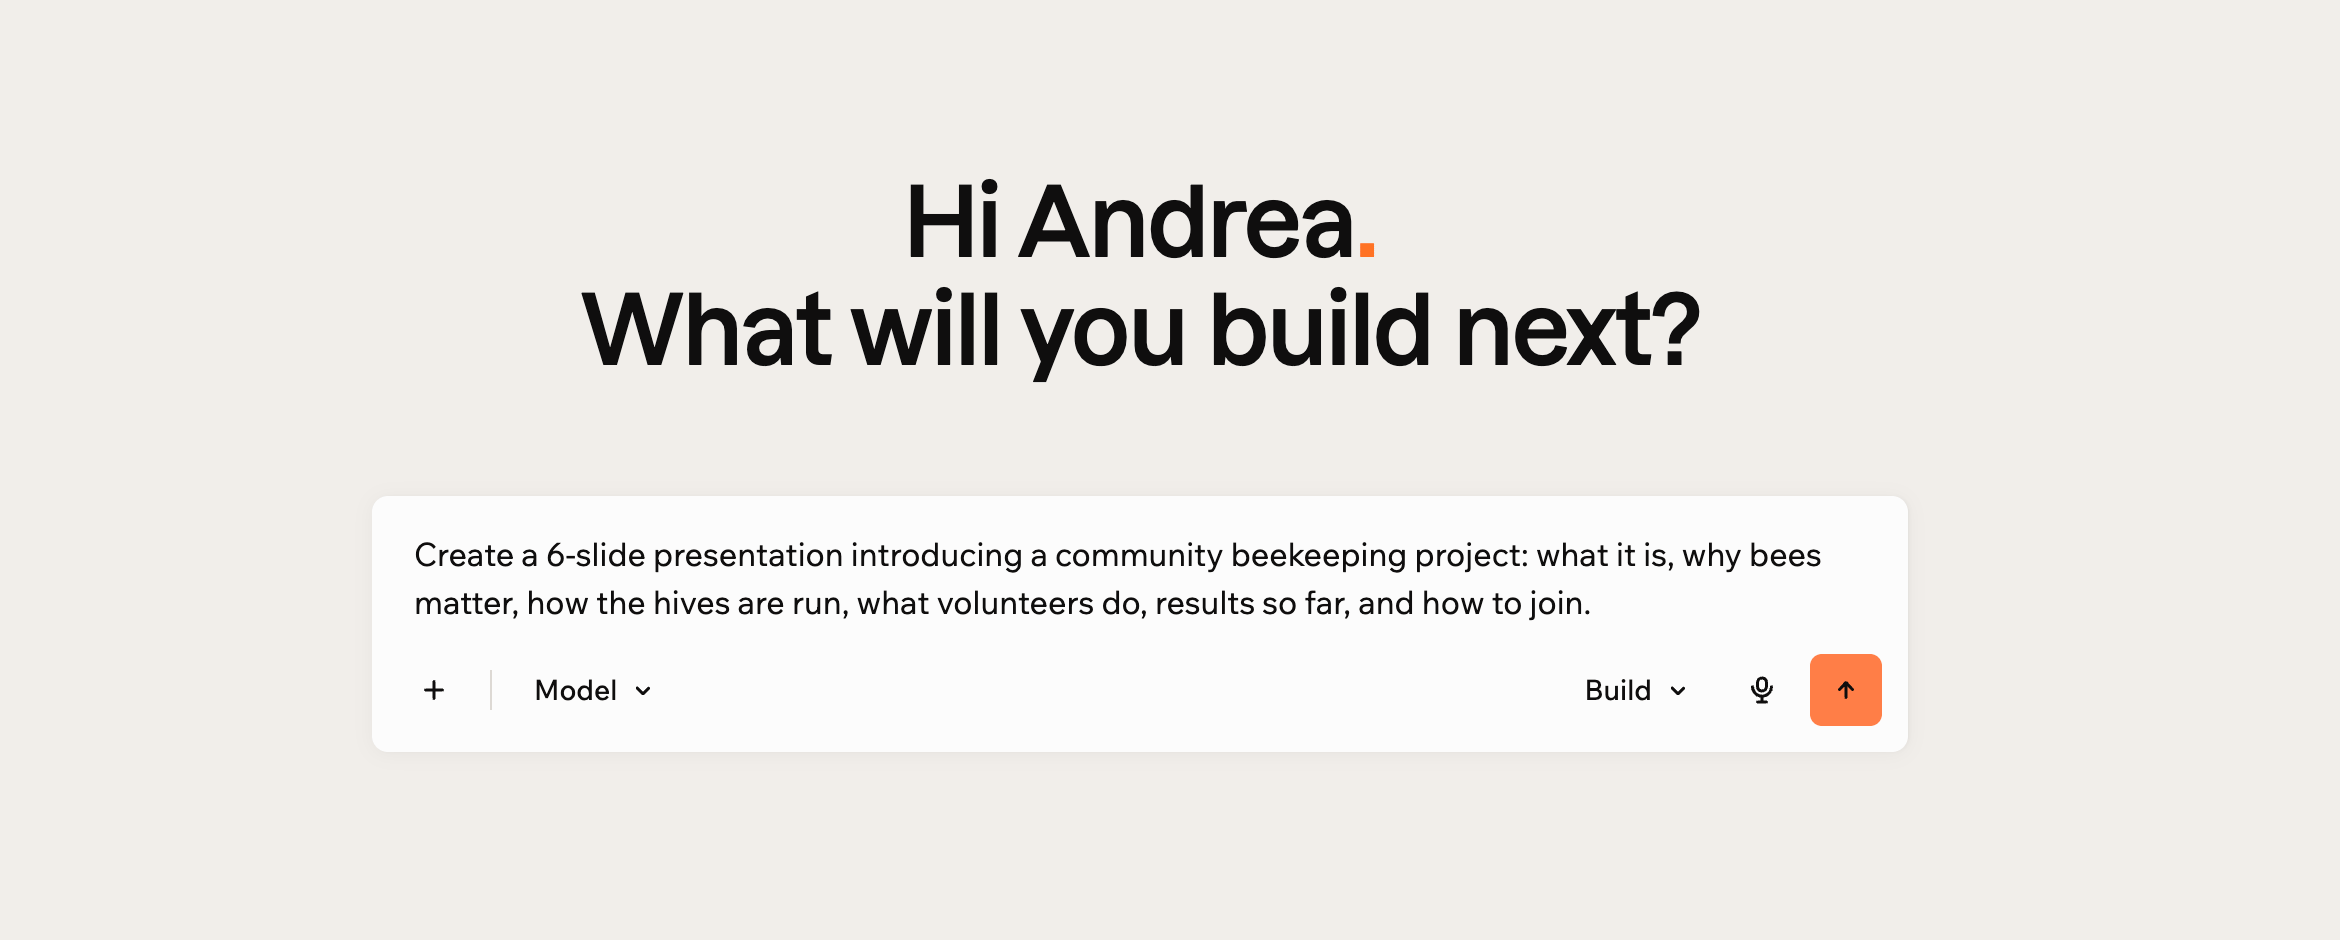
Describing the presentation you want
- Go to the Base44 home page.
- In the prompt box, describe the presentation you want, including roughly how many slides and what each should cover.
- Click the send icon.
- Wait while Base44 builds your deck. It writes the copy, designs each slide, and picks images to match, which usually takes a few minutes.
Working on your slides
Your presentation opens in the app editor, with a rail of slide thumbnails down the side and a Speaker Notes panel underneath. Select a thumbnail to jump to that slide, drag a thumbnail up or down to reorder your slides, and drag the edge of the rail to make the thumbnails larger or smaller. To change anything, ask in the AI chat as you would with any app. Rewriting a slide, changing the colors, adding a chart, or translating the whole presentation are all chat requests. For a quick wording change you do not need the chat at all. Click Select at the top of your app editor, click the text on the slide, click Design, then click the T icon and type your new wording in the Text content field. Base44 builds each slide so its text stays editable this way.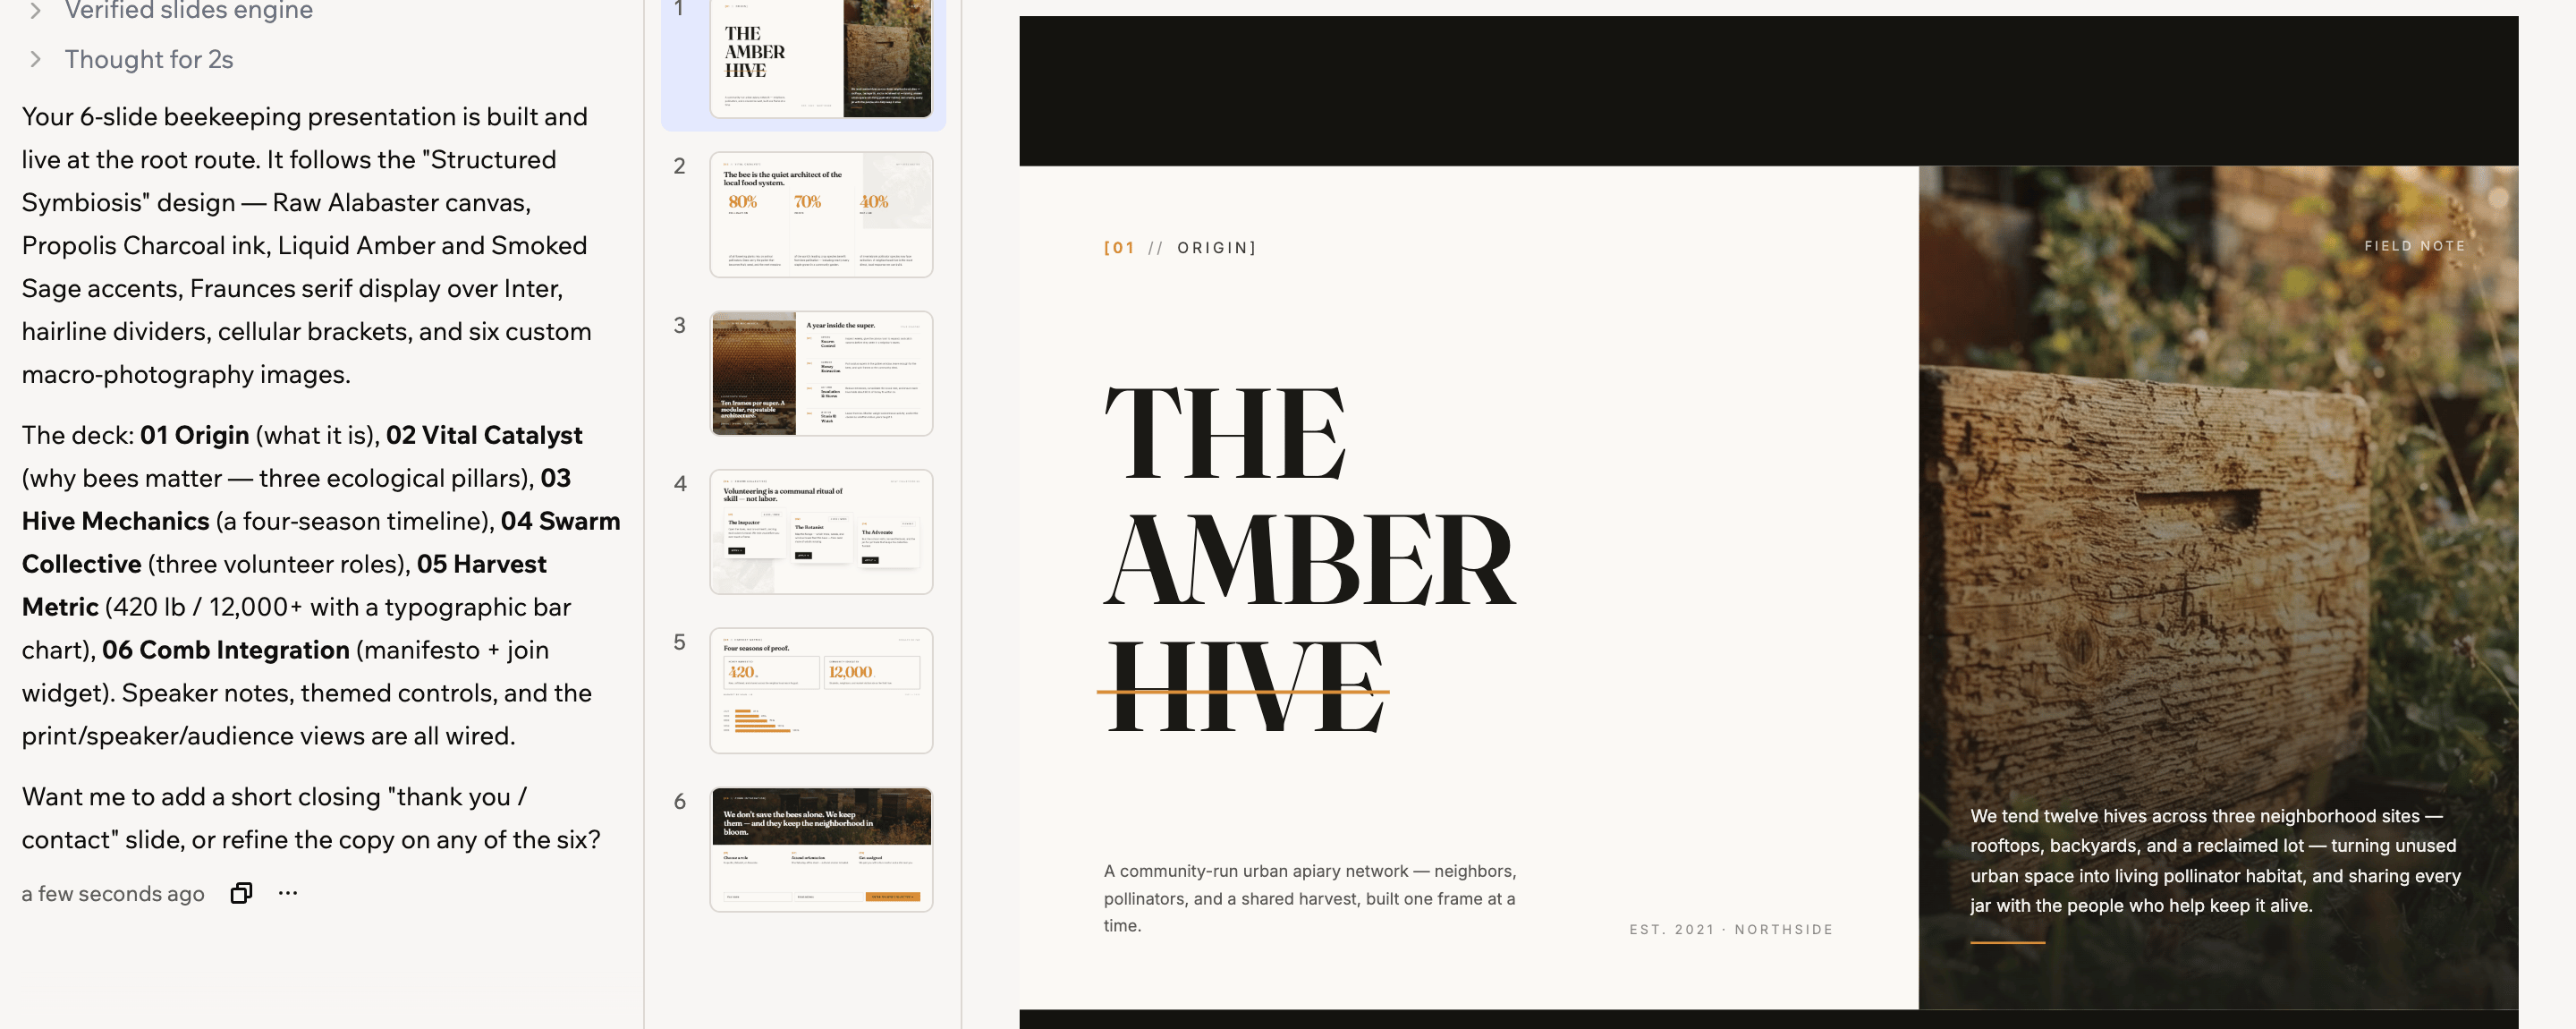
The slides editor, with the thumbnail rail and speaker notes
Animating your slides
Animations bring the text, images, and shapes on a slide in one after another, so your audience sees each point appear instead of the whole slide at once. You choose when each one plays. It can play on its own as the slide opens, or wait for your click, so you bring in each point as you talk about it. This works both when you present your deck and when someone opens your published presentation. You can ask the AI chat to animate your slides, or set up and change animations yourself in the Animations panel.Adding an animation
Add an animation to any text, image, or shape on a slide, then choose how and when it comes in. To animate a slide:- Go to your app editor.
- Select the slide you want to animate in the slide rail.
-
Click Animate at the top.
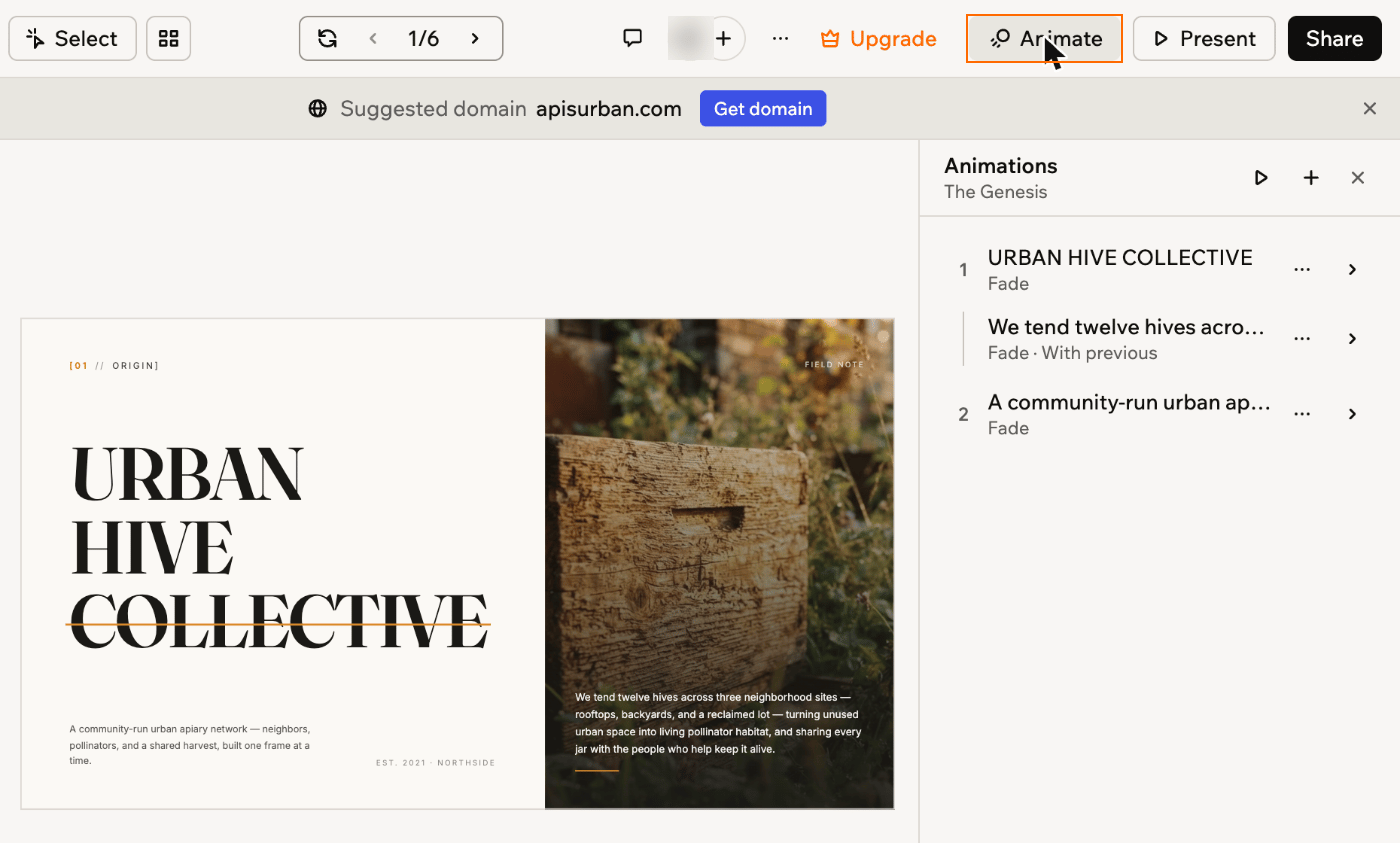
The Animations panel
If the panel shows a message:- Can’t use the animation editor: Click Fix with chat.
- Some animations “live in code”: They were added to your presentation’s code instead of set up in the panel. Click Convert with chat so they show in the panel and come with you when you export.
- Click Add animation. If the slide already has animations, click the add icon at the top of the panel instead.
- Click the text, image, or shape on the slide that you want to animate.
- Click the new animation in the list to open its settings.
-
Under Effect, choose how the element comes in:
- Fade: It fades in where it is. This is the default.
- Rise: It fades in while moving up into place.
- Slide in from left: It fades in while moving in from the left.
- Slide in from right: It fades in while moving in from the right.
- Zoom: It fades in while growing to full size.
-
Under Speed, choose how long the effect takes:
- Slow: A longer, gentler entrance.
- Medium: The standard speed. This is the default.
- Fast: A quick entrance.
-
Under Start, choose when it plays:
- When the slide opens: It plays as soon as the slide appears. Only the first animation on a slide has this option.
- After previous: It plays as the next step, after the animation above it.
- With previous: It plays at the same time as the animation above it.
- On click: It waits until you click or move forward while you present. Any animations set to play with or after it follow once you do.
If you made your presentation before November 7, 2026, you may see “Base updates this presentation first” under On click. Your presentation needs a quick update before it can start animations on click. When you choose it, the AI chat makes that update for you, then sets your animation to start on click. This uses credits like any other chat message.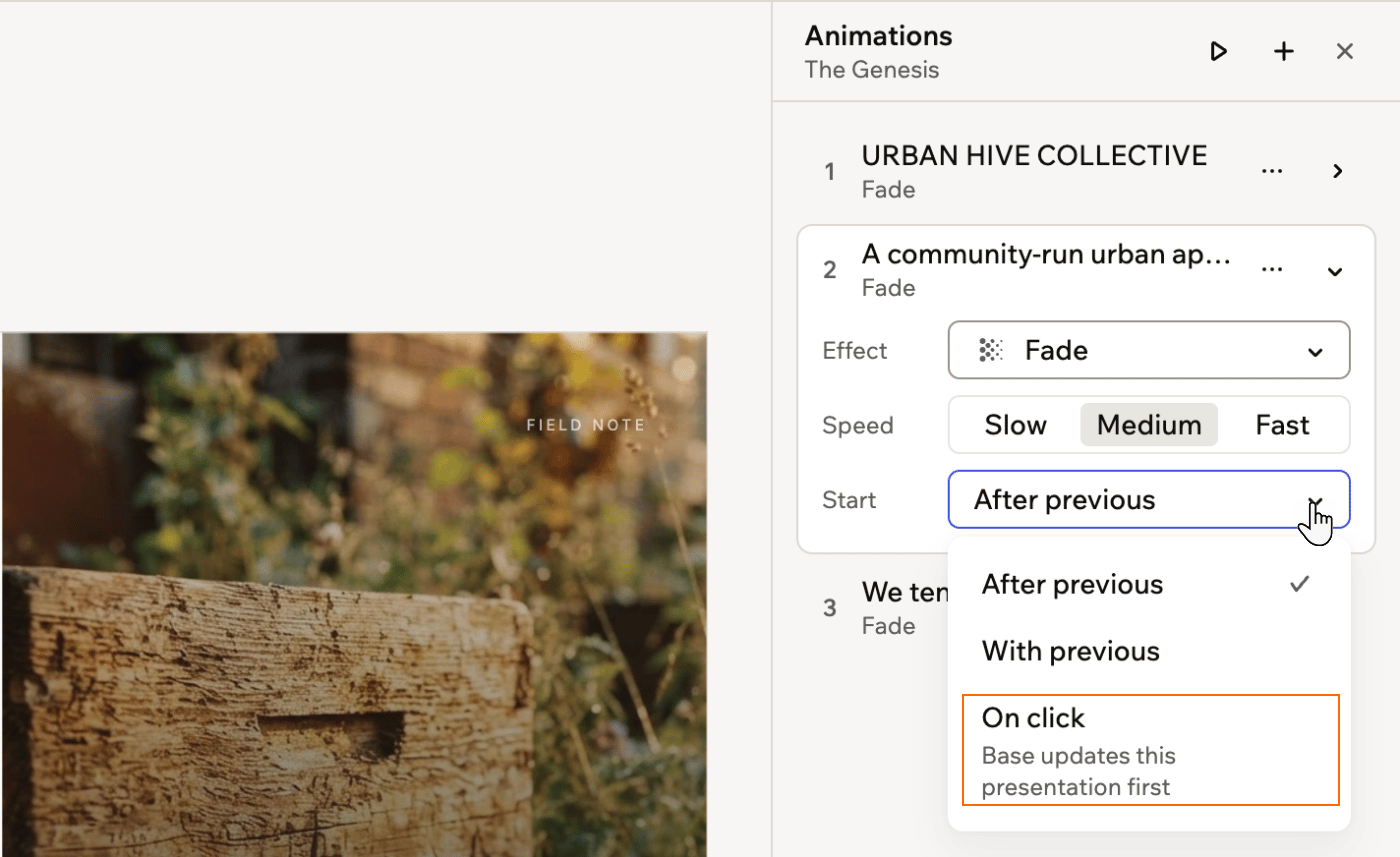
Choosing when an animation starts
Changing your animations
The Animations panel lists the animations on the slide you’re on, in the order they play. Each numbered step plays after the one before it, and an animation set to play with the previous one sits under it without a number. To watch the slide’s animations again, click the play icon at the top of the panel. Your changes save automatically.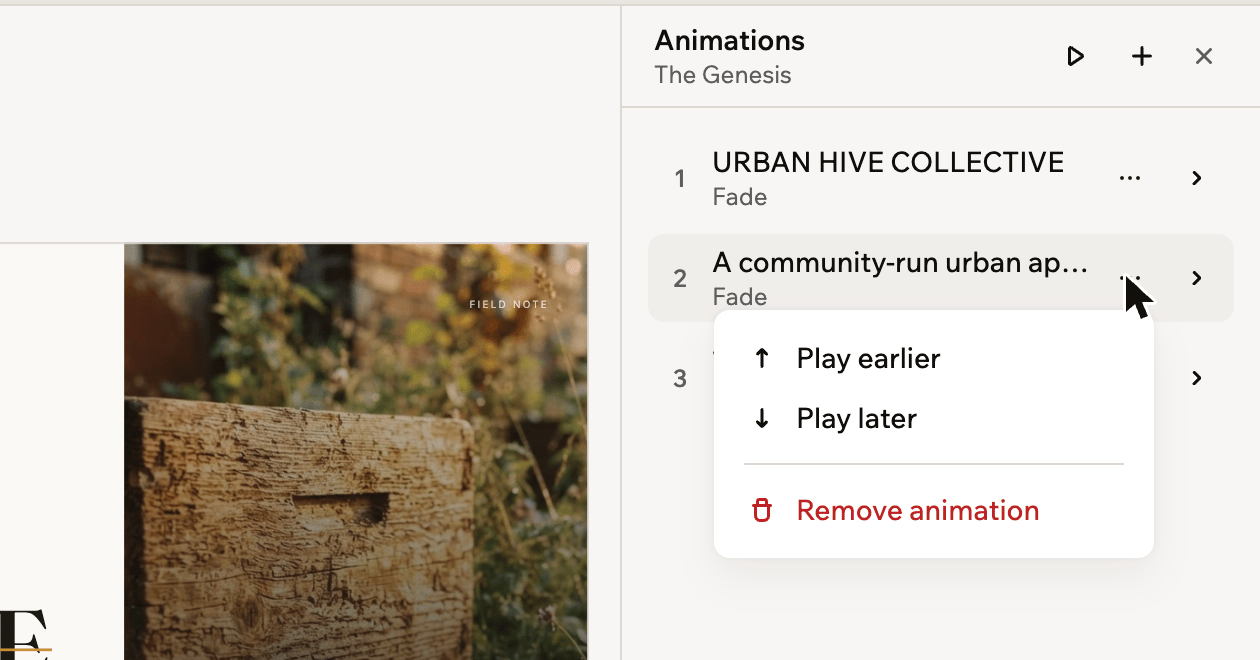
Changing the order of an animation or removing it
- Go to your app editor.
- Select the slide in the slide rail.
- Click Animate at the top.
- Do one of the following:
Change an animation's settings
Change an animation's settings
Change the play order
Change the play order
Remove an animation
Remove an animation
Presenting
You can present your deck full screen straight from the app editor, or publish it and use its link for presenter tools such as speaker notes and an audience view.Presenting from the editor
You can present your deck full screen from the app editor, without publishing it first. It starts on the slide you’re on and shows the slides only, without your notes or the presentation controls. To present from the app editor:- Open your presentation in the app editor and select the slide you want to start on.
-
Click Present at the top, to the left of Share. In a narrow window, click the play icon instead.
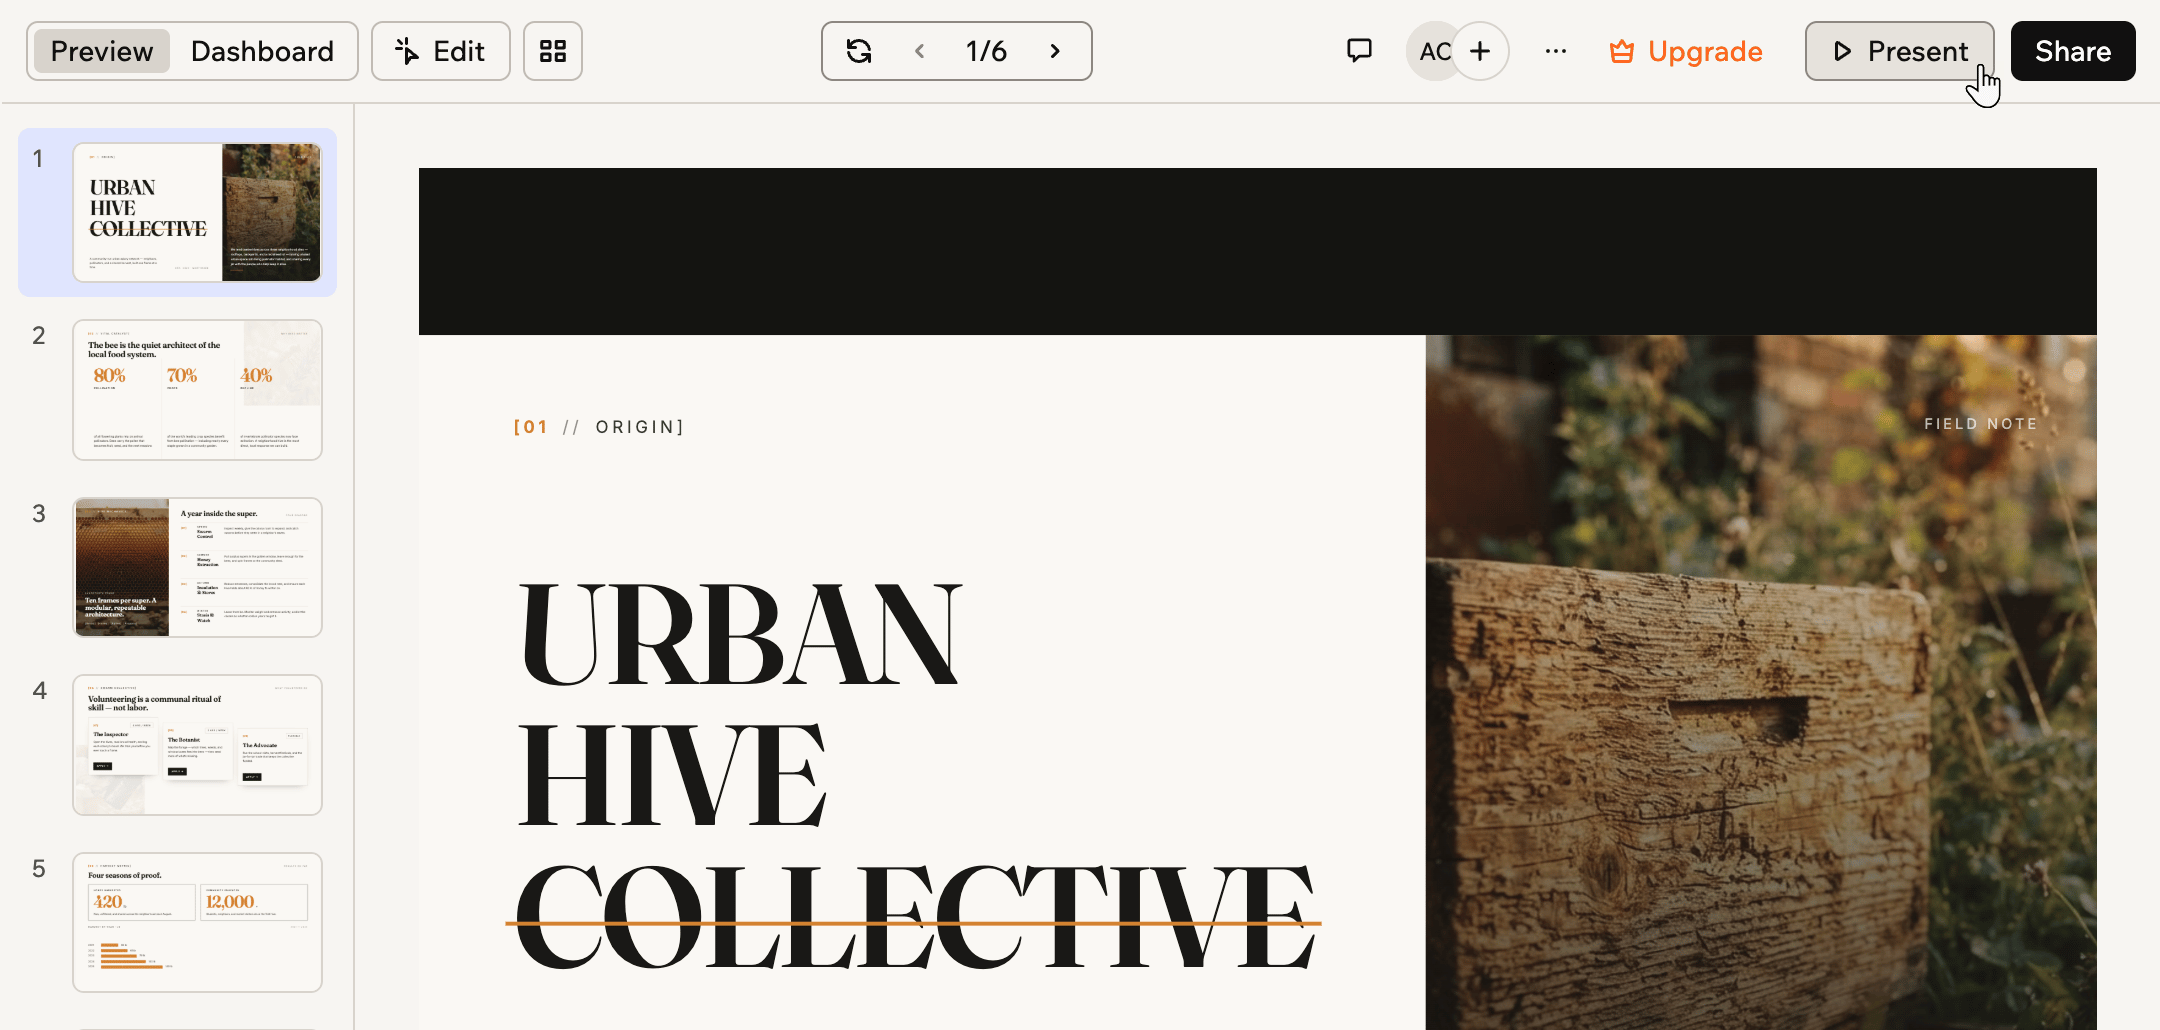
Present, at the top of the app editor
- Move through your deck with the arrow keys, Space, or Page Up and Page Down. A presentation clicker works too, and so does clicking the slide. If a slide has animations that start on click, each move forward plays the next one before you go to the next slide.
- Press Esc to leave full screen.
Using the published link
Publish your presentation and open its link to get 4 ways to use it, shown across the top. These controls are part of your published presentation, so they don’t appear in the app editor.- Overview: Every slide in the deck at once, so you can see the whole thing and jump to any slide.
- Speaker: Your presenter view, with your notes, a timer, and next and previous controls.
- Audience: A clean display with no controls or notes, for a projector or a shared window.
- Print: A printable version of the deck. Use your browser’s print dialog to send it to a printer or save it as a PDF.

A presentation, with the Overview, Speaker, Audience and Print controls
Seeing the whole deck
Overview shows every slide as a thumbnail with its title, so you can find the slide you want without clicking through the deck. Select a slide to go to it, or click Close to return.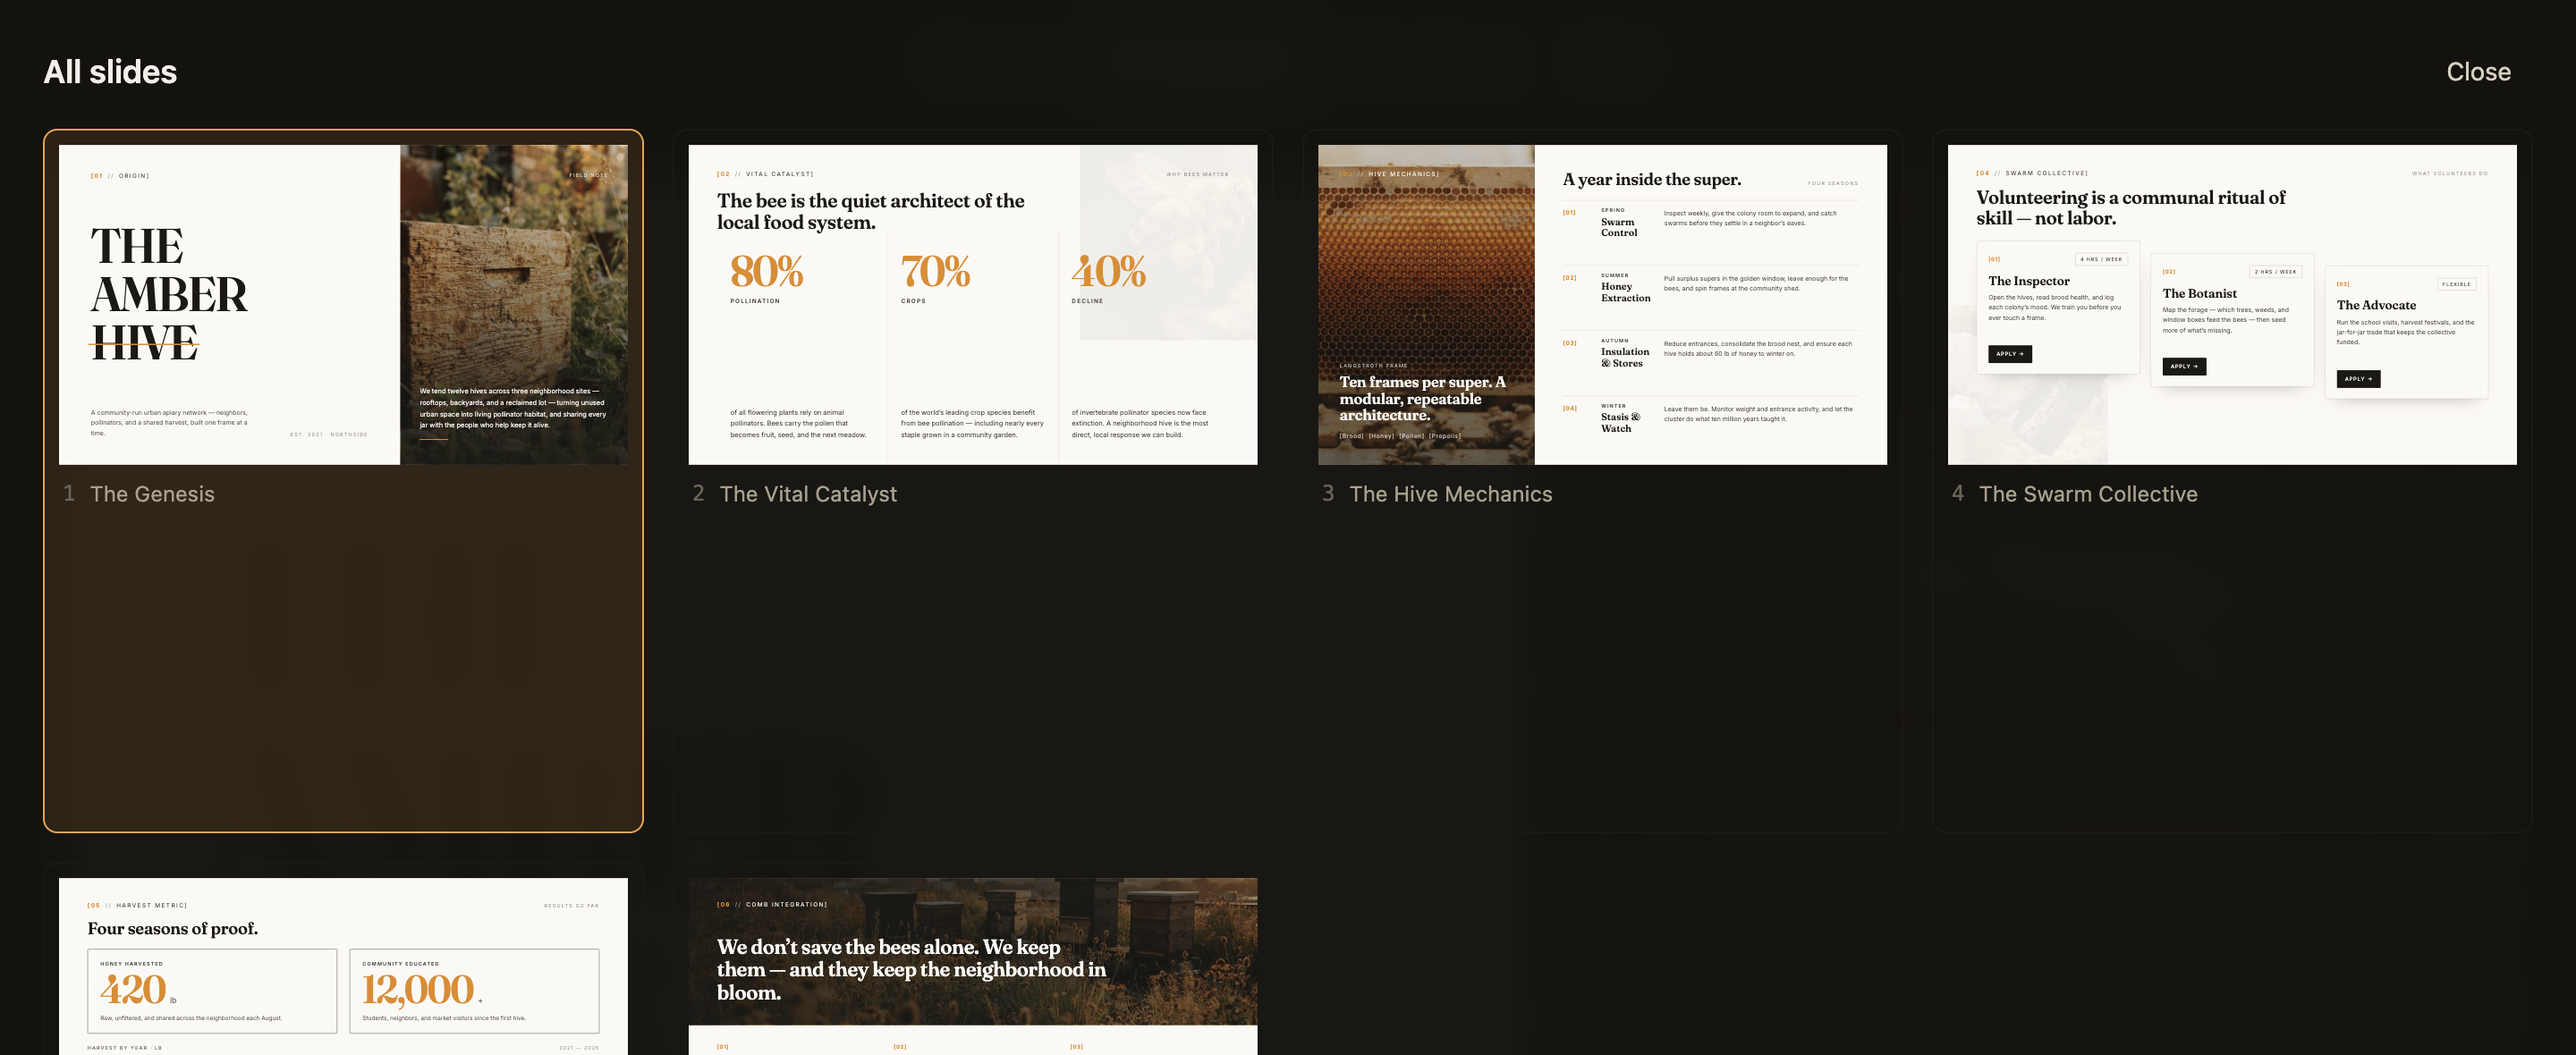
Overview, showing every slide in the deck
Presenting to a room
Speaker is the view you keep on your own screen. It shows the current slide, your speaker notes, how far through the deck you are, and a timer you can reset.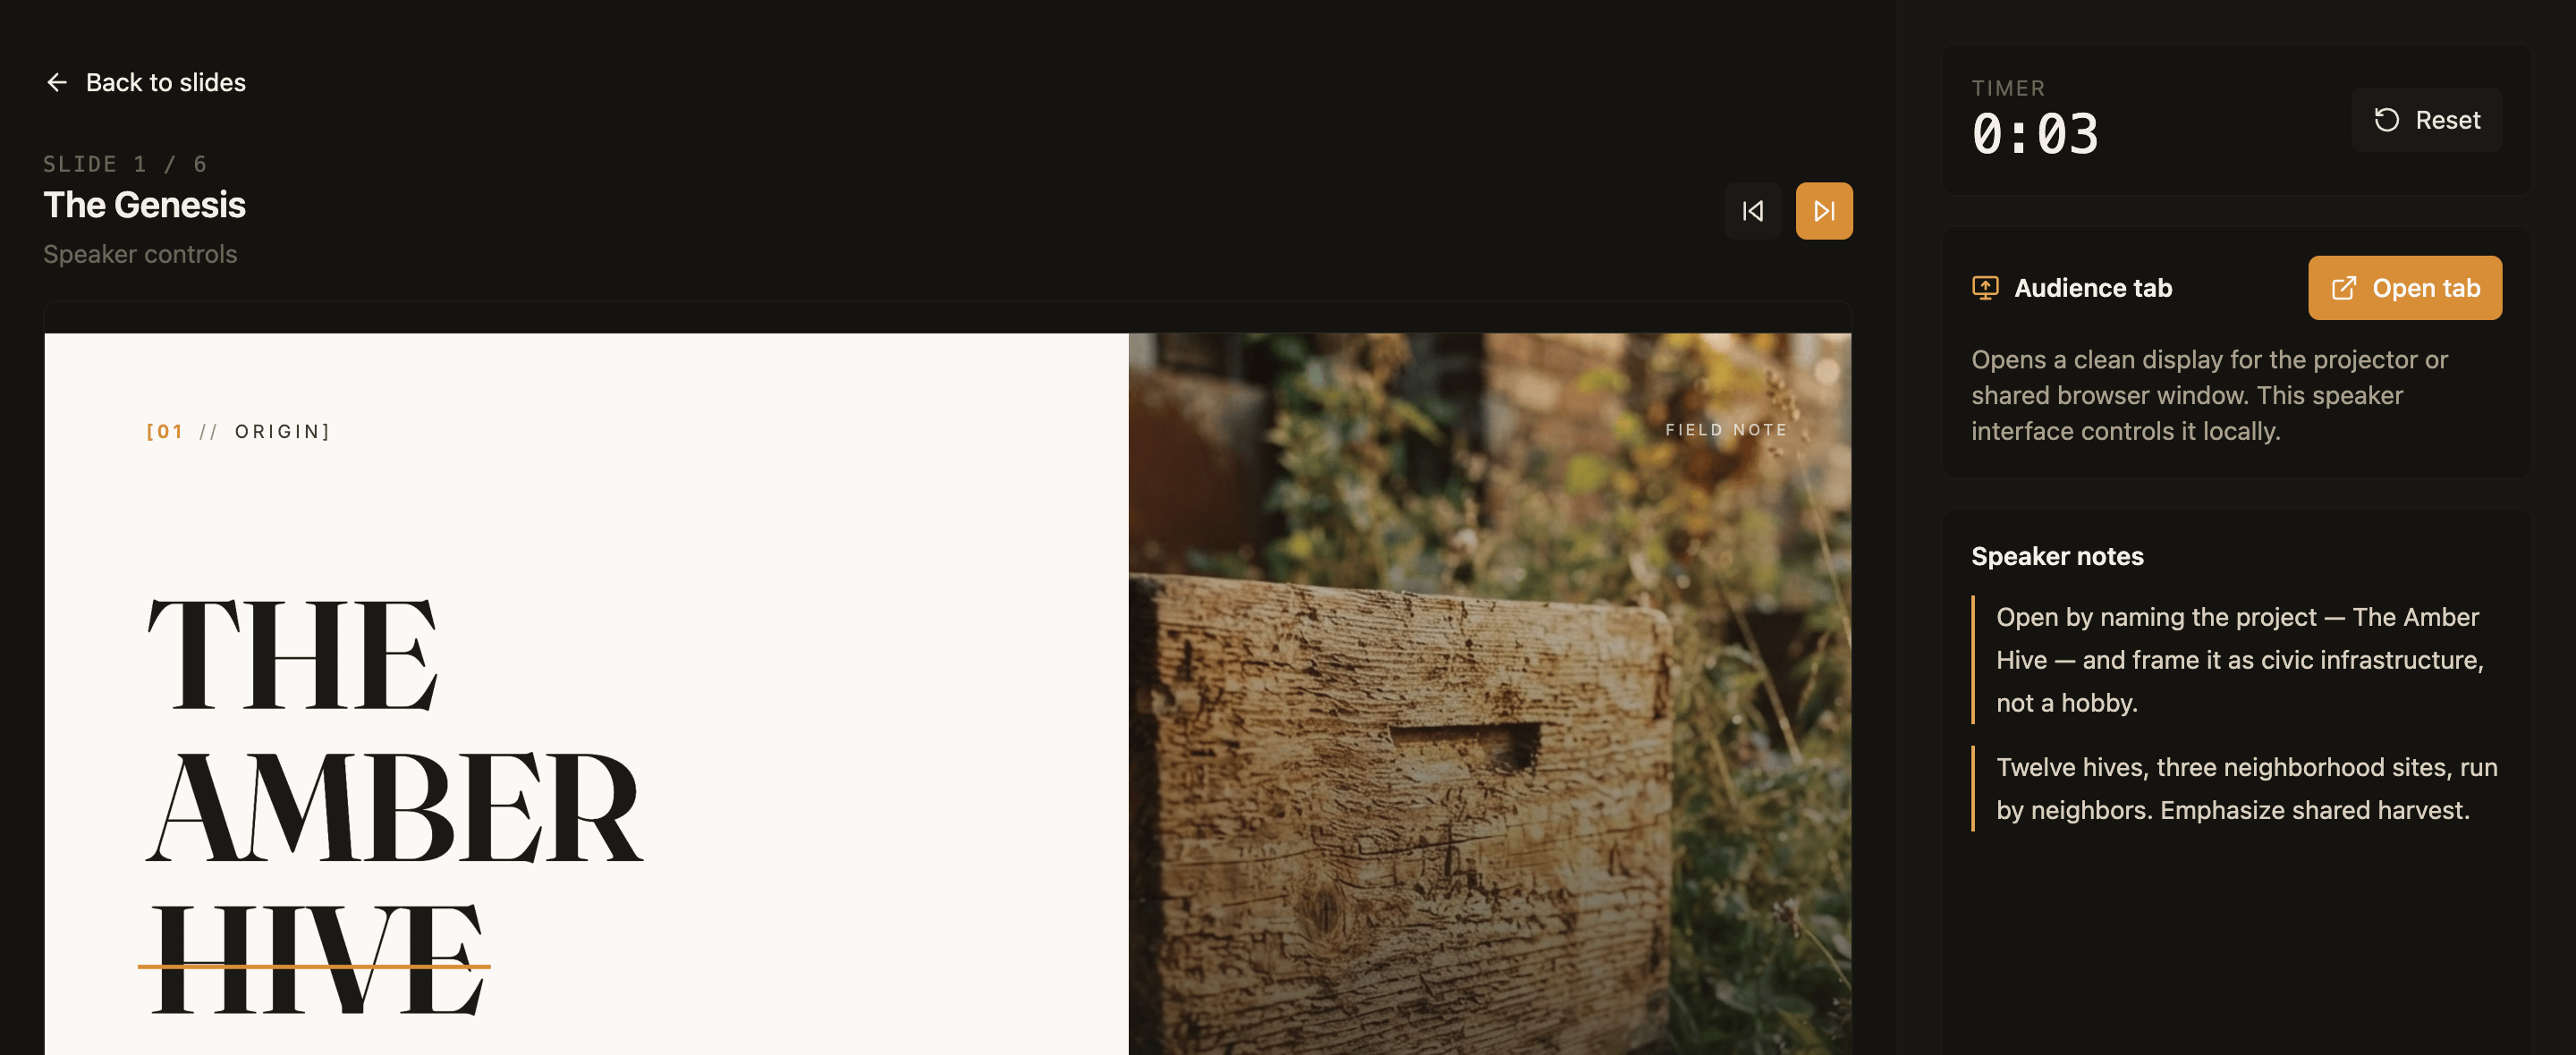
The speaker view, with your notes, a timer, and the audience tab
- Open your presentation and click Speaker.
- Next to Audience tab, click Open tab.
- Move the new tab to your projector or shared screen, and make it full screen.
- Move through your deck with the arrow keys. The audience display follows you.
Sharing your presentation
Publish your presentation to get a link you can share. Anyone who opens it gets the presentation itself, with the same controls you have. You can connect your own domain, and set who is allowed to open it, exactly as you would for any other app. The 4 views are part of your presentation rather than part of Base44, so anyone who can open it sees the same controls you do. That includes Speaker, so treat your speaker notes as visible to anyone you send the link to. The audience display your speaker view opens is the exception, and shows the slide on its own with no controls. To publish your presentation:- Open your presentation in the app editor.
- Click Share.
- Click Publish.
- Once it’s live, copy or open the Presenter view or Audience view link.
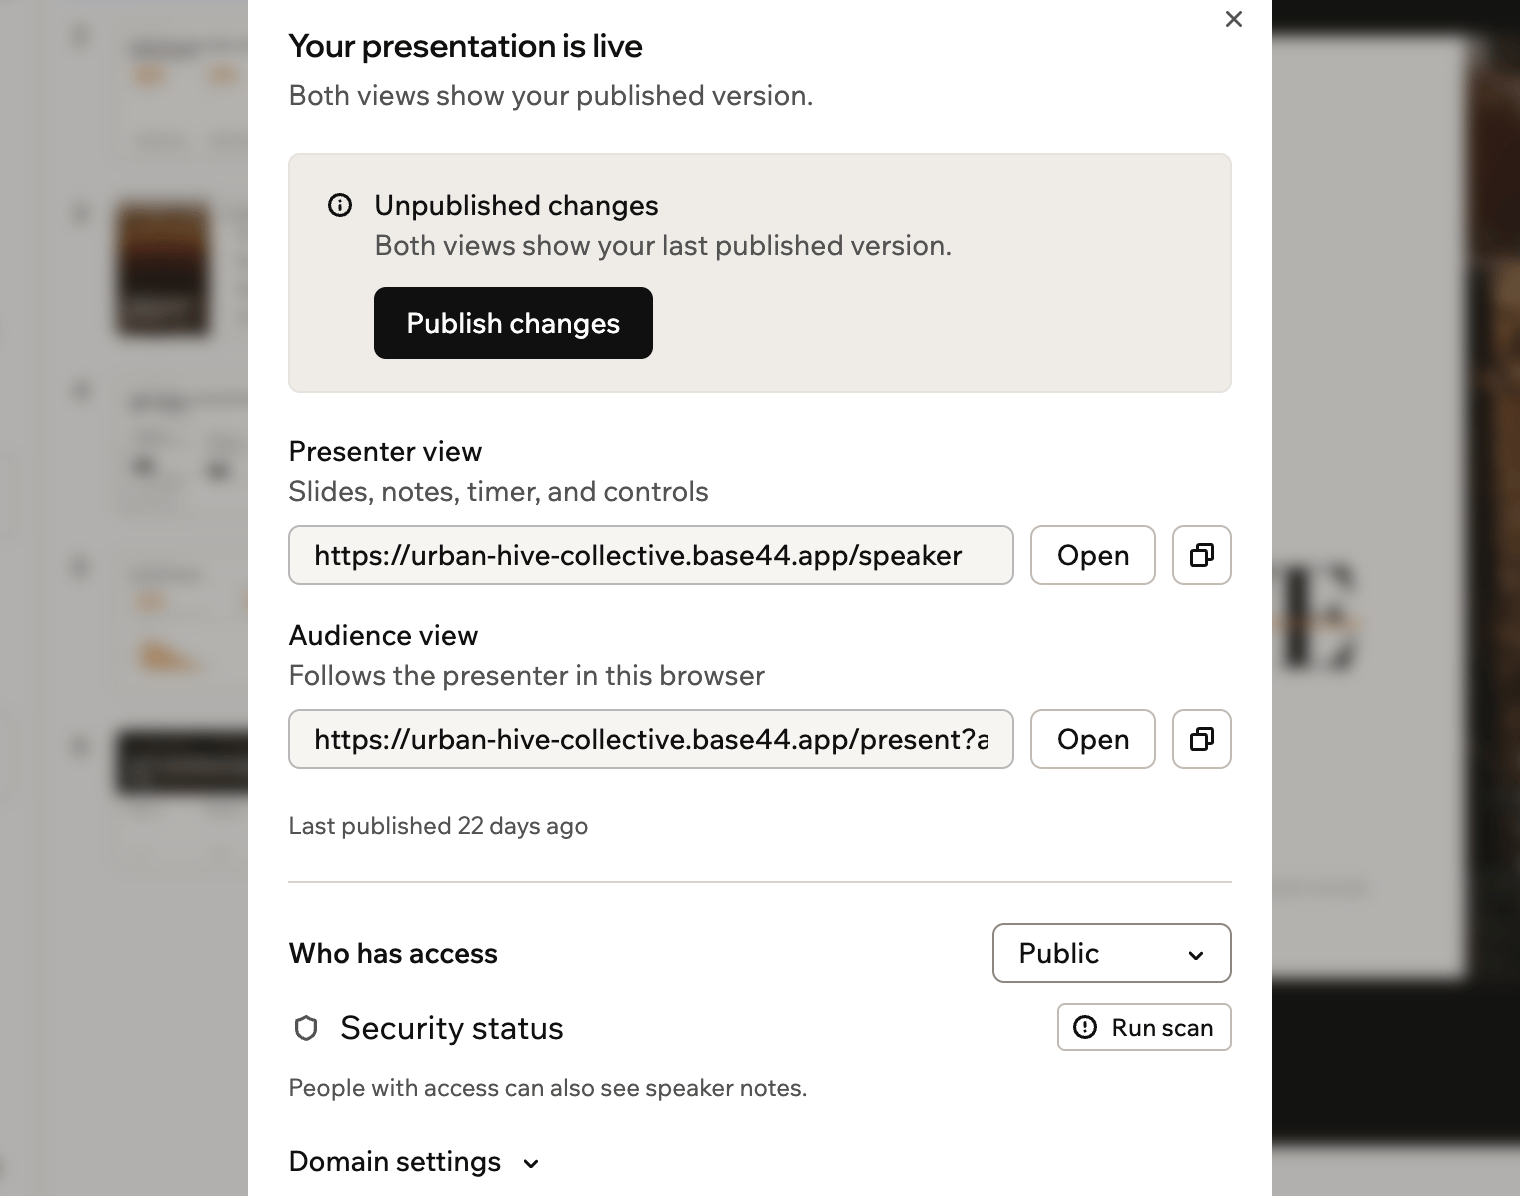
Presenter and audience links for a published presentation
Exporting your presentation
You can take your deck out of Base44 as an editable PowerPoint file, an editable copy in your own Google Drive, or a PDF. Every export uses your latest saved changes, so let the AI chat finish building before you export. To export your presentation:- Open your presentation in the app editor.
- Click Share.
- Click PDF, PowerPoint, or Google Slides.
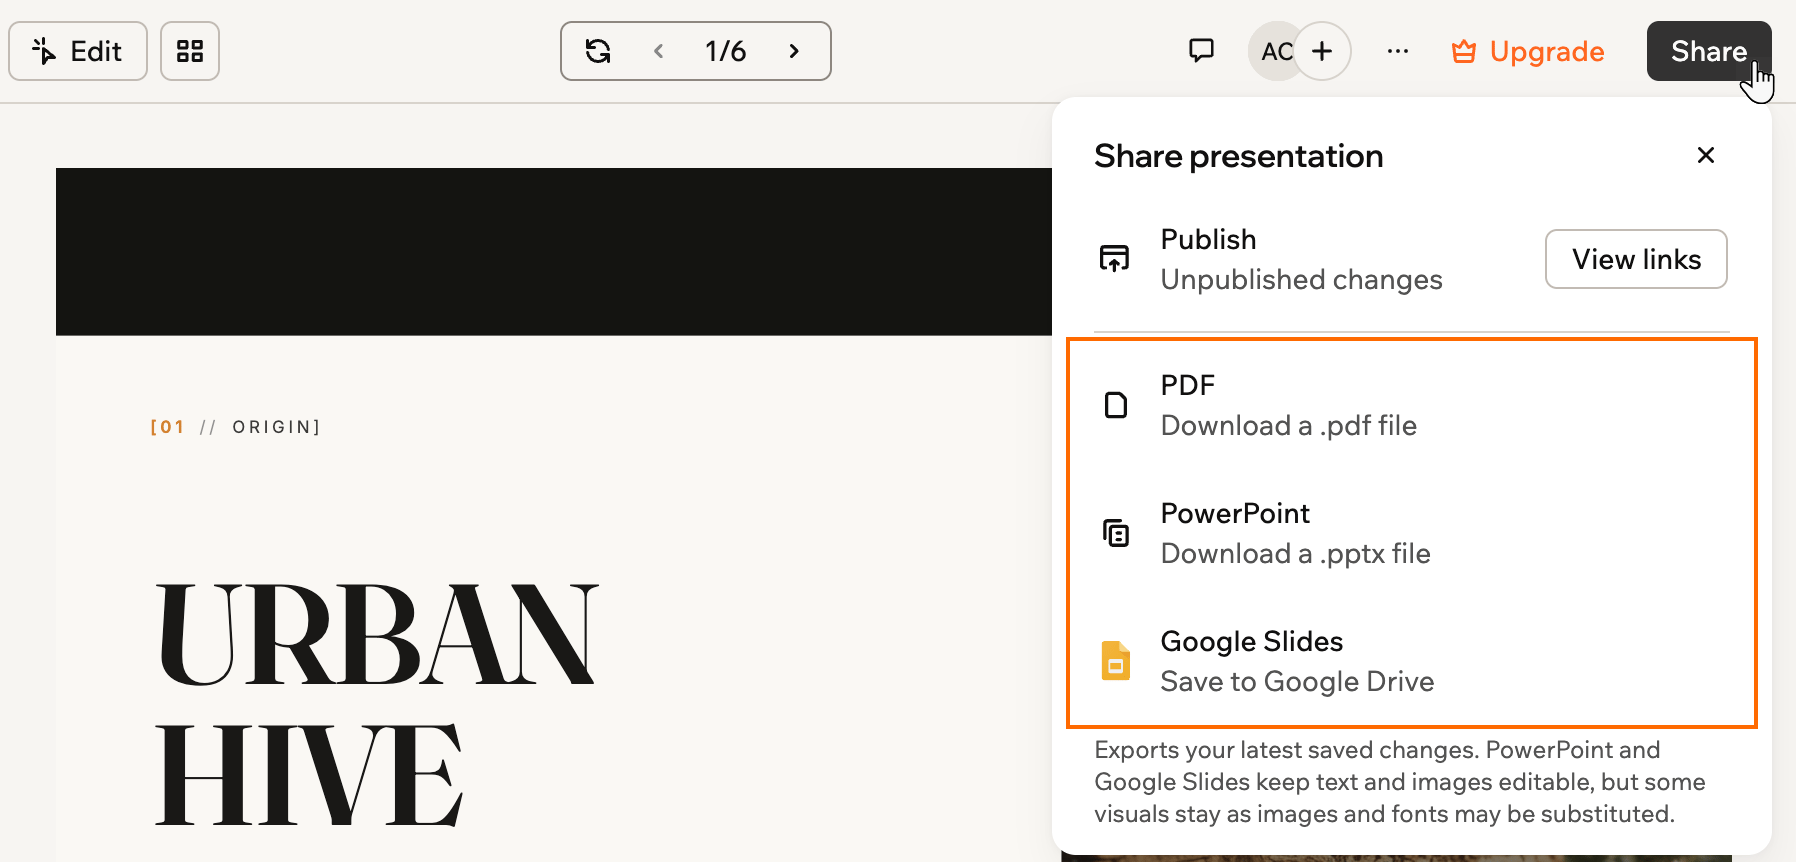
Exporting a presentation from the Share panel
- The first Google Slides export asks you to connect Google Drive. When it finishes, click Open on the Google Slides row to go straight to the new file.
- In PowerPoint and Google Slides, text keeps its font, size, color, bold, italic, and direction, and your speaker notes come across.
- Fonts are referenced rather than embedded, so PowerPoint substitutes any font the opening computer doesn’t have. In PowerPoint and Google Slides, if a line has letters your font doesn’t include, such as Russian in a font made only for English, you see that line in a font that has them, often Arial.
- Charts, vector graphics, decorative shapes, and any text that is underlined, rotated, clipped, or filled with a gradient come across as part of the slide picture instead of editable text.
- Your animations come across to PowerPoint and Google Slides and play there as they do in Base44, including the ones that wait for a click. Animations that only exist in your presentation’s code, which the Animations panel can’t list, aren’t included.
- A PDF has one page per slide and looks exactly like your preview. Its text can’t be selected or edited, and speaker notes and animations aren’t included.
- In the mobile app, the export options open your presentation in a browser, because the app can’t save the file for you.
FAQs
Here are some common questions about building presentations.Can I change the design of my slides?
Can I change the design of my slides?
Can I present in another language?
Can I present in another language?
Can I add data or forms to a presentation?
Can I add data or forms to a presentation?